Working on the web has never been easier and more engaging than now. And for those who are privileged enough to have the skills and have put in the hours to develop themselves, the opportunities are out there.
Being an exceedingly productive developer keeps getting easier. But as our leverage grows, so do the threats and liabilities we need to mitigate. Thus, our expertise needs to grow and meet those challenges.
For that purpose, we have created a series of articles tackling the most common security threats and how to mitigate them effectively. These articles cover an extensive range of topics and technologies so that no matter what your stack of choice is, we have an article for you. This article will cover the topic of command injection in the context of Vue.js. We will use Node.js as our runtime and controller layer, including Vue.js as the view framework.
If you have no experience with any of these technologies, we recommend that you take a quick look at these guides to Node.js and Vue.js to familiarize yourself with them. We will not be going too deep into the specifics of these technologies, but a basic understanding of JavaScript and the concepts of these stacks is required. We promise it won’t take too long. You will learn some cool stuff too. If, however, your expertise lies in another development stack, please read our other articles and find your flavor of choice.
Without further ado, let’s get to it.
Introduction to Vue.js
Alright, so let’s first briefly explore how to set up our Vue.js project. This will be the project we will be working on for this article.
Building a Node.js project with Vue.js is deceptively easy. First, let’s create our Node.js app using express-generator . If you don’t have the express-generator , you can install it with the following command:
npm install -g express-generator
Once installed, you can proceed to create our project app by running the following command:
express demo_vue_app --no-view
This command will generate a boilerplate app called demo_vue_app with everything you need and no view engine. If you want to use a specific view engine, you can use the -v flag to pick one.
Great! Now that we created the project, we need to install the dependencies required for running. Just run the following command while inside the project folder:
npm install
Finally, you can just run the project and see the website running with the following command:
npm start
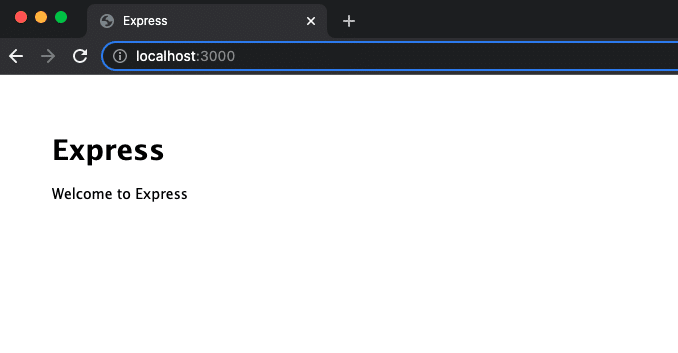
This results in the following:
The result of the above code
Yay!
One last thing. To add Vue.js to our project, you need only add the following tag to the index.html file:
<!-- development version, includes helpful console warnings -->
<script src="https://cdn.jsdelivr.net/npm/vue@2/dist/vue.js"></script>
And that’s pretty much it, really.
Now we can start.
What Is Command Injection?
So, what is command injection?
Command injection, or code injection, is a particular kind of injection attack where an attacker sends JavaScript or Node.js code to the server in an attempt to seize control over it. The browser or the Node.js runtime then interprets this malicious code, and it can’t distinguish between the code the developer intended and the code that the attacker provided as input.
The main reason this attack can escalate and jeopardize the server’s stability is the ability of Node.js to run commands in the OS. Internally, Node.js contains a module called child_process . This allows JavaScript code to run programs, as well as communicate with them through standard I/O provided by the underlying operating system. In addition, users can often start such programs interactively using the command line interface.
Moreover, the ability to make use of the child_process module to run external processes dramatically enhances the power of the Node.js standard library.
Of course, this can be our Achilles’ heel if we are not careful with our security and implementation.
Command Injection Example
Now that we know what command injection is, let’s see an example.
Assuming that our victim application uses a function that uses the aforementioned child_process module—say, the exec Node.js function or the eval JavaScript function—then an attacker can reach our server command line by simply appending commands to the request.
var express = require('express');
var router = express.Router();

/* GET home page. */
router.get('/', function(req, res, next) {
 // Get parameter. In this case, the image name.
 const image = req.query.image;
 // Execute the command
 exec(`git log ${image}`, (err, output) => {
   // Respond with HTTP 500 if there was an error
   if (err) {
     res.status(500).send(err);

     return;
   }
   // output the HTTP response
   res.send(output);
 });
});

module.exports = router;
In this request, you can see that the attacker is trying to run the following command:
nc -l 5656 | /bin/bash
This command, called netcat , can run arbitrary code on our server on behalf of the attacker and do significant damage.
Fixing Command Injection Vulnerabilities
So then, how do we go about preventing this from happening?
The first line of defense is incredibly effective against this kind of threat, and that is to do away with using functions that execute commands at a low level altogether.
Avoid eval() , exec() , setTimeout() , setInterval() , and any other function that allows dynamic code, unless absolutely necessary. Additionally, avoid new Function() for reasons that should be obvious at this point.
var express = require('express');
var router = express.Router();

/* GET home page. */
router.get('/', function(req, res, next) {
 // Get parameter. In this case, the image name.
 const image = req.query.image;
 // Execute the command
 execFile(`git log ${image}`, (err, output) => {
   // Respond with HTTP 500 if there was an error
   if (err) {
     res.status(500).send(err);

     return;
   }
   // output the HTTP response
   res.send(output);
 });
});

module.exports = router;
Once you have done that, make sure to employ some input sanitization mechanism for any user input that your application allows. As a general rule of thumb, it is essential to restrict and regulate all avenues of user input that our application provides. For example, look for ways to change dynamic input into fixed selection. And make sure to safelist all input to sensitive functionalities.
Other Flaws
Additionally, avoid using code serialization in JavaScript. Yes, it is a thing, and no, you shouldn’t overlook it. Thankfully, chances are that you won’t need to code your own serialization and deserialization solution for your platform. However, in the vast library of npm exists more than 1,600,000 open-source packages ready to be used, and one of them might end up implementing a form of serialization. If we are not careful with what we bring to our platform, we might introduce unnecessary vulnerabilities to our code.
Finally, make use of security analysis tools like StackHawk and regularly scan your application for injection vulnerabilities. StackHawk tests your applications, services, and APIs for any security vulnerabilities that may have been introduced by your team, and it also checks for exploitable open-source security bugs. This means that application security can keep up with the fast pace that engineering teams of today have to maintain. Use StackHawk to find vulnerable spots at the pull request and fix them quickly, leaving outdated security tools in the dust as they wait for someone to start a scan manually.
Final Thoughts
Making attractive and robust applications for our clients is now a breeze with technologies like Node.js and Vue.js. Having extensive expertise and history on these development stacks is becoming more and more attractive every year.
Gone are the days when countless hours and thousands of dollars needed to be invested in building the know-how. Instead, producing a mid-size production-ready product is now an affair that a single individual could potentially carry out.
Nevertheless, it is essential to know that, despite the enormous leverage and versatility that these development stacks offer, it is still crucial to keep an eye on our security. Now that JavaScript is such a mature and robust language, there are many things that can be done to solve our vulnerability issues. Therefore, finding and choosing a simple and adequate solution is important without introducing unnecessary complexity.
This post was written by Juan Reyes.Juanis an engineer by profession and a dreamer by heart who crossed the seas to reach Japan following the promise of opportunity and challenge. While trying to find himself and build a meaningful life in the east, Juan borrows wisdom from his experiences as an entrepreneur, artist, hustler, father figure, husband, and friend to start writing about passion, meaning, self-development, leadership, relationships, and mental health. His many years of struggle and self-discovery have inspired him and drive to embark on a journey for wisdom.
Golang open redirects are among the least expected types of attacks, and yet they can cause a lot of harm to application users. Hackers are quickly making the internet a minefield, with tricks and links stealing user information. As such, you’re best staying a step ahead when building apps with Golang.
This post contains information, code examples, and advice to help you create safer navigation links in Golang applications. This is the start to writing better Go code and creating applications that don’t leave end users at the mercy of hackers.
What Is a Golang Open Redirect?
Golang web applications are a series or network of pages that you can navigate through using links and buttons. Typically, a Golang open redirect attack takes form when the links you generate to navigate the application take in arguments that lead out of your root domain. This way, even when your end users don’t notice it, the browser redirects them to an external (clone) resource. There, they risk having their identities stolen through illegitimate input forms.
Usually, with Golang web applications, code sections generate URLs to pass state-changing input to the server. Open redirect vulnerabilities can carry user input to different storage locations that the developer intends.
If you haven’t sanitized the URLs generated when passing information from the front to the back end, attackers can go as far as loading different redirects with payloads that harm your users. More on this when we discuss sanitization methods shortly. For now, let’s look at some examples of Golang open redirects to further cement the concept.
Examples of Golang Open Redirects
Depending on the Go framework used to build a web application, some default redirects will help navigate between pages and pass input to the server. Usually, these operate by appending input and any arguments to the end of a webpage on which links originate. This means that after you fill in a form, the URL that the browser loads will look like this:
The code above is part of the signup.go file in this open source project on GitHub. The app is for online ticket reservations, so the redirect() function is a perfect opportunity for hackers to acquire as much information about users as possible. Using system logic and process flow, the next form for such an instance would ask for banking information to attach to the new account and their desired destination. I’ll leave the rest to your imagination.
How It Happens
The Golang open redirect attack launchpad is where only the /signin page is the next destination. This leaves a very open (and dangerous) parameter space for hackers to play with. The Go docs specify that your redirect() function syntax should be as follows:
func Redirect(w ResponseWriter, r *Request, url string, code int)
If you look at our example code, the w (writer) and r (request) constructors are empty, in which case the defaults ( http.StatusOK ) take over. When w is set, the Go server will take a look at the application’s header map before writing any form data to a new state. The request is typically the “action” part of the form. It tells the server what call to make. The default is GET, which basically loads whichever next page the form is set to trigger.
What you don’t see in the example, and most crucial to Golang open redirects, is the url and the string variables. These two are acceptable, so they’ll run into the redirect link outside of the source file. Hackers can spring them into the picture by sending long links to users through email and even on social media. Even craftier would be a shortened link. So think twice before clicking or even using those bitly links that reveal their content only once the browser starts loading.
Another Example
Another example of how Golang open redirects can take shape is when users make legitimate searches for content on your application, only for the results to redirect to external sources. Of course, the Google search integration with applications is good to help users access the wider internet from within your application. However, your search bars can be the gateway to potentially harming users.
Consider the code below, which is part of this repository of an open source project:
func searchHandler(w http.ResponseWriter, r *http.Request) {
	context := &Search{}
	t, err := template.ParseFile("template/search.html")
	if err != nil {
		http.Error(w, err.String(), http.StatusInternalServerError)
	}
	context.T = t
	ae := appengine.NewContext(r)
	query := r.FormValue("q")
	queryLength := len([]int(query))
	if queryLength > 8 {
		query = query[0:8]
		http.Redirect(w, r, fmt.Sprintf("search?q=%s", query), 302)
		return
	}
	// lowercase only
	if query != strings.ToLower(query) {
		http.Redirect(w, r, fmt.Sprintf("search?q=%s", strings.ToLower(query)), 302)
		return
	}
	context.Q = query

	hashTable := make(map[string]byte, 0)

	if 0 != queryLength {
		if queryLength > 8 {
			query = query[0:8]
		}
		var e *word.Enable
		var err os.Error
		if e, err = loadEnable(); err != nil {
			ae.Errorf("%v", err)
		}
		channel := word.StringPermutations(query)
		for p := range channel {
			if valid := e.WordIsValid(p); !valid {
				continue
			}
			if _, inHash := hashTable[p]; !inHash {
				context.Permutations = append(context.Permutations, p)
				hashTable[p] = 1
			}
		}
	}
	// display template
	if err := context.T.Execute(w, context); err != nil {
		http.Error(w, err.String(), http.StatusInternalServerError)
	}
}
This time, the redirect function openly lets input from the search bar become part of the URL through this section of code:
While you can trust everyone else to build good/clean links, this makes life easier for hackers as they can build redirects to their own pages. This basically creates a generator for them to plant their own URLs and send to legitimate application users.
The second code example tries to limit search queries to a maximum of eight characters. (This is good; you’ll soon see how.)
However, it’s not a perfect sanitization method for Golang open redirect attacks. Which brings us to the advice and strategy part of our post.
Conclusion: How to Fix and Prevent Open Redirects
The best way to fix the Golang open redirect vulnerabilities? Impose parameters and limits to what can run in the browser. The second example used an array length counter to limit users from using too many characters. This can lock out attacks that want to use long URLs. However, it also leaves users at a disadvantage and makes for bad experience, especially with search boxes.
However, a smarter approach would be to whitelist a finite set of URLs that can run against your own. In the same way that the input turns into an array, you can set for that array to be scanned and shut down if it contains external content sources.
Having a team of developers that know the Golang open redirect vulnerability is a good strategy. This way, you can keep your applications sanitized. As code piles up, you can also have tools like StackHawk constantly scan new code for any vulnerabilities.
This post was written by Taurai Mutimutema.Tauraiis a systems analyst with a knack for writing, which was probably sparked by the need to document technical processes during code and implementation sessions. He enjoys learning new technology and talks about tech even more than he writes.
First of all, what is HTTP strict transport security (HSTS) and why do you need it? HSTS is a specific HTTP response header that tells the browser to load a site over HTTPS. The browser will do so whether the user uses the HTTP or the HTTPS protocol. Even if you have a redirect, it’s a good idea to set up HSTS since that initial plain text send from the browser to the HTTP endpoint remains vulnerable. That’s because the browser will still send any domain cookies to that endpoint—unless, of course, they’re set to secure .
In this post, you can read more about HSTS and how it relates to React apps. You’ll learn a few ways to enable it, whether you’re serving your app via Next.js, Express, or some other means. Note that the term “React.js” will be used at times rather than simply “React,” in order to distinguish it from the React ecosystem that includes React Native. First up: HSTS.
More Info About HSTS
The Internet Engineering Task Force (IETF) published the HSTS spec in 2012. Members from Google, PayPal, and others designed HSTS as a way in which web servers could direct user agents to use HTTPS only. With HSTS enabled, users can’t bypass any issues with the certificate.
But the real reason for HSTS is to protect cookies—especially session cookies—from being hijacked when and if the site is first loaded over HTTP. It does this by telling browsers (user agents or UAs) to load the site only using HTTPS even when the user enters the HTTP URI scheme rather than HTTPS. Even if you redirect users from HTTP to HTTPS, the initial hit is over plain text and the cookies can be seen by attackers.
An HSTS header is relatively simple. It looks like this:
The user agent will cache the HSTS policy for your domain for max-age seconds. When the user visits your site, the browser will check for an HSTS policy. If it finds it, then boom! It uses HTTPS even if you went to http://example.com instead of https://example.com.
From now on we’re going to focus on enabling HSTS for React apps.
Setting HSTS on the Web Server
Setting HSTS headers on the web server is my first recommendation. Since this is not application code, it doesn’t really belong to the React app itself. This is in line with the principle of separation of concerns , meaning you should keep separate concerns in their own domain. Servicing web traffic is the web server’s concern, not that of the application itself.
For example, if you’re using NGINX to serve your React.js app, you can set headers in NGINX. Add the following to the nginx.conf file:
This directive uses the HTTP headers module to add arbitrary headers to responses. Other servers will have their own way to add headers, but it’s a common feature of web servers. Alternatively, most response headers can go at the server or location level.
You might instead be serving your React.js app via a CDN. You will still want to protect the user cookies by ensuring they’re sent only over HTTPS. This is true even if your app comes from a CDN. From my own travels, I know you can set up an Amazon S3 bucket to deliver an app payload, but this is not an HTTPS site by default. For HTTPS hosting you need to use Amazon CloudFront . Even still, I looked into several popular CDNs (AWS, GCP, CloudFlare) and they don’t allow us to set the strict transport security header. So if you’re distributing your React.js app via a CDN, you might have other means at your disposal for making sure it’s only served via HTTPS. For example, CloudFront has the option to block HTTP traffic and only serve HTTPS.
Now, we’ve gone over a few options for client-side React.js. It’s fairly common, however, to do some kind of server-side rendering to deliver a React web app that’s locked, loaded, and ready to rock. Let’s see how to add the HSTS headers in an SSR’d React web app.
How to Set HSTS in an SSR React App Like Next.js
Next.js is a fairly common way to deliver a server-side-rendered React.js app. It even has its own server, which you should probably have behind something like NGINX or another production-grade load balancer anyway. But if you have some reason to add the HSTS in Next.js, you can definitely do it that way too. Here’s how to accomplish this feat!
In your app, open the next.config.js file and add the headers directive there like so:
Hadouken! —>>)) That’s a lot of indentation, but it’ll get the job done. You can add other site-wide headers there as needed too. But should you? The creators of Next.js think not.
Vercel , the official Next.js hosting solution, adds the HSTS headers automatically. Nothing to do there! I suspect they’re probably using something like NGINX behind the scenes to deliver your apps. If so, they’re probably setting it just as I’ve pointed out above in the NGINX config section.
ReactDOMServer is another approach to SSR, so let’s talk a bit about how you might add HSTS headers when you use ReactDOMServer. Well, if you’re using ReactDOMServer, you’re probably using something like Express to serve the rendered app. While it’s entirely possible to add custom headers to responses, there’s a more concise approach. A third-party middleware named Helmet has the ability to add HSTS headers and many other security headers with the greatest of ease. Use Helmet for Express like this:
First, install while adding the dependency to package.json in one fell swoop:
npm i helmet --save
Then, simply import and add the middleware:
const helmet = require('helmet')
// ...make your express app...

// add HSTS headers only
app.use(helmet.hsts())

// or all the headers helmet offers
add.use(helmet)

// CAUTION!!! some header settings -- including HSTS -- may
// cause MAJOR borkage if your site is not prepared!
Cannot Be Set Via Client-Side React
You can’t set HSTS in client-side code since it’s a server response header. That said, you might be wondering if there’s anything you need to do with your client-side React.js code. In short: no. The response header is handled by the browser itself. This wouldn’t really apply to React Native apps where you should probably be using HTTPS in your URLs in any case. I usually recommend using a variable to hold the scheme and host of the API URLs so it’s quite a bit easier to change between different servers (e.g., dev and test servers). There isn’t much else to be said about client code, so let’s round this post off with a summary of the main points.
Summary of the Main Points
At some level, you’ll need to set these headers on the server. Now, whether you are doing this on NGINX, a gateway, your hosting platform, or your preferred SSR server to set it is up to you. I prefer setting it up on the server alongside the TLS certificate. Since HSTS relates somewhat closely to the TLS cert, it makes the most sense to me to have it right in the same place. Even still, you have options so you can choose what’s best for your own situation.
One final important thing: be careful when setting this up! Your users might get stranded if you aren’t properly prepared. They won’t be able to click through the security gate in their browser.
This post was written by Phil Vuollet.Philleads software engineers on the path to high levels of productivity. He writes about topics relevant to technology and business, occasionally gives talks on the same topics, and is a family man who enjoys playing soccer and board games with his children.
There’s a lot to learn about web application vulnerability mitigation. And the amount of information to master in the web development domain is already intimidating enough. Nevertheless, we must go to great lengths to keep ourselves up to date on the latest trends in vulnerabilities and exploits.
So in this article, which is part of a series exploring vulnerabilities on the web, we’ll discuss one particularly pernicious kind that we must deal with to secure our applications: cross-site scripting, or XSS.
I’ll briefly explain the basics of cross-site scripting and how it works. Then we can explore the subject within the context of the Node.js stack. Don’t worry whether or not you have enough experience working with Node.js. I’ll keep the explanations grounded enough so that you can apply the concepts with any development stack. Nevertheless, I recommend that you take some time and familiarize yourself with Node.js and JavaScript. You can start here .
Making Sense of XSS
Let’s start with the basics. If you don’t know what cross-site scripting is or have never seen it in action, don’t worry. It’s simple to understand.
Most web applications rely on user input and data manipulation as their main conduits for functionality. After all, providing these kinds of interactions is their features’ core service. Some examples are social media, bank portals, and music services.
Due to the nature of these interactions, web applications are inherently vulnerable to bad actors who seek to profit from the legitimate users of those services. Suppose any of these bad actors can, in some way, manipulate or influence what other users might see or be able to interact with on their site. In that case, they can trick a legitimate user into unintentionally surrendering their data or guide them away to a malicious site.
Some of these bad actors accomplish this through some form of JavaScript injection. Hence, cross-site scripting.
Now, the avenues that attackers might use to take advantage of our platforms are plentiful and diverse. But unfortunately, no global mitigation strategy really exists, at least not one that’s effective enough. Therefore, it’s necessary to have a robust understanding of concepts like injection, scripting, HTTP protocols, and the development stack they’re working on to tackle this issue competently. Additionally, one must understand the context of every vulnerability to mitigate the threats effectively.
XSS Example
Attackers usually produce cross-site scripting attacks in JavaScript or another scripting language that a browser can process. Modern browsers can process hundreds of scripts and requests on every page load. This means that exploiting the client’s security can sometimes be relatively straightforward. So much so, in fact, that cross-site scripting can exploit something as simple as a comment section.
Imagine, if you will, a user profile page in a social network. This user has allowed comments on his posts, and the developer did not think to escape the user input.
This simple script code would then be stored in the database and executed every time a user visits the page. This means that victims will send their cookies to the attacker’s website just by loading the profile page. The attacker waits for the cookies to arrive, the code runs stealthily, and the victims are none the wiser.
Types of XSS Vulnerabilities
As I mentioned before, these attacks are not exclusive to comments or any specific user input. Attackers can very well inject these exploits into other areas of the application by various means.
Let’s explore some of them.
Reflected XSS Attacks
These attacks are the simplest forms of cross-site scripting and depend heavily on tactics like phishing and social engineering to exploit their victims. The attacker simply needs to create a URL with a malicious query string injected into it and convince the victim to click on it by masking it or using another means of deception.
Once the victim clicks and the browser redirects to the website, the script executes and sends the cookies without the victim realizing something is wrong.
This kind of attack is very effective, especially when the attacker has developed sophisticated means to deceive users into clicking on links. Therefore, it is essential to protect websites against them.
Persistent XSS Attacks
The pattern we explored in the previous section is an excellent example of a persistent cross-site scripting attack. These attacks take advantage of the social features that exist on many websites where users can input and share data between them.
DOM-Based XSS Attacks
Finally, DOM-based cross-site scripting attacks are similar to reflected cross-site scripting attacks in that they depend on manipulating the victim into clicking on a malicious link. In this case, however, the link alters the target website’s DOM directly and injects malicious scripts into the otherwise safe features on the page.
In this case, ‘default’ would be customarily used to populate or set the default index on a select element or a picker. Then, when the victim clicks on the link, the select element is modified to execute the script when they interact with it.
Mitigating XSS Vulnerabilities in Node.js
Most of these attacks depend either on a weak or nonexistent escape policy on user input or on the execution of scripts on the site.
Therefore, the first step in cross-site scripting attack mitigation should be minimizing the amount of untrusted user input, escaping the rest, and employing robust policies against scripts running on the site. Of course, this means developers must apply XSS mitigation measures on the Node.js platform.
Input Restriction
A straightforward way to mitigate a lot of potential vulnerabilities in your application is to replace manual input with elements that restrict what kind of data a user can input. For example, if you only expect a user to input integers, consider using a select element with the possible values.
This approach can reduce the amount of work needed to protect your applications from attacks. However, do keep in mind that sufficiently experienced and motivated attackers can circumvent these solutions.
Input Validation
We must perform input validation to ensure that only secure data reaches the server. Therefore, validation of user input should happen on the client side.
Something as simple as this can go a long way to protecting us against script injection:
var v = require('validator');
var escaped_input = v.escape(user_input);
You can also validate user input with server-side JavaScript with the module strip-js . This module can automatically remove script tags, sanitize input data, and strip all scripts found on ‘href’ properties or otherwise.
Cookie Policies
Cookies are one of the most frequent targets of cross-site scripting attacks. One effective way to crack down on these attacks is to implement an HttpOnly cookie policy. This policy essentially prevents JavaScript from having access to cookies.
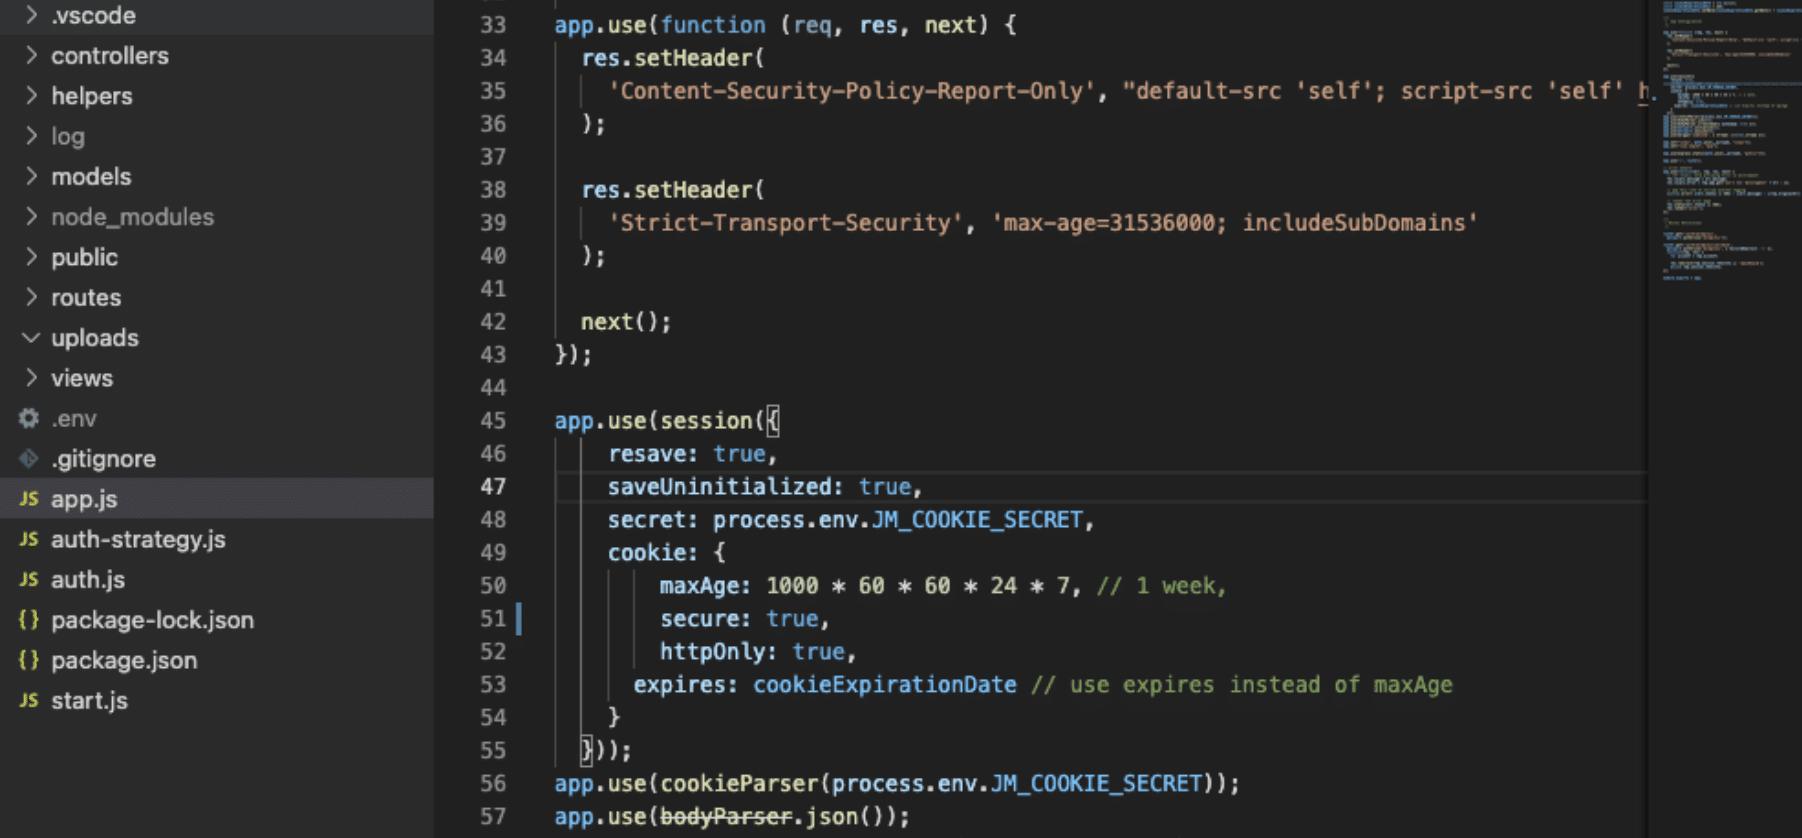
One way to achieve this in Node.js is the following:
HttpOnly instructs the browser not to expose cookies to any script.
If you want to read more about cross-site scripting in general and get a more robust understanding of the logistics behind it, I encourage you to read our pillar post about it here . Additionally, you can explore our security solution platform and find out how you can mitigate all vulnerabilities in your application effortlessly here .
Managing Risk
Protecting applications from the myriad vulnerabilities that exist daily can be an arduous task. Moreover, these vulnerabilities, which reside in our own platforms, can be the single most significant liability to the stability and security of our businesses and our client’s data.
Many exploits can affect our platforms in different ways. For example, threats like DDOS can temporarily bring services down and affect our quality of service. Meanwhile, sophisticated SQL injection attacks can wreak havoc on databases and even facilitate the takeover of servers. Understanding this is important because we can’t eliminate all threats since we only have so much time and energy.
This post was written by Juan Reyes.Juanis an engineer by profession and a dreamer by heart who crossed the seas to reach Japan following the promise of opportunity and challenge. While trying to find himself and build a meaningful life in the east, Juan borrows wisdom from his experiences as an entrepreneur, artist, hustler, father figure, husband, and friend to start writing about passion, meaning, self-development, leadership, relationships, and mental health. His many years of struggle and self-discovery have inspired him and drive to embark on a journey for wisdom.
Once upon a time, most websites were unencrypted. Website operators limited HTTPS connections to high-value login and payment forms. Today, transport layer security (TLS/SSL) is the default mode for most websites. The internet is a safer place now. As the next evolutionary step, the HTTP strict transport security (HSTS) standard ensures that HTTPS isn’t just possible but that unencrypted HTTP connections become impossible. This article covers configuring HSTS in Laravel applications. We’ll discuss good reasons for HSTS and the prerequisites first. Then, we’ll look at the necessary steps and two options for enabling it.
What Is HSTS?
HTTP strict transport security is a method for websites to announce that they only accept encrypted connections and will continue to do so.
Browsers that understand this announcement will force encrypted connections (https://) to the site even when a user tries to access the site without encryption (http://). That announcement comes in the form of the “Strict-Transport-Security” header.
Since the header is visible only on the first request, you reach the best security only afterward. As an additional mechanism, modern browsers come with a preloaded list of HSTS-enabled domains to enforce security from the first request.
Why Is HSTS Necessary?
Imagine you’re browsing the web through an untrusted connection, such as a public Wi-Fi access point. A hacker may have modified the router to run a man-in-the-middle attack. This attack replaces a website with a spoofed version that could grab your login session or other personal data. For example, they might insert a script that sends confidential information to a server they control. A man-in-the-middle who can rewrite HTTP responses can do this even when the website implements protection from cross-site-scripting (XSS) . Since the hacker probably won’t have a valid certificate for the website, they need to downgrade your connection from HTTPS to HTTP to intercept your interactions. HSTS prevents that.
Of course, this only works if you previously visited the site from a trusted network or if it’s on the preloaded list, so your browser knows that it’s HTTPS-only.
Should You Use HSTS?
There are a few unusual scenarios where your domain has to accept unencrypted connections either now or in the future. Those may not be for your main website, but subdomains for internal purposes like a sandbox or Intranet website, or if you have a legacy API for IoT devices that don’t speak HTTPS. In all other cases, you should enable HSTS for additional security. Handling a lot of valuable personal data like payment information strengthens the case for HSTS even more.
What Are the Prerequisites For HSTS?
The obvious prerequisite is that your website supports HTTPS connections already. It means that you’ve created a key pair and acquired a certificate from a trustworthy certificate authority. Let’s Encrypt offers such certificates for free. You also need to configure your webserver (nginx, Apache, IIS, etc.) to enable TLS. I’m assuming that you’ve already done this, so I won’t cover the TLS setup in this article. If you aren’t there yet, you can find many guides, such as this official article from nginx on configuring Let’s Encrypt with their webserver .
If your website uses the root domain and multiple subdomains (e.g., “example.com”, “www.example.com”, “somethingelse.example.com”), you need a certificate for each or a wildcard certificate covering all subdomains.
After confirming that your website works with HTTPS, you also need to consider how you’ll handle unencrypted HTTP connections from now on. One option would be to reject them, but that stops users from finding your website if they enter it with http:// or without any prefix and their browser assumes http:// instead of https://. The better option is to ensure that every insecure request redirects to a secure request.
How Can I Implement HTTP to HTTPS Redirects?
One way to do this is to configure your webserver to issue a redirect. If that’s your preferred way, check the documentation for your webserver and edit the configuration files accordingly.
You can also do this in Laravel with custom middleware. Create the new file app/Http/Middleware/HttpRedirect.php with the following content:
<?php

namespace AppHttpMiddleware;

use Closure;
use IlluminateHttpRequest;
use IlluminateSupportFacadesApp;

class HttpRedirect
{

    public function handle(Request $request, Closure $next)
    {
        if (!$request->secure() && App::environment('production')) {
                return redirect()->secure($request->getRequestUri(), 301);
        }

        return $next($request);
    }

}
Note that the redirect uses the HTTP 301 status code. It indicates that this is a permanent redirect, which is in line with HSTS. Remember, we want no exceptions from HTTPS-only. To ensure that the middleware runs on every request, add it to the $middleware array in app/Http/Kernel.php :
protected $middleware = [
        // other existing middleware
        AppHttpMiddlewareHttpRedirect::class
];
After meeting the prerequisites, you can finally add “Strict-Transport-Security” to your responses. As mentioned in the beginning, I will show you two ways of doing that. First, however, let’s discuss the configuration options:
With max-age , you can specify how long browsers should remember that the site is HTTPS-only. Since there’s no going back to unencrypted HTTP during this time, you should test the setup with a few minutes at first. Later, you can increase this time. Most websites set this to one or two years.
With includeSubdomains , you can specify that the directive is valid for subdomains as well. That means that if you set the header for “example.com”, the browser will consider requests to “www.example.com” (or “somethingelse.example.com”) HTTPS-only as well.
With preload , you can specify that browsers may include your domain in their preloaded list of HTTPS-only host names.
Adding the HSTS Header With Custom Middleware
You can create custom middleware to add the “Strict-Transport-Security” header to every request, similar to the HTTP-to-HTTPS redirect middleware we saw earlier. If you want to take this route, create the new file app/Http/Middleware/HSTS.php with the following content:
<?php

namespace AppHttpMiddleware;

use Closure;
use IlluminateHttpRequest;

class HSTS
{

    public function handle(Request $request, Closure $next)
    {
        $response = $next($request);

        $response->header('Strict-Transport-Security', 'max-age=31536000; includeSubdomains');

        return $response;
    }

}
In the example, we set the max-age to 31,536,000 seconds, which is equivalent to one year. As I mentioned before, you should probably start setting this to 300 seconds (or 5 minutes) for testing purposes first. We also added the includeSubdomains option. Once again, to ensure that the middleware runs on every request, add it to the $middleware array in app/Http/Kernel.php :
protected $middleware = [
        // other existing middleware
        AppHttpMiddlewareHSTS::class
];
Using the Secure Headers Library
There’s a third-party library that supports HSTS and several other security-related HTTP headers that could be interesting or relevant for your Laravel website. It can be an alternative option to custom middleware, especially when you’re interested in these other security headers as well.
To install the library, navigate to your Laravel project directory and enter the following two commands in your console:
Next, add it to the $middleware array in app/Http/Kernel.php like this:
protected $middleware = [
        // other existing middleware
        BepsvptSecureHeadersSecureHeadersMiddleware::class,
];
After this setup, you can enable HSTS by editing the ‘hsts’ configuration block in config/secure-headers.php . Set ‘enable’ to true and the other parameters ( max-age , include-sub-domains , and preload) to the desired settings. You’re done and have enabled HSTS for your website!
The library comes with a few additional preconfigured headers. For example, X-Content-Type-Options prevents browsers from executing scripts or styles if they don’t have the correct Content-Type .
X-Frame-Options prevents other websites from loading yours in an iframe. Unless your Laravel website explicitly offers embeddable content, this is a good policy.
Permission policies describe the browser features that the website wants to use. Disabling features helps with XSS attacks, where an attacker uses browser features that the website doesn’t need, similar to content security policies.
I won’t discuss all options here, but the comments in the file include helpful links to read about other security headers.
What’s Next?
Once you’ve configured HSTS with the preload option, you can request the inclusion of your website in the preload lists. Go to the HSTS Preload website to learn more about the prerequisites for it and submit your domain. In any case, by configuring HSTS, you’ve already improved your website security.
We’ve mentioned XSS attacks in this article, but make sure to check out our articles about cross-site request forgery (CSRF) and path traversal attacks , as these are other security issues you should prevent in your Laravel website.
This post was written by Lukas Rosenstock.Lukasis an independent PHP and web developer turned API consultant and technical writer. He works with clients of all sizes to design, implement, and document great APIs. His focus is on creating integrations and mashups that highlight the values of APIs, and educate developers about their potential.