
Codex CLI lives in your terminal and works alongside the tools that developers already use. Like other terminal-based agents, you simply point it at a directory, and OpenAI’s coding agent reads, changes, and runs the code inside it. The features it finishes pile up quickly. The security check on those features is still the slow, manual part of your day.
This guide shows you how to add the runtime security testing layer. By the end, Codex will run StackHawk scans against your live app, repair what turns up, and back every fix with a clean rescan.
What Are StackHawk Agent Skills for Codex?
A StackHawk agent skill is a set of instructions that teaches a coding agent the entire runtime security job. That means running scans, reviewing findings, fixing vulnerable code, and verifying the results. The skill compresses it into a five-step loop. Configure a stackhawk.yml for your app type, host, and auth pattern; scan the running app with HawkScan; parse the structured findings; fix the code; verify with a rescan.
We ship two skills. HawkScan covers scanning and fixing, and it’s the one this tutorial installs. StackHawk API answers the reporting questions: security posture, findings reports, scan history, and triage status. For Codex specifically, Codex will configure HawkScan, run the scan, parse findings, and help you fix them.
The skills are structured markdown with no runtime dependencies installed, no code running in the background. That’s the Agentic StackHawk position on AI coding agent security: the agent that built the feature also tests it, so “done” means “done and secure”.
Prerequisites
Here are a few prerequisites to check off before the steps below:
- Codex CLI:
npm i -g @openai/codexinstalls it (Homebrew works too), and it’s included with ChatGPT Plus, Pro, Business, Edu, and Enterprise plans. New to the tool? OpenAI’s Codex CLI docs cover installation and setup - A StackHawk account; agent skills need the Secure, Scale, or Wingman plan
- A Java 17+ JDK if you’re on Linux; the installers for macOS and Windows already include Java
- Your app running locally, source code included, listening on a port from 1024 to 65535
Set Up Codex CLI Security Scanning with StackHawk
Step 1: Get a StackHawk API Key
To get an API key, log in to the StackHawk console in the browser and click Settings in the left-side menu, then click API Keys in the menu that appears. On the API Keys screen, click the Create API Key button in the top right corner.
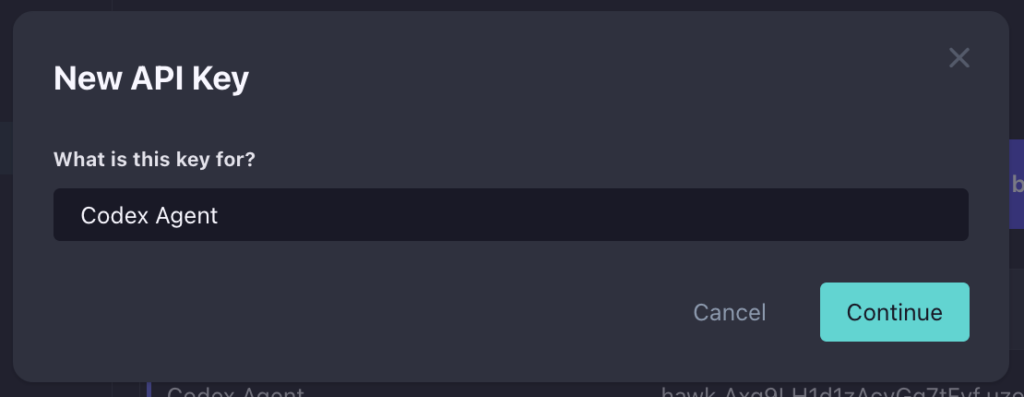
Give your API key a descriptive name like “Codex Agent” and click Continue.
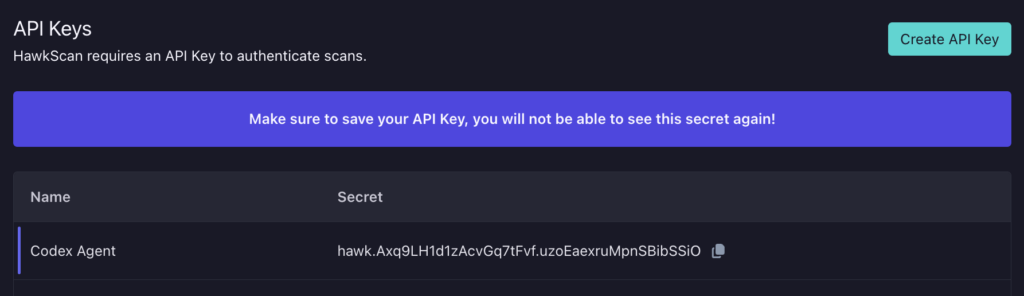
The API key has now been created. Leave this screen open or temporarily copy the key somewhere secure so it’s ready for the next step. If you exit before copying it, you’ll need to delete the key and create a new one.
Step 2: Install the hawk and hawkop CLIs
One Homebrew line covers both tools on macOS or Linux, followed by an init for each:
brew trust stackhawk/cli && brew tap stackhawk/cli && brew install hawk hawkop
hawk init
hawkop init
hawk init asks for the API key from Step 1, checks that it’s valid, and stores it at $HOME/.hawk/hawk.properties.

hawkop init reads the stored key on its own; the only thing it wants from you is a default organization.
For Windows users: the StackHawk downloads page has MSI installers for both CLIs, with Java baked into the hawk one, and OpenAI calls Codex CLI’s Windows support experimental and recommends running Codex inside WSL.
Three command-line tools are now in play, so keep the roles straight: codex is the agent, hawk runs scans, and hawkop operates on the results.
Step 3: Install the StackHawk agent skill in Codex
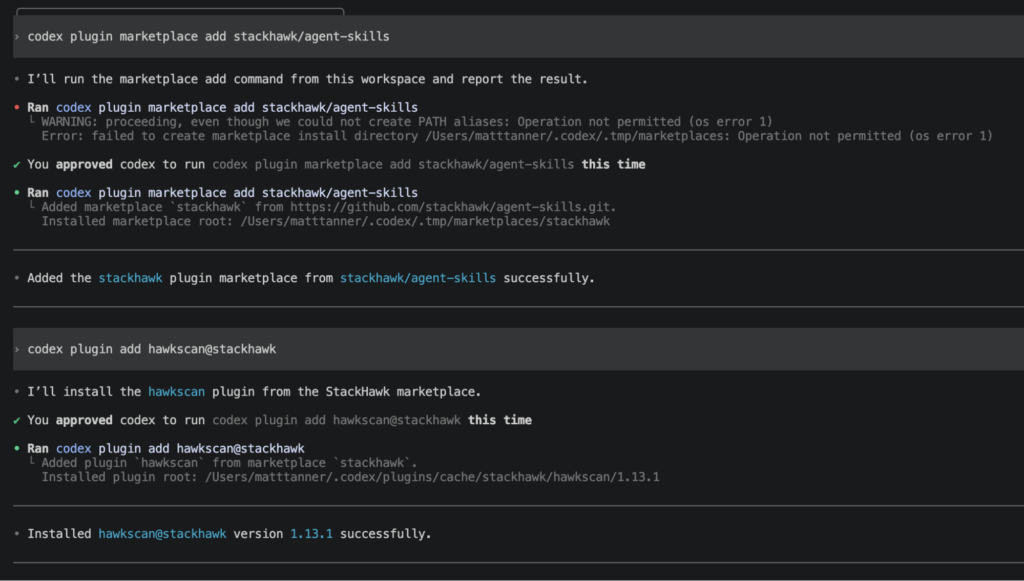
From your shell, run two commands to install the Codex skill:
codex plugin marketplace add stackhawk/agent-skills
codex plugin add hawkscan@stackhawk
codex plugin add stackhawk-api@stackhawk
The first command registers StackHawk’s marketplace; the second pulls in the relevant StackHawk skills.
Step 4: Verify the skill is active
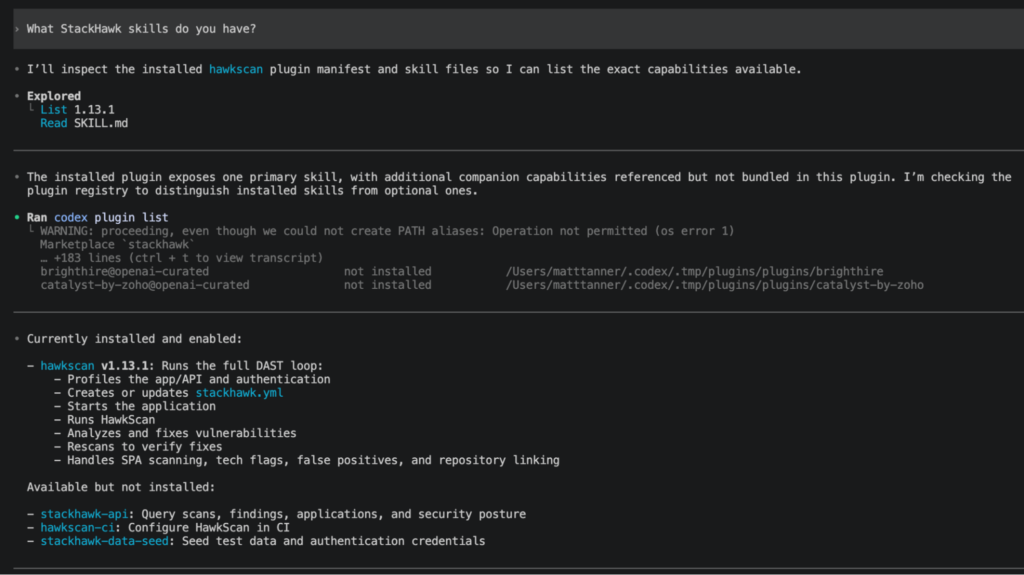
Ask Codex directly:
What StackHawk skills do you have?A response describing the HawkScan skill means the install landed.
Step 5: Ask Codex to scan your app
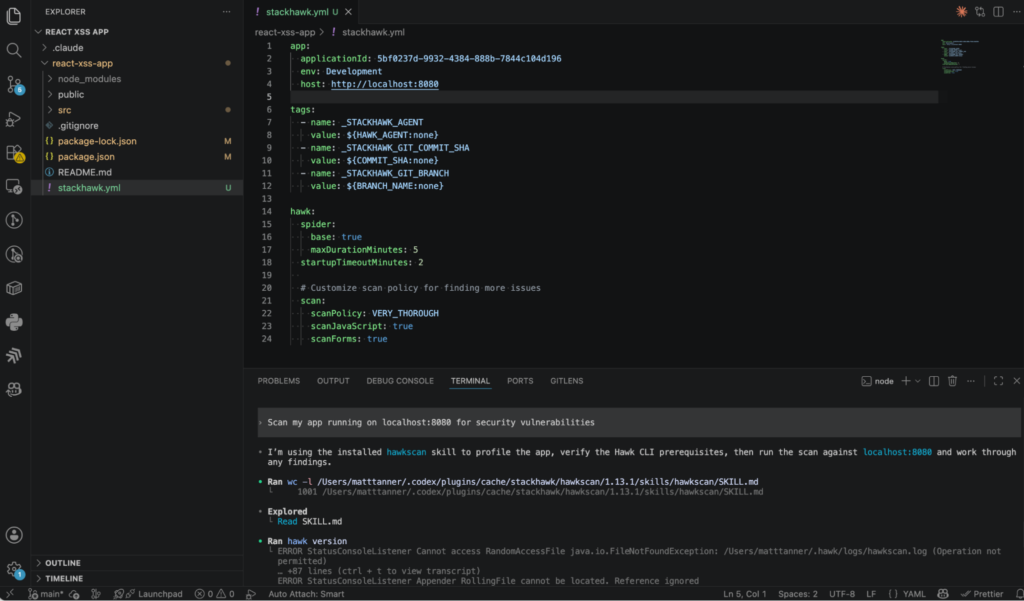
With your app up, give Codex a scan prompt, swapping the port for the one your app uses:
Scan my app running on localhost:8080 for security vulnerabilitiesCodex starts by checking that the app is reachable, and it prompts you to start the app if it isn’t. Then it configures HawkScan, which, in practice, means writing a stackhawk.yml file. The file needs exactly three fields, app.applicationId, app.env, and app.host, and the first of those has an outside origin. It points to an application record in the StackHawk platform, not to anything in your source tree. Setting up that record falls inside the configuration work that the skill walks Codex through.
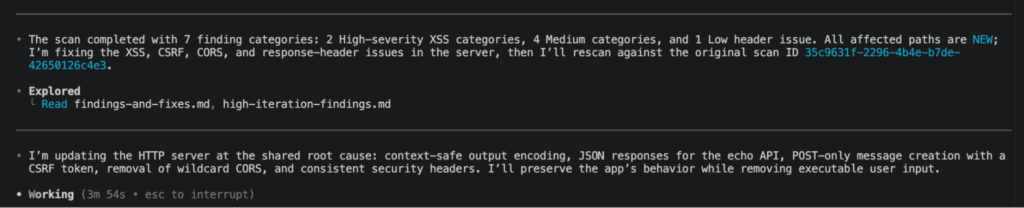
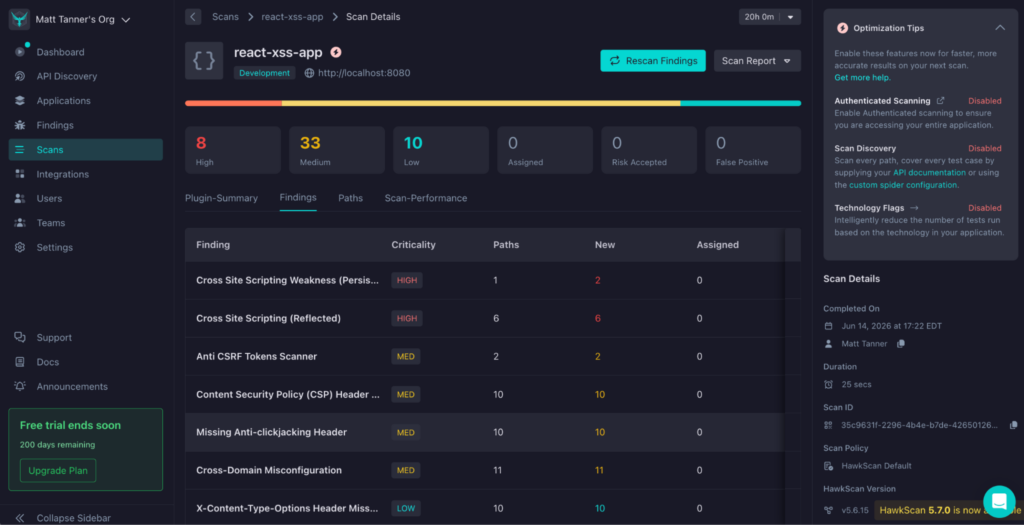
When the scan finishes, the results are printed to the terminal. Depending on how Codex determines the best output format, there is usually a count of findings by severity first, followed by the details for each one: risk, confidence, which paths, and which methods.
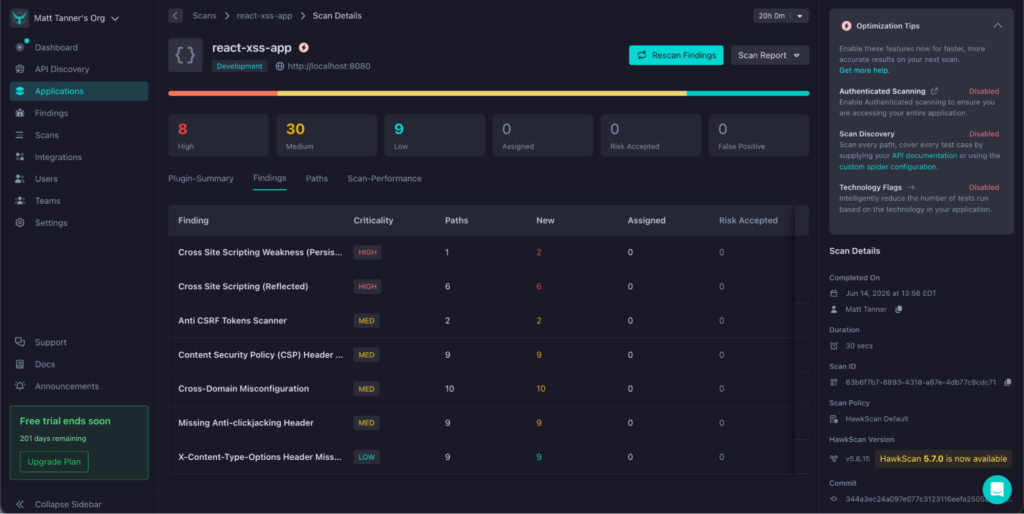
The same results also land in the StackHawk platform.
Step 6: Let Codex fix the findings and verify
As you can see in the terminal scan result screenshot above, sometimes Codex will take off and start fixing things itself. However, other times the findings list appears, and you’ll need to prompt Codex to fix, like so:
Fix all of these security findingsCodex reads the code around each finding and fixes it the way your codebase would expect. Think parameterized queries where SQL was used with direct string concatenation, output encoding where user input came back untouched, and security headers where none existed.
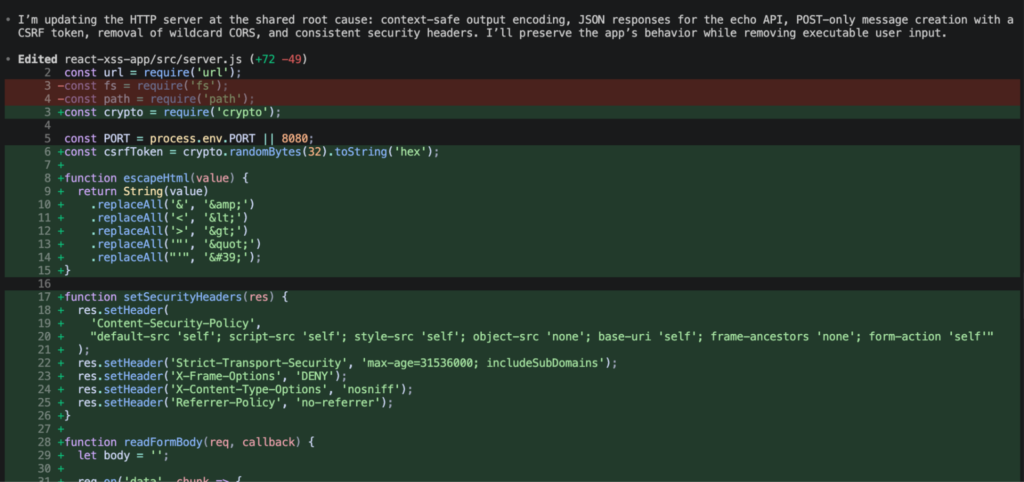
After the fixes go in, it rescans and confirms that the findings no longer reproduce.
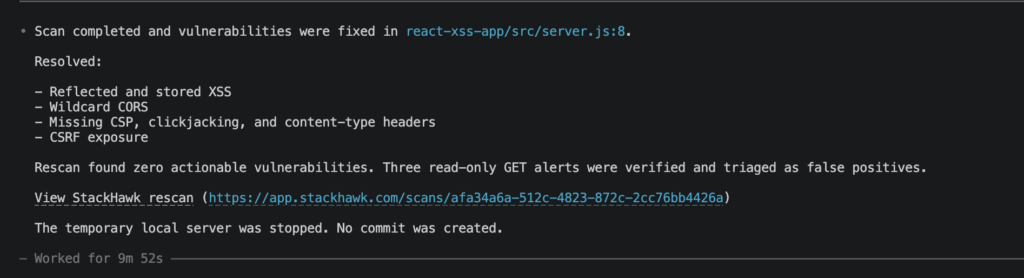
Reviewing and Triaging Findings in the StackHawk Platform
One of the best parts of using StackHawk skills with a coding agent is that the skill can automatically review and triage findings. The agent will then decide whether something should be fixed and add a note. All of this happens without any intervention (as shown above).
If you still want to review scans and triage manually, that’s also possible in the StackHawk console in the browser.
In the console, unprocessed findings are marked New, and the Finding Details page provides each one with three triage paths: Assigned, Risk Accepted, or False Positive. Whichever you pick, the platform asks for a comment, which is how a triage decision survives team turnover.
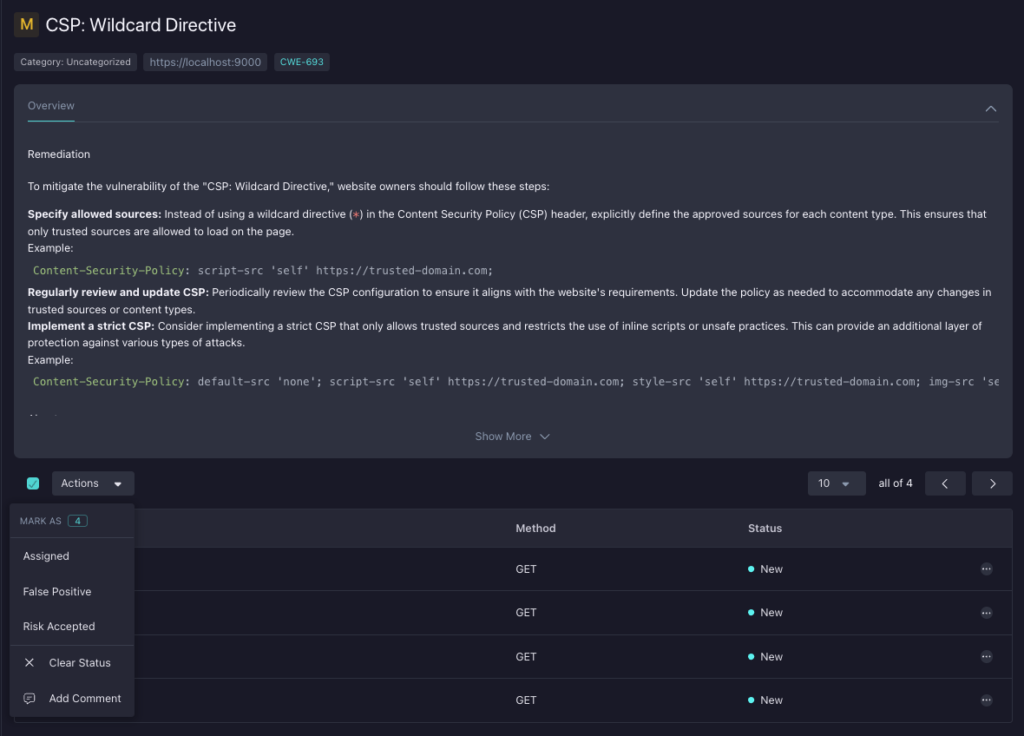
When a finding looks questionable, the Validate action generates a ready-to-run curl command that reproduces the attack, including the correct verb, headers, and data. Fire it at your local app and trace exactly what the scanner saw.
However, in most cases, you’ll want to (and can) rely on the agent to take care of this whole workflow without any intervention. Below is a screenshot showing Codex automatically triaging an issue.
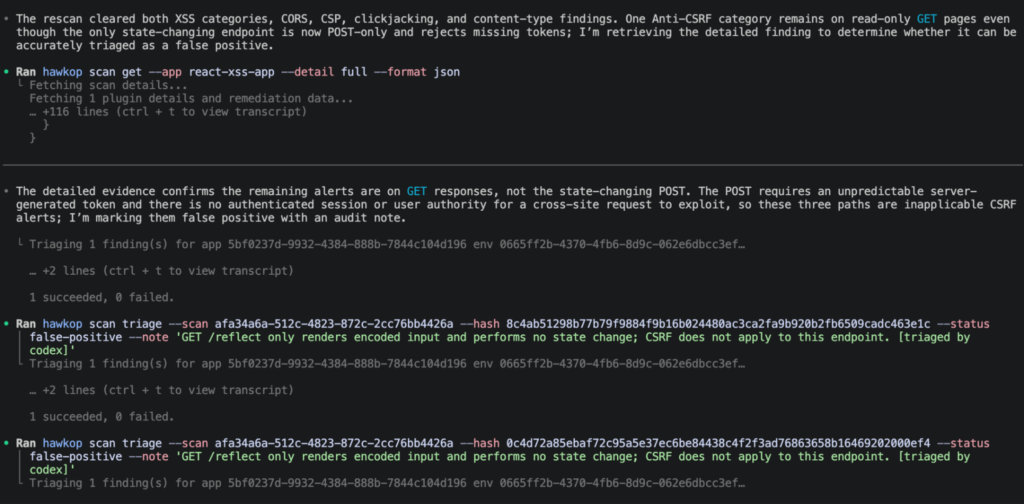
Wrap-Up
Codex already runs your code all day; the skill just widens its job description. Now the same agent attacks the running app, patches what gives way, and hands you a clean rescan as proof. That’s what secure code with Codex looks like when none of it requires a separate workflow. Start a free StackHawk trial and run the loop against your own app today. For the long-form version of this setup, the Agentic StackHawk Setup Guide has all the steps in one place.


