Today we are thrilled to announce the StackHawk CLI.
Until now, running StackHawk has required a Docker container. By introducing the CLI, we remove the Docker dependency and more importantly, developers get a security tool that feels more familiar and better fits their workflow.
The CLI has been months in the making and we can’t wait to help users get going with the tool. We have put together this getting started guide to help you get scanning and better protect your apps.
Wait…But I ❤️ The Docker Version
If you are currently using the Docker version of the StackHawk scanner, don’t worry. That version is still fully supported and has some of the great configuration validation capabilities mentioned later in this post. While the Docker version is well-suited for running in your CI/CD pipeline, the CLI is great for running on your local computer.
If you want more details on the Docker vs CLI check out the docs that explain all the differences.
A Few Resources Before We Get Going
We will break down the CLI highlights in this blog, but there are other resources that will help guide you through this process as well.
📺 A Video Demo
Join StackHawk engineer Omar Alkhalili as he guides you through using the CLI step-by-step. This is a great resource to watch, pause, and replay as you get going.
📝 The Docs
Wouldn’t be a release without the docs, now would it? If you are looking for all the technical details, dive into the CLI documentation .
CLI Pre-Reqs
In order to get going with the StackHawk CLI, you will need to:
Have a StackHawk account. Sign-up here .
Create an app in the StackHawk platform. This requires configuring an app which will provide you with an API key and a YAML config file.
Make sure you save your API key and YAML config file.
Have Java version 11 or higher.
Have a way to install the CLI. This can be done with homebrew or by downloading the self-contained zip file .
Once you have completed those steps, open a terminal window and get ready to hawk 🦅.
Installation
Depending on your OS and personal preference you can either install via homebrew or you can install the zip.
We will walk through homebrew here, but if you are interested in the zip, you can find those docs here .
To install, using homebrew run the commandbrew install stackhawk/cli/hawk
, at which point your terminal should output something like this: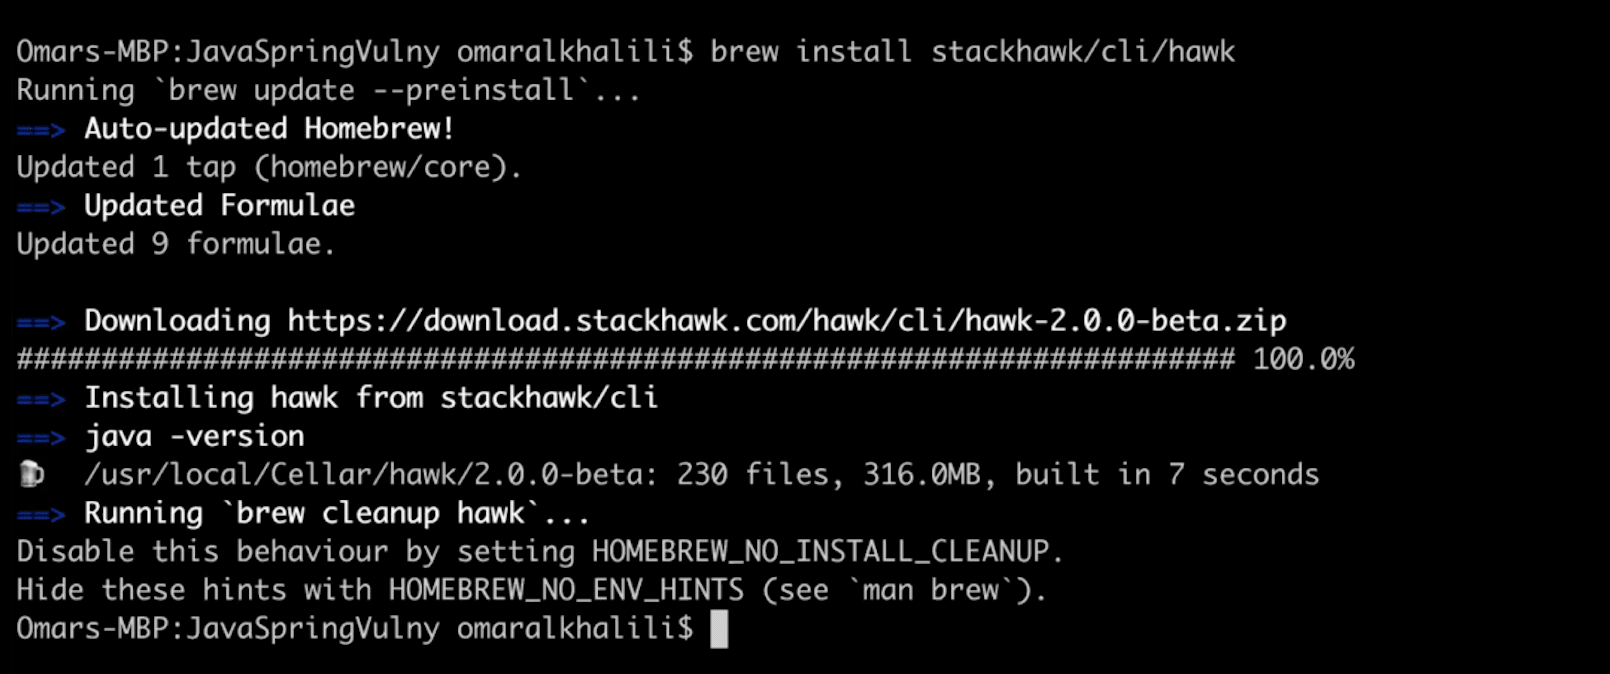
You are now ready to start using the CLI 🎉
CLI Commands
Getting Your Bearings:hawk–help
If you are unsure where to get started with the CLI, use the commandhawk --help
 or hawk -h
. This will provide you with a list of available commands: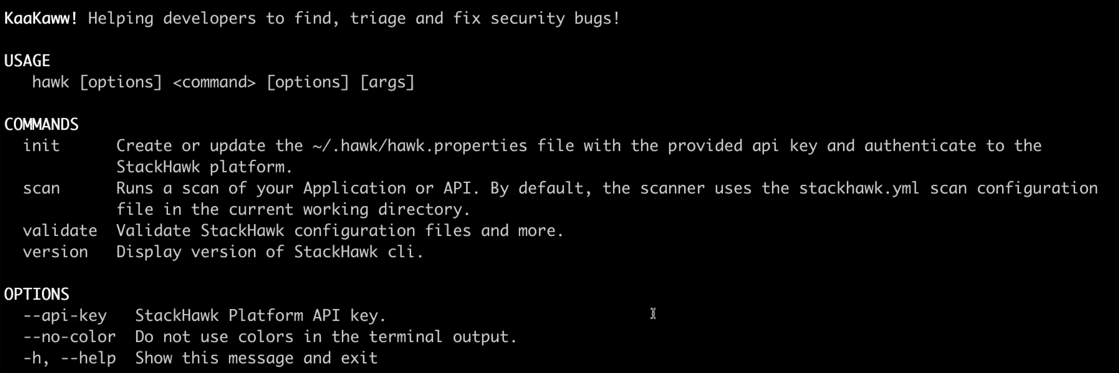
Initializing the Scanner:hawk init
To connect to the StackHawk platform use thehawk init
command. Upon entering this command you will be prompted for your API key to authenticate your session.
Once you enter your API key you should get a message that you are now authenticated!

Note: You should have saved your API key upon creating your app in the StackHawk platform, but if you did not or your dog ate your homework, head over to the settings menu in the bottom left of the platform and you can create a new one.
Validating Your Config:hawk validate
The next step in getting scanning with the CLI is validating your config file, which by default will be named stackhawk.yml. Store this file at the base of your project’s directory.
Once you have updated your YAML with any specific configurations not included by default (like authentication, or API configuration details), you will be ready to run the ‘hawk validate’ command.
If your configuration file is error free, the CLI will return back a success message.

If your configuration file has errors, the specific lines causing the issue will be called out with error messages and suggestions for how to fix.

Getting Scanning:hawk scan
Once you have initialized and validated your config, you are ready to complete your first scan.
Enter the commandhawk scan
in your terminal and you will see your scan kick off.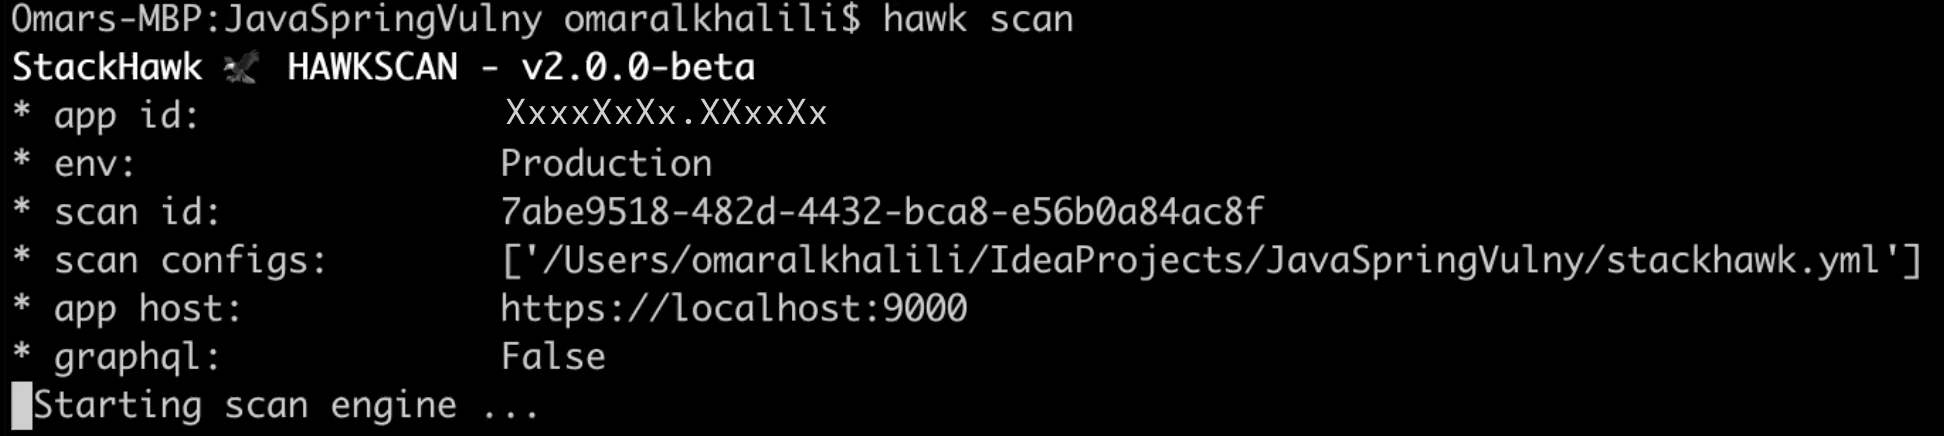
By default, the scanner will expect your config file to be named stackhawk.yml. If your config file is named something else, just append your file name to the hawk scan command. So, the command would look something likehawk scan file-name.yml
.There are many other configuration modifications you can make to thehawk scan
command to better fit your specific scanning scenario.You can learn more about these by adding the subcommand --help or -h tohawk scan
, at which point your terminal should output all of the configuration options.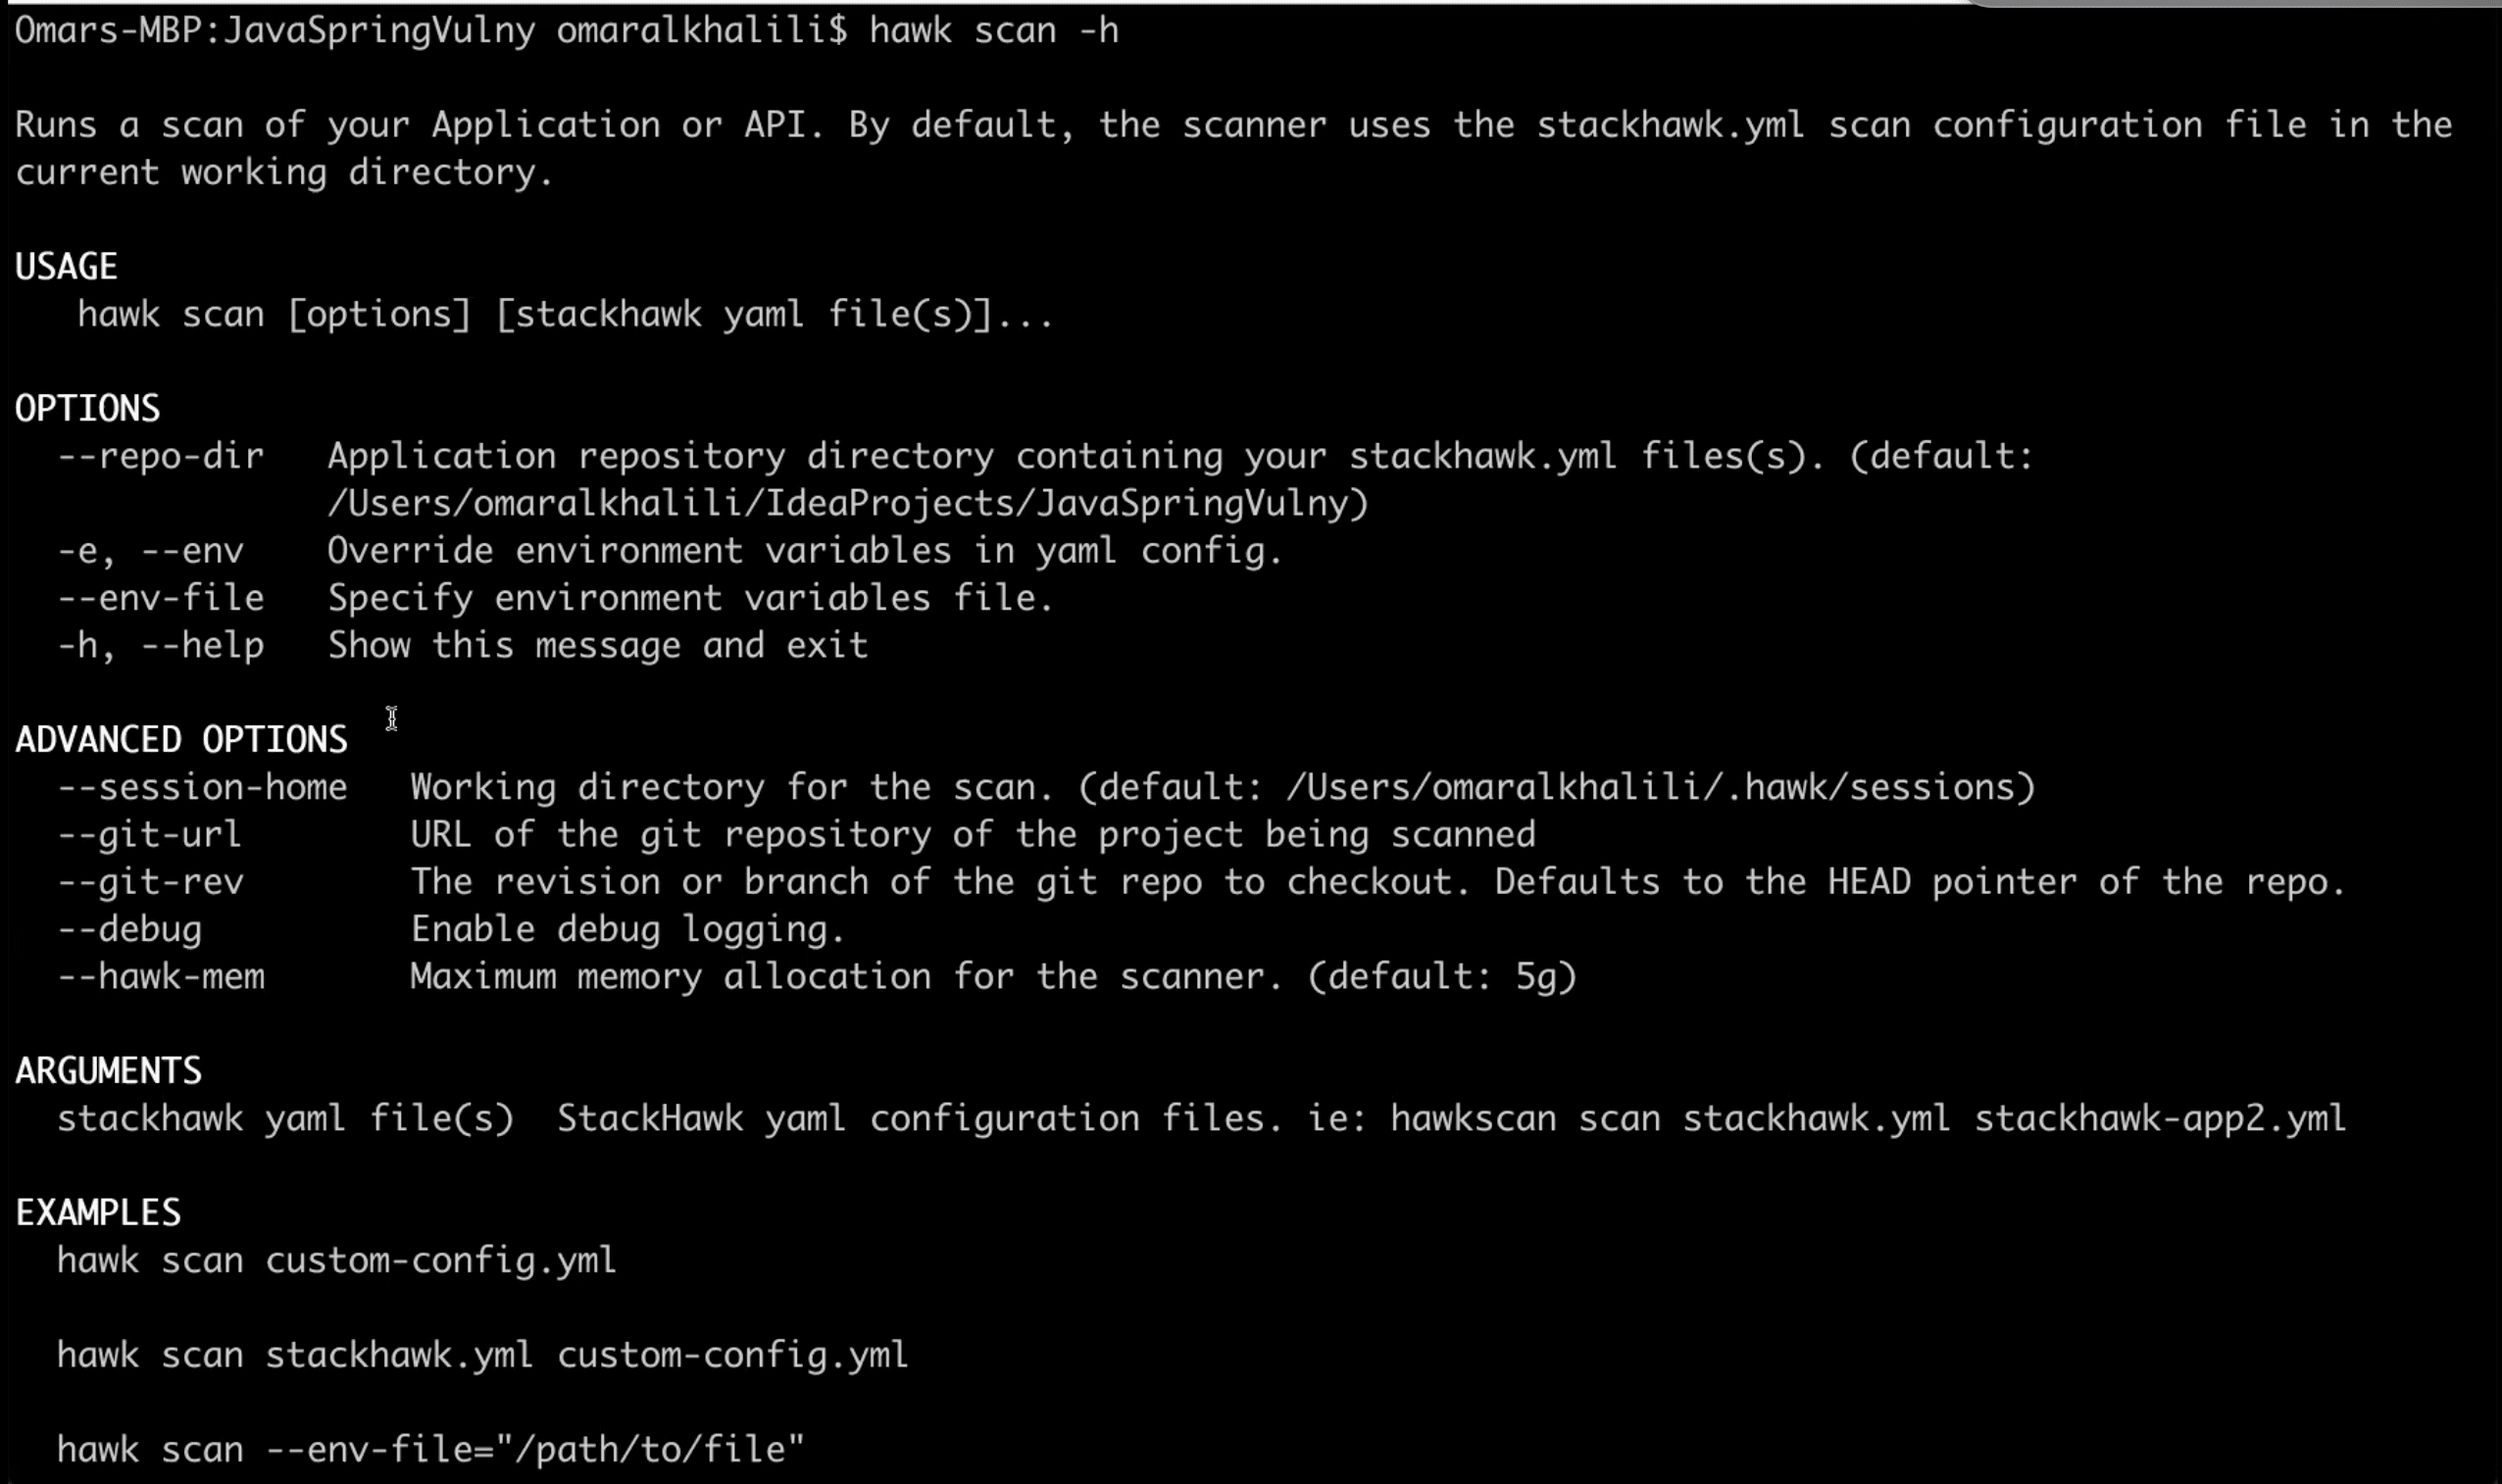
Note: The -help and -h subcommand also work with the other commands in this blog.
So Get CLI-ing
There you have the quick overview of the new StackHawk CLI. We hope you find it makes it easier to get going with your first scan, and every scan after that.
If you get going with it and have run into any issues, drop us a line at support@stackhawk.com . We would love to help you!