


If you have used OWASP ZAP , you know what a powerful tool it is for uncovering security issues in your application. You may also have noticed that automating it can be a challenge. To get a scan that covers your application adequately, you need to work within the ZAP Desktop environment to develop your contexts, policies, scripts, and authentication configurations. Then to automate it, you need to collect the various files where those elements are stored, and make them available to a ZAP Docker image at runtime.
Once all of that upfront work is done, you can run ZAP in your build pipeline. It can then produce a detailed report on a schedule, or on every code commit. Developers and security engineers can examine those reports to look for new issues and decide how to address them.
If you’re getting value from ZAP, why should you consider migrating to StackHawk?
StackHawk is Built for Teams and Automation
StackHawk loves ZAP, and we use it as the heart of our scanner, HawkScan . But unlike ZAP, HawkScan has no desktop component. It is configured entirely from a single YAML file to consolidate all of its power into a CI/CD-friendly package that is built for automation. And it improves upon some of ZAP’s core capabilities, such as OpenAPI ingestion and GraphQL scanning.
HawkScan is also backed by the StackHawk cloud platform, which enables a ton of features not possible in a standalone scanner. For instance, the platform provides
Slack and MS Teams integration to notify developers of new security findings as they are found
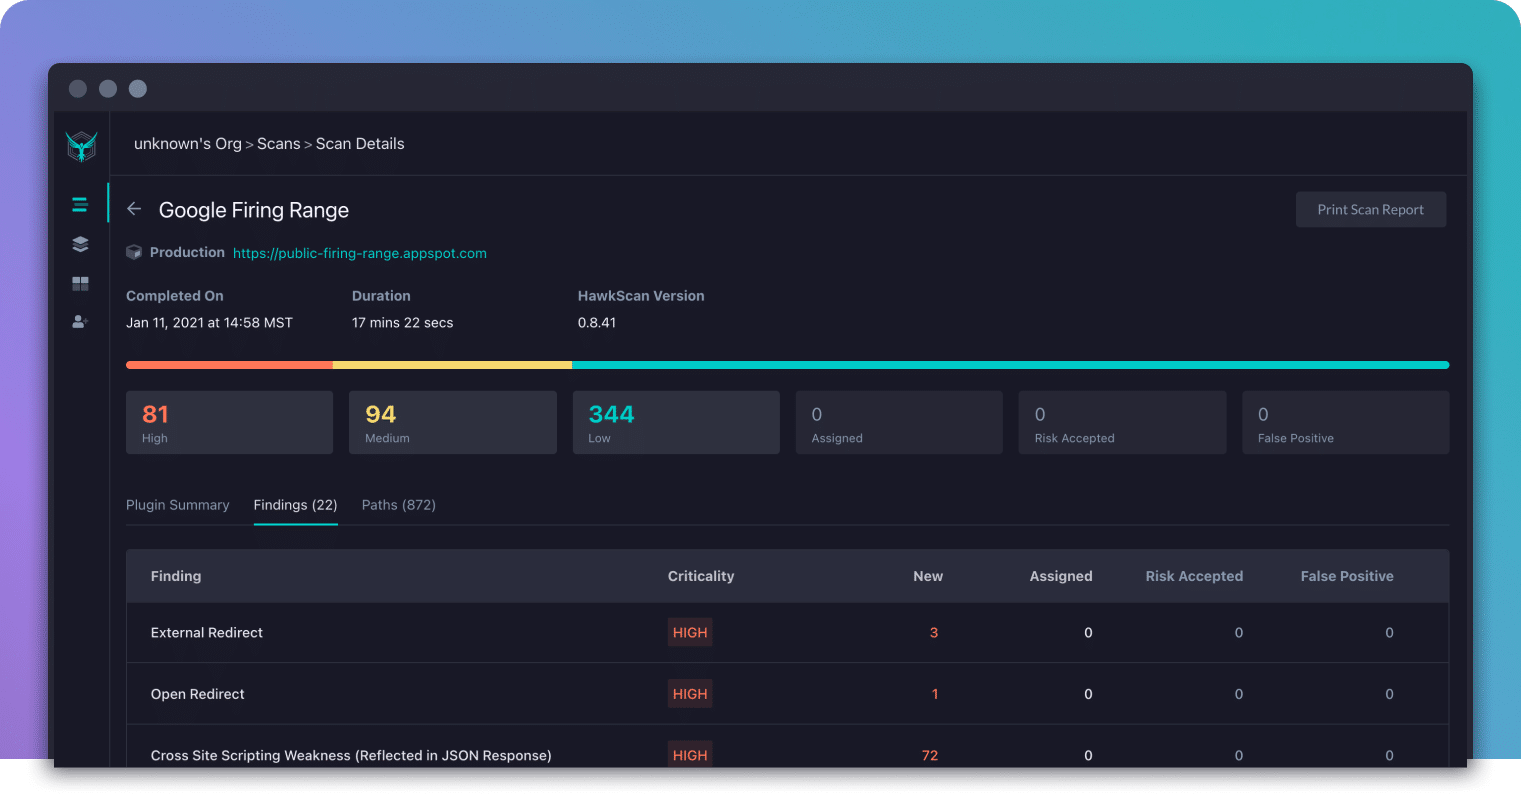
Detailed evidence and tools for each scan finding to help developers understand and reproduce issues
Historical reporting for individual applications to track trends and changes over time
Jira integration to track issues to resolution, with rich detail filled in by default
Triage actions to mark false positives, accept known issues, or assign findings for further action
It is tough to overstate the difference it makes for developers to be aware of new security issues as they are found on PR. Because the platform keeps track of scan results over time, it can surface new vulnerabilities with clarity. Developers don’t have to pick through a report to identify new issues. They receive specific actionable information about new bugs while the code they have written is still fresh in mind, and while they are in code review.
Finally, StackHawk comes with support. We want all of our customers to be successful, so we will bend over backwards to be responsive if you need a hand.
Transitioning from ZAP to StackHawk
If you run ZAP as a container in your continuous integration system, you will find the basic HawkScan Docker runtime command familiar. HawkScan expects to be deployed from within a clone of your application repository, and to mount that repository as a volume so it can reach your HawkScan configuration file,stackhawk.yml
. The following command is typical, with the StackHawk platform API key delivered as an environment variable,API_KEY
:
docker run --tty --network host --env API_KEY --volume $(pwd):/hawk stackhawk/hawkscanWhen it comes to configuration, HawkScan is a very different animal from ZAP. There are currently no configuration files that you can lift or automatically convert from ZAP to HawkScan. But you will find the configuration process to be more straightforward since it is constrained to a single YAML file, which you can check into source control alongside the code for the application you are scanning.
The lessons you learned about how your app works from using ZAP will give you an advantage over newcomers to DAST scanning in general. That is especially true when it comes to configuring authentication so that HawkScan can probe the full depth of your application.
StackHawk Step By Step
If you’re ready to give it a try, here’s a plan you can follow to see some quick results.
Sign up for a free account
Create a minimal StackHawk configuration
Run a scan from the command line
☝️ You can get this far in 20 minutes, no problem. Then if you’re ready to go a little deeper, continue with…
Add authentication
Add some scan features
Put it in your pipeline
You can follow this guide with your own application, or use our test app, JavaSpringVulny . That’s what I used to write my examples below. To run it, just clone the repository and rundocker-compose up --build -d
to build and run it. It will listen on port 9000, and you can explore it in a browser at https://localhost:9000 .
1. Sign Up for a Free Account
Head over to https://app.stackhawk.com and sign up for a free account. Create an API key and application. Snag a copy of your API key and the application ID for the application you just created.
2. Create a Minimal StackHawk Configuration
Here’s the simplest possible configuration for a StackHawk scan.
stackhawk.yml
app:
  applicationId: xxXXXXXX-xXXX-xxXX-XXxX-xXXxxXXXXxXX
  env: Development
  host: https://localhost:9000
Setapp.applicationId
to the app ID for the app you just created in the platform. And set theapp.host
value to the target of your scan.3. Test It on the Command Line
Export your StackHawk API key as an environment variable,API_KEY
, and run a scan.
export API_KEY=hawk.AAaaAAaaAAaaAAaaAAaa.BBbbBBbbBBbbBBbbBBbb
docker run --tty --network host --env API_KEY --volume $(pwd):/hawk stackhawk/hawkscanYou should see the scan start up, display a summary of results to the console, and provide a link to your scan results in the platform. Go check the platform for your results. Congratulations! You have your first scan!
4. Add Authentication
To give HawkScan access to your web app’s secure routes, you will want to add authentication. This part is usually the most challenging aspect of any DAST scan. There are just so many ways an application can handle authentication! If you already have it working in ZAP, you have a head start, because that means you have a good understanding of how your application’s authentication works.
Since this is a big subject, please refer to our official Authenticated Scanning documentation for some great detailed examples of common scenarios.
For JavaSpringVulny, I used the common scenario of username/password authentication to extract a bearer token . In this configuration, we POST a JSON object with{"username":"user", "password","password"}
to the login path/api/jwt/auth/signin
, and extract a JWT token from thetoken
field of the returned JSON object. Then to authenticate to the API for subsequent requests, we add that as a bearer token to theAuthorization
request header. We also exclude the path/logout
from our scan to prevent the scanner from logging itself out.stackhawk.yml
app:
  applicationId: xxXXXXXX-xXXX-xxXX-XXxX-xXXxxXXXXxXX
  env: Development
  host: https://localhost:9000
  excludePaths:
    - "/logout"
  authentication:
    loggedInIndicator: "\QSign Out\E"
    loggedOutIndicator: ".*Location:.*/login.*"
    testPath:
      path: /api/jwt/items/search/i
      success: ".*200.*"
    usernamePassword:
      type: JSON
      loginPath: /api/jwt/auth/signin
      usernameField: username
      passwordField: password
      scanUsername: "user"
      scanPassword: "password"
    tokenAuthorization:
      type: HEADER
      value: Authorization
      tokenType: Bearer
    tokenExtraction:
      type: TOKEN_PATH
      value: "token"
Now scan, using the same command line as before.
docker run --tty --network host --env API_KEY --volume $(pwd):/hawk stackhawk/hawkscanIf there are any problems with your authentication setup, HawkScan will fail with an error message to help you pinpoint the problem. If you struggle with this, send us a message at [email protected] , and we will be happy to help. Yes, even with the free plan.
When you get authentication working, give yourself a pat on the back. That’s a big deal!
5. Add Some Scan Features
Now you can light up some other features. Check out the HawkScan Configuration documentation to read about your options, including the OpenAPI parser, GraphQL scanner, header replacers, and more.
JavaSpringVulny has a built-in OpenAPI endpoint at/openapi
. So I added that feature to better target all of the available endpoints in my scan. Here’s my updated configuration (with the authentication section collapsed for readability)stackhawk.yml
app:
  applicationId: xxXXXXXX-xXXX-xxXX-XXxX-xXXxxXXXXxXX
  env: Development
  host: https://localhost:9000
  excludePaths:
    - "/logout"
  authentication:
	### authentication section here
  api: /openapi
If you’re following along with the same app, you will notice that the scanner finds a lot more of the API routes with this setting enabled.
6. Put It in Your Pipeline
Your scan is looking great! Now it’s time to put it into your continuous integration pipeline so you can run it on every pull request.
Since my app repository already lives in GitHub, I used GitHub Actions to build, run, and scan my app for every pull request to themain
branch. I set up a GitHub Actions workflow using the HawkScan Action to simplify the configuration. And I stored my StackHawk API key as a GitHub secret ,HAWK_API_KEY
.
Here’s what my GitHub Actions workflow configuration looks like.
.github/workflows/build-and-scan.yml
name: build-and-scan
on:
  push:
    branches:
      - main
  pull_request:
    branches:
      - main
jobs:
  stackhawk-hawkscan:
    runs-on: ubuntu-20.04
    steps:
    - uses: actions/checkout@v2
		- run: docker-compose up --build -d
    - uses: stackhawk/[email protected]
      with:
        apiKey: ${{ secrets.HAWK_API_KEY }}
Check out our Continuous Integration guides for details on how to run HawkScan in your pipeline.
Next Steps
Your scan configuration is looking great at this point. But there is still so much to explore with StackHawk. Check out your scan results . Triage some issues by taking actions on them. Try recreating some of the findings withcurl
using the  Validate  button. Explore Integrations and connect StackHawk to Slack and Jira. And finally, invite some team members to join your organization.