


Build a live security test environment within a Travis CI build pipeline, and scan your applications for security vulnerabilities each time you check in code.

Every time you commit and push software changes, you should be building and testing it for bugs. That includes security bug testing against a live integration environment, so you can be aware of any new bugs as they are introduced, and before they go to production. Here’s a step-by-step guide to accomplishing that in a fully automated way using StackHawk and Travis CI .
In this tutorial, we will build and containerize an intentionally flawed Django app called vuln_django , based on the Django Tutorial series. We will stand up an integration environment complete with an Nginx front-end and a PostgreSQL database backend using Docker Compose. Finally, we will test our app for security vulnerabilities using StackHawk. And we will do all of this in a self-contained Travis CI build environment, triggered by pushes to GitHub.

Getting Started
You will need accounts with StackHawk , Travis CI , and GitHub . You will also need some familiarity with Git and Docker. Familiarity with Python and Django is helpful, but not necessary.
You should have the following software installed on your computer.
Python 3 (` brew install python` on MacOS)
All prerequisites for Python3 mysqlclient (`brew install mysql` on MacOS)
All prerequisites for Python3 psycopg2 (`brew install postgres` on MacOS)
Fork and Clone vuln_django_play
Fork a copy of the vuln_django_play repository to your own GitHub account. Then clone the fork to your workstation. This repo already contains all of the automation that we will be creating in this tutorial and more. Since that’s what we want to create, remove it by running the script,delete-automation.sh
.
cd vuln_django_play
scripts/delete-automation.shNow try running vuln_django locally to verify that it works.
python3 -m venv env<br>$ source env/bin/activate
pip install -r requirements.txt
python manage.py migrate
python manage.py createsuperuser
python manage.py seed polls --number=5
python manage.py test
python manage.py runserver
Browse to http://127.0.0.1:8000/ and you should see the vuln_django polling application! The strange polls you see were generated in theseed
step above, and the poll data is stored in a SQLite database that was created with themigrate
step.Hit<ctrl>-c
to stop the development server.Containerize vuln_django
Rather than running the development server, let’s run the app with Gunicorn for better performance, and to better simulate a production environment. And for portability, let’s containerize it.
Create a Dockerfile at the base of your cloned repo with the following contents.
# Create the base stage
FROM python:3.7-buster as base

COPY requirements.txt /opt/app/
COPY vuln_django/ /opt/app/vuln_django/vuln_django
COPY static/ /opt/app/vuln_django/static
COPY templates/ /opt/app/vuln_django/templates
COPY polls/ /opt/app/vuln_django/polls
COPY manage.py /opt/app/vuln_django/

RUN pip install -r /opt/app/requirements.txt

# Create the micro stage to run as a gunicorn container
FROM base as micro
ARG SERVER_PORT=8010
ENV SERVER_PORT=${SERVER_PORT}
EXPOSE ${SERVER_PORT}:${SERVER_PORT}
RUN apt-get update &&
    apt-get install -y --no-install-recommends
    netcat
WORKDIR /opt/app/vuln_django
CMD exec gunicorn vuln_django.wsgi --bind 0.0.0.0:${SERVER_PORT} --workers 3
Build the container image and run it to make sure you get the same results as when you ran the app manually.
docker build . --tag vuln_django:micro
docker run --rm --detach --publish 8010:8010 --name vuln-django vuln_django:micro
docker exec vuln-django python manage.py migrate
docker exec -it vuln-django python manage.py createsuperuser
docker exec vuln-django python manage.py seed polls --number=5
docker exec vuln-django python manage.py test
Browse to the containerized app server at http://localhost:8010/ , and once again you should see some polls. Go to http://localhost:8010/admin/ and log on with the superuser credentials you created, and check out the Django admin interface.
Notice how we ran migrations, seed data, and tests asdocker exec
commands. As before, those commands created a SQLite database file, this time within the container, and populated it with seed data.
Cool! Shut it down.
docker stop vuln-djangoSince we used the--rm
flag todocker run
, the container goes away, along with all of its data. If you started it again, you would again need to run migrations, create the superuser, and seed the data for the app to work.Build a Docker Compose Configuration
Let’s make this look more like a real application environment by assembling some supporting services in Docker Compose. We will add an Nginx container to host static files and forward requests to our app, and we’ll add a PostgreSQL database to host the polling data.
Create a file,docker-micro.yml
and add the following contents:
version: "3.7"
services:
vuln-proxy:
image: nginx
volumes:
- ./nginx.conf.micro:/etc/nginx/nginx.conf:ro
- ./static:/opt/app/vuln_django/static:ro
ports:
- 8020:8020
depends_on:
- vuln-django
vuln-django:
image: vuln_django:micro
build:
context: .
target: micro
depends_on:
- db
environment:
- DJANGO_SUPERUSER_USERNAME=admin
- DJANGO_SUPERUSER_PASSWORD=adminpassword
- [email protected]
- SQL_ENGINE=django.db.backends.postgresql
- SQL_HOST=db
- SQL_PORT=5432
- SQL_DATABASE=django_db
- SQL_USER=django_user
- SQL_PASSWORD=django_password
db:
image: postgres
restart: always
environment:
- POSTGRES_DB=django_db
- POSTGRES_USER=django_user
- POSTGRES_PASSWORD=django_password
Notice that thevuln-django
service requires the container image,vuln_django:micro
. Thebuild
section specifies where to find the Dockerfile forvuln_django:micro
, and which target stage to build. Recall we added a micro stage to the Dockerfile above.Underservices.vuln-django.environment
, we populate several variables to tell thevuln-django
service how to connect to its database, and how to create a superuser account for the Django Admin interface. Notice that SQL_HOST is set todb
, which is the name of our PostgreSQL service defined inservices.db
.Thedb
service uses the officialpostgres
image, and we configure the database, username, and passwords with environment variables.Finally, thevuln-proxy
service is an official Nginx container with a custom configurationnginx.conf.micro
. This configuration serves custom static content from the/static
directory, mounted as a volume from the./static
directory in the project repo, and forwards all other requests tohttp://vuln-django:8010
. We publish port8020
as a convenience so that we can test this service locally.
Build and run this Docker Compose configuration.
docker-compose --file docker-micro.yml build
docker-compose --file docker-micro.yml up --detach
Run migrations and setup as before, using docker-compose toexec
the commands on thevuln-django
service container.docker-compose --file docker-micro.yml exec vuln-django python manage.py migrate
docker-compose --file docker-micro.yml exec vuln-django python manage.py createsuperuser --no-input
docker-compose --file docker-micro.yml exec vuln-django python manage.py seed polls --number=5
docker-compose --file docker-micro.yml exec vuln-django python manage.py testNow that the database has been configured and seeded, click around to see how it looks at http://localhost:8020/polls/ . You should see a new waving Pikachu in the background, since we are now serving extra static content from the Nginx proxy service.
Great! Now shut your stack down and remove all of the containers.
docker-compose --file docker-micro.yml downAdd Automation
This is looking good, but there are a lot of steps to build this stack and run it. Let’s script what we have done so far.
Create a file in your project calledscripts/build-and-run.sh
, and add the following content.
#!/usr/bin/env bash
# Build and run vuln-django with Nginx and PostgreSQL
set -ex
# We'll use this `docker-compose exec` command a lot...
EXEC_CMD='docker-compose --file docker-micro.yml exec vuln-django'
# Build docker images, in particular the vuln-django container
docker-compose -f docker-micro.yml build
# Launch the app, PostgreSQL and Nginx
docker-compose -f docker-micro.yml up --detach
# Wait for the database, using netcat to ping it
echo Wait for database to become available...
while ! ${EXEC_CMD} bash -c 'nc -z "${SQL_HOST}" "${SQL_PORT}"'; do
sleep 0.5
done
echo Database ready!
# Run database migrations to build tables
${EXEC_CMD} python manage.py migrate
# Create Django admin user from DJANGO_SUPERUSER_ environment variables
${EXEC_CMD} python manage.py createsuperuser --no-input
# Seed database with test data
${EXEC_CMD} python manage.py seed polls --number=5
# Run unit tests
${EXEC_CMD} python manage.py testMake the script executable.
chmod 755 scripts/build-and-run.shNow bring the whole stack up like so.
./scripts/build-and-run.shAnd again, tear it down.
docker-compose --file docker-micro.yml downTry that a few more times, and click around the app to make sure it all looks good.
Add HawkScan
Create astackhawk.yml
file and add the following content. Be sure to replace<STACKHAWK_APP_ID>
with your own StackHawk application ID. Check your app list if you need to find or create one.
app:
applicationId: <STACKHAWK_APP_ID>
env: ${APP_ENV:Travis CI}
host: ${HOST:http://localhost:8020}
riskLevel: MEDIUM
appDataType: PII
antiCsrfParam: csrfmiddlewaretoken
excludePaths:
- /admin/logout/ # the scanner will log itself out if you don't ignore here
- /admin/password_change/
authentication:
loggedInIndicator: "\QLog Out\E"
loggedOutIndicator: "\Qlogin-form\E"
testPath:
path: /admin/auth/user/
type: HEADER
success: ".*200.*"
cookieAuthorization:
cookieNames:
- "token"
- "csrftoken"
usernamePassword:
type: FORM
loginPath: /admin/login/
logoutPath: /admin/logout/
usernameField: username
passwordField: password
otherParams:
- name: next # The login form parameter is needed to make login work
val: "/admin/"
scanUsername: admin # You created this user with the 'createsuperuser' command. Enter that info here
scanPassword: adminpassword
hawk:
spider:
base: false
config:
- "spider.processform=true"
- "spider.postform=false"
- "spider.handleParameters=IGNORE_VALUE"This configuration lets HawkScan know where to find the app, how to log in and log out, and whether to spider the app to find more routes. We turned spidering off for now to make sure the scan doesn’t take too long. Check the HawkDocs to learn more about all of the HawkScan options.
Fire up your app stack.
./scripts/build-and-run.shNow run the HawkScan container to scan it. Replace<STACKHAWK_API_KEY>
with your StackHawk API key.docker run --tty --volume $(pwd):/hawk --env API_KEY=<STACKHAWK_API_KEY> stackhawk/hawkscan:latestYou should see logs indicating a HawkScan is in progress. Check your StackHawk console for scan results.
HawkScan in Docker Compose
To add HawkScan to the Docker Compose stack, add a supplemental Docker Compose configuration. We will overlay it on top of the stack configuration above. This gives us the ability to automate our database migration between standing up the stack and scanning it.
Create a new Docker Compose file to your project calleddocker-micro-scan.yml
and add the following content:
version: "3.7"
services:
hawkscan:
image: stackhawk/hawkscan:latest
environment:
- API_KEY=${HAWK_API_KEY}
- APP_ID=<STACKHAWK_APP_ID>
- APP_ENV=Travis CI
- HOST=http://vuln-proxy:8020
volumes:
- .:/hawk
vuln-proxy:
logging:
driver: none
vuln-django:
logging:
driver: noneReplace<STACKHAWK_APP_ID>
in the configuration above with your StackHawk application ID. To populate the API key at run time, export an environment variableHAWK_API_KEY
with your StackHawk API key.export HAWK_API_KEY=<STACKHAWK_API_KEY>Let’s walk through the process of building, running, preparing, and then scanning the vuln_django stack.
docker-compose -f docker-micro.yml -f docker-micro-scan.yml down
./scripts/build-and-run.sh
docker-compose -f docker-micro.yml -f docker-micro-scan.yml up --abort-on-container-exit
Again, you should see logs indicating a HawkScan is in progress. Check your HawkScan console for scan results.
When the scan is complete, shut the stack down and remove all of the containers.
docker-compose -f docker-micro.yml -f docker-micro-scan.yml downTry running it again from start to finish.
Build and Scan in Travis CI
If you haven’t already, activate your project repository with Travis CI . Follow the Travis CI tutorial if necessary.
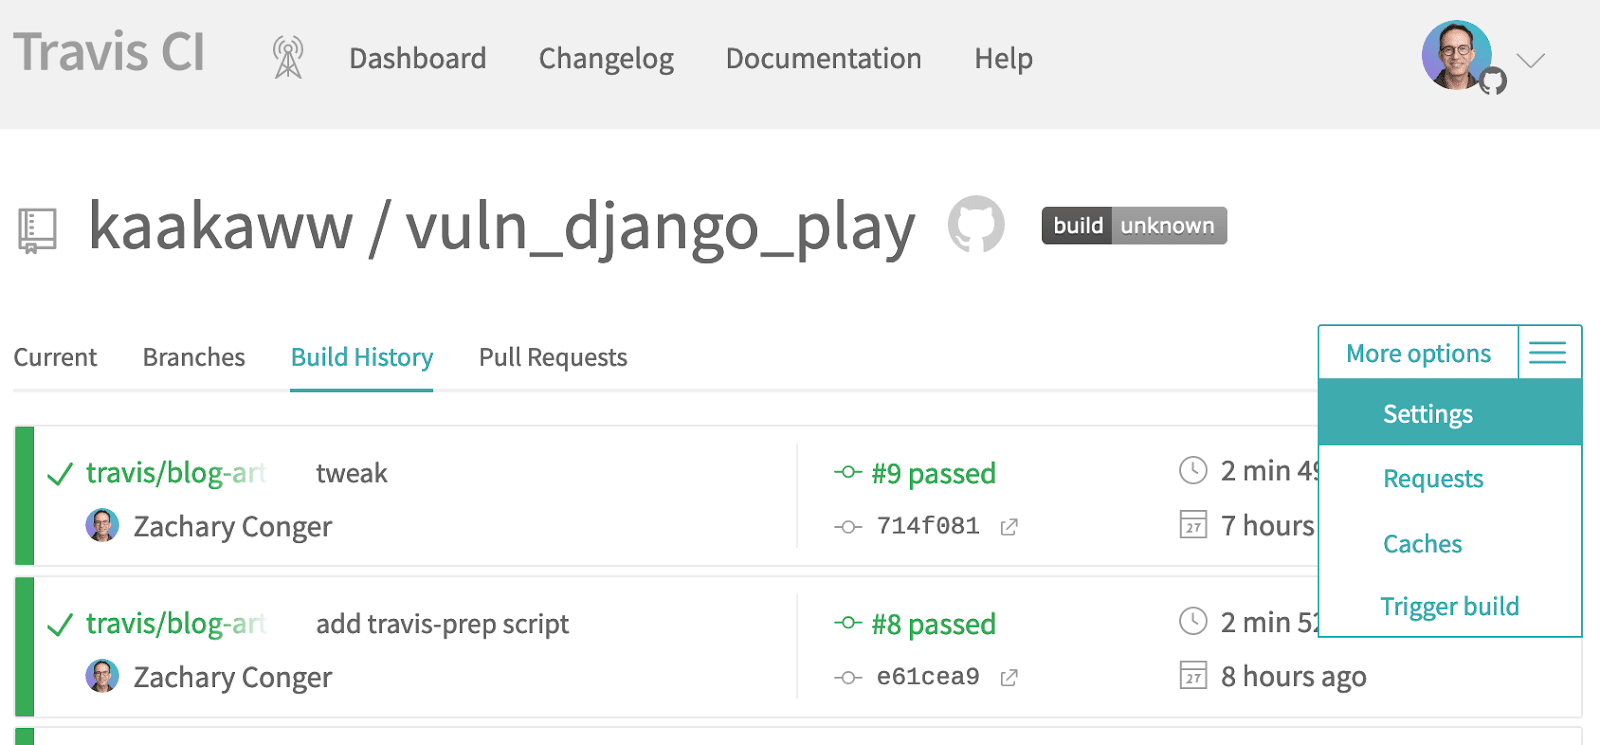
Add your StackHawk API key as a secret environment variable under your project in Travis CI. From your project, find the More options menu, and select Settings.
On the Settings page, add your API key as a variable calledHAWK_API_KEY
, to match the environment variable you used indocker-micro-scan.yml
.
At the base of your project, create a Travis CI configuration file, .travis.yml
, and add the following.
language: generic
services:
- docker
jobs:
include:
- stage: build-and-test
name: Build and Test
script:
- scripts/build-and-run.sh
after_success:
- docker-compose --file docker-micro.yml --file docker-micro-scan.yml up --abort-on-container-exitCommit and push all of your changes up to GitHub.
git add .
git commit -m "automated everything"
git push
Through the magic of gitops, Travis should detect the updates to your repository and trigger a build with your new configuration. Because we added the HawkScan step to theafter_success
phase of thebuild-and-test
job, it will not block your build if it exits non-zero.Check your project in Travis CI and watch the build run. After all of the containers have been built, pulled, and run, you should see HawkScan kick off. Check your StackHawk scans console and watch for your results.

Notes
Security testing can be hard. But as a developer, you are in a great position to add it as an automated process in your CI/CD pipeline. And what you just created is a way to do it without the need for additional AWS resources or standing environments. It all happens in the Travis build environment.
If you haven’t already, you should integrate StackHawk with Slack so your team can receive notifications any time new findings are detected. And within the StackHawk platform, you should assign, accept, or mark findings as false positives, so you don’t have to see the same alerts over and over.
Thanks for reading!