Given the extensive resource pool that exists on the web regarding the topic of security and vulnerability mitigation, it’s no surprise to find articles about pretty much every exploit that lurks on the net. Injection, scripting, phishing, you name it. These have all undoubtedly been explored and written about extensively.
However, the world of security and vulnerability mitigation keeps evolving every day. Therefore, it’s essential to keep exploring the different ways they are changing and their impact on our platforms.
The purpose of this article is to examine HTTP strict transport security, or HSTS, and provide a brief but comprehensive analysis of how it protects our users from bad actors. We will start by briefly defining what HSTS is and what makes it a fundamental part of secure communication between server and client. Afterward, we will examine how we can enable this security feature on Kotlin. Finally, we will review some of the issues that might emerge during the process of implementation.
It’s important to note that this article assumes that you have proficiency in Kotlin and Spring Boot. However, if your proficiency level with this development stack is limited or you are just dipping your toes into them, we recommend you visit Spring’s tutorial and become acquainted with it. It’s vital to have a basic understanding of these technologies to follow the concepts we explore in this article.
Starting a Kotlin and Spring Boot Project
Before we jump into the topic of strict transport security, we have to set up our sample project. We will be following the same structure and pattern of the example project used in the Spring Boot introduction article shared above, so if you took the time to check it out, you can skip this part.
To facilitate the process, we will begin by going to https://start.spring.io and setting up our start-up project. Before downloading the zip file, remember to select Kotlin as the language and the Spring Web and Spring Security dependencies.
Once you have done this and downloaded the template project, proceed to the src/main/kotlin/com/example/blog folder and create a class file called HtmlController.kt . We named our project “Blog,” but you can call it whatever you want.
In it, just input the following code:
package com.example.blog

import org.springframework.stereotype.Controller
import org.springframework.ui.Model
import org.springframework.ui.set
import org.springframework.web.bind.annotation.GetMapping

@Controller
class HtmlController {
  @GetMapping("/")
  fun blog(model: Model): String {
    model["title"] = "Blog"
    return "blog"
  }
}
Now, proceed to the src/main/resources/templates folder and create the header and footer template files. We have chosen the mustache template syntax for our templates, but you can make them in the syntax of your preference.
header.mustache
<html>
<head>
  <title>{{title}}</title>
</head>
<body>
footer.mustache
</body>
</html>
Finally, create the blog.mustache template file and add the following HTML:
blog.mustache
{{> header}}

<h1>{{title}}</h1>

<p>This is a test blog.</p>

{{> footer}}
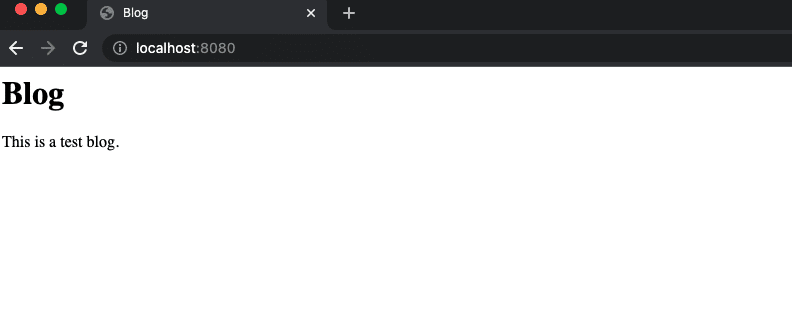
There you go, that’s all you need. You can now proceed to run the code by typing “gradle bootRun” in the terminal and seeing your website by going to localhost:8080.

Simple blog page.
Et voilà.
If you want to have a more concise explanation of what is going on with the project, please explore the Kotlin community and the Spring Boot tutorial .
What Is HTTP Strict Transport Security?
Now that we have a basic website running with Kotlin and Spring Boot, let’s talk HTTP strict transport security.
Encryption has been, since the time of its inception, the silver bullet against data eavesdropping. Therefore, guaranteeing the encryption of our transactions with the appropriate protocols is crucial for any web platform to provide security. Still, while the web depends on SSL/TLS protocols to encrypt and secure transactions between the client and server, ensuring that all transactions are protected is entirely different.
Let’s illustrate with a basic scenario.
A typical communication flow between a website and a user first requires making an HTTP request to the domain. Then, if the server in question implements SSL/TLS with a valid certificate and enforces HTTPS rerouting, the user will be redirected (301) to the same site with an HTTPS request. This flow ensures that all communication between the client and server is done securely through encryption.
Except, no, not really.
Consider the following scenario.
MITM Attack
An unsuspecting user looking to access our website attempts to reach our server through a compromised network (a counterfeit access point concealed as legitimate). In this case, the initial handshake can open the victim to vulnerabilities in the following way.
The attacker intercepts the communication between client and server, acting as “man in the middle.”
The attacker then rewrites all transactions between themselves and the victim to be unencrypted.
Consequently, all transactions between the attacker and the server remain encrypted, misleading the server to believe the victim is protected.
Meanwhile, the attacker intersects all data the victim sends to our server.
Profit.
This attack we just explained is known as SSL stripping. It works by allowing the attacker to act as a communication intermediary. The attacker can then dictate the victim’s security protocol, basically stripping the client of any encryption security.
Not good. So what can we do?
Well, the most critical step in this attack is, of course, the initial handshake that the victim performs at the beginning.
Preventing the exploit from happening requires ensuring that the browser communicates with our server using encryption exclusively. And the best way to do that is, well, to tell the browser to do so explicitly.
This flow is, in essence, what HTTP strict transport security means, and it is a cornerstone of web security.
Mitigating the Vulnerability
For the most part, browsers—and the security features they include—do most of the heavy lifting for us to keep our users safe. All we need to do to implement an essential layer of security with HSTS is to add the following header to your server responses:
Strict-Transport-Security: max-age=31536000 ; includeSubDomains
HSTS headers contain three directives (one required and two optional).
max-age: This says how long the browser will comply with the policy. We have set the value as 31536000, which equals one year. You can put any value you consider appropriate, but remember that clients won’t access your site if there’s an issue with your SSL certificate once the browser receives the HSTS policy.
includeSubDomains: This is an optional directive that states whether the subdomains will need to comply with the policy. Say you have mywebsite.com with an SSL certificate and you set the header for clients who visit it. That means www.mywebsite.com and subdomain.mywebsite.com will also be required to follow that same HSTS policy.
preload: This optional directive says that you want to add your website to the HSTS preload list included in the browser. This list essentially tells your website to follow HSTS for that client permanently.
Thankfully, the Spring security dependency includes this header by default. However, if you want to do it yourself or make some modifications to the header, you can do the following:
Modify the <hsts> element like so:
<http>
	<!-- ... -->

	<headers>
		<hsts
			include-subdomains="true"
			max-age-seconds="31536000" />
	</headers>
</http>
Similarly, you can work with only HSTS by adding the following in the config file:
@EnableWebSecurity
public class WebSecurityConfig extends
WebSecurityConfigurerAdapter {

  @Override
  protected void configure(HttpSecurity http) throws Exception {
  	http
  	// ...
  	.headers()
  		.httpStrictTransportSecurity()
  			.includeSubdomains(true)
  			.maxAgeSeconds(31536000);
  }
}
Additionally, we recommend that you enforce HTTPS on all transactions. To achieve this in Spring Boot, add the following to the config file:
server.port=8443
server.ssl.key.alias=demo-https
server.ssl.key-store-type=pkcs12
server.ssl.key-password=PASSWORD
server.ssl.key-store=classpath:demo-https.pkcs12
After that, make sure to create the appropriate certificate and include it in the resource folder.
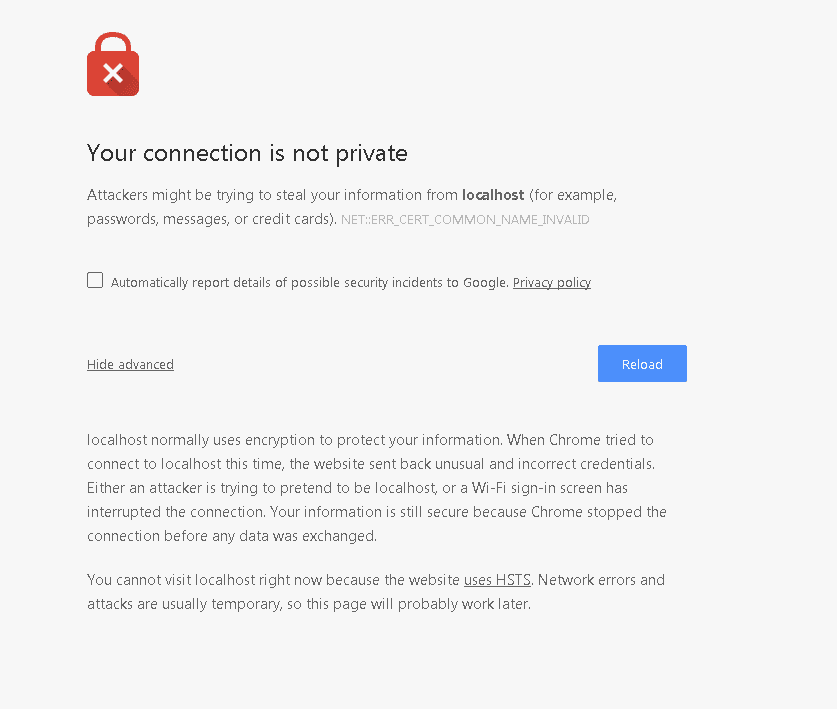
Finally, making sure we understand the HSTS header is important, but we must also be aware of what happens to websites that are not ready to follow the policy.

Browser error.
We can see that an error is causing our browser not to display the page. The error indicates that the server listed this website as working exclusively with encryption. However, the browser detected something suspicious.
Decoding HSTS Errors
Reading the error, we can have an idea of what the possible sources of the problem are.
An attacker could be trying to impersonate the server.
A Wi-Fi login screen could be causing issues with the loading process.
The server doesn’t have a proper SSL/TLS configuration.
We know we purposely set up our website to fail the HSTS policy check. That means our next step should be to ensure that we set up encryption correctly. Also, if we are deploying HSTS for the first time, we have to have a proper implementation plan.
Taking some notes from Scott Helme’s HSTS tutorial , here is a checklist of steps to follow.
Find all subdomains that belong to your website (consult your DNS CNAME entries). These might belong to third-party services.
Check that the root domain and all subdomains are accessible via HTTPS.
Confirm that you configured proper redirection of HTTP to HTTPS.
Choose a short expiration time. For example, you can set “max-age=300” (which is five minutes).
Append the includeSubDomains directive if necessary.
Increment max-age in stages. Strive for two years’ validity.
Once everything looks good, add the preload directive.
While optional, you can submit your domain to Google’s HSTS preload list. This will ensure that future versions of major web browsers have your domain preloaded and marked as “secure only.”
Once you follow these steps, you will have a site that enforces HTTPS communication only. From that point on, all users will follow the policy.

Moving On
Today, encryption is the most vital protection in our arsenal against attackers and malicious exploits. However, as we know already, no solution is absolute, and there is still the possibility of a breach from highly sophisticated attacks. Regardless, implementing SSL/TLS and HSTS policies are rather effective in protecting almost all of the web.
This post was written by Juan Reyes. Juan is an engineer by profession and a dreamer by heart who crossed the seas to reach Japan following the promise of opportunity and challenge. While trying to find himself and build a meaningful life in the east, Juan borrows wisdom from his experiences as an entrepreneur, artist, hustler, father figure, husband, and friend to start writing about passion, meaning, self-development, leadership, relationships, and mental health. His many years of struggle and self-discovery have inspired him and drive to embark on a journey for wisdom.


