Web browsers prevent unknown websites from accessing your application programming interfaces and services. This way, your server shares its resources only with clients that are on the same domain. However, there are situations where you want to lift this guard or get more fine-grained control over which websites access your server’s resources. In such cases, you implement CORS (cross-origin resource sharing) on your server.
In this post, I’ll talk about what CORS is and why it’s useful. I’ll then walk you through how you can enable CORS in your NodeJS application. You can also learn more about the basics of CORS here .

A Bird’s-Eye View of CORS
Let’s say your server runs on https://domain1.com. You could serve images, fonts, or have simple web services that send back some data. Now imagine there’s another website that runs on https://domain2.com that wants to access your services and get some data from your server. To do so, this website makes an HTTP request to one of your API endpoints.
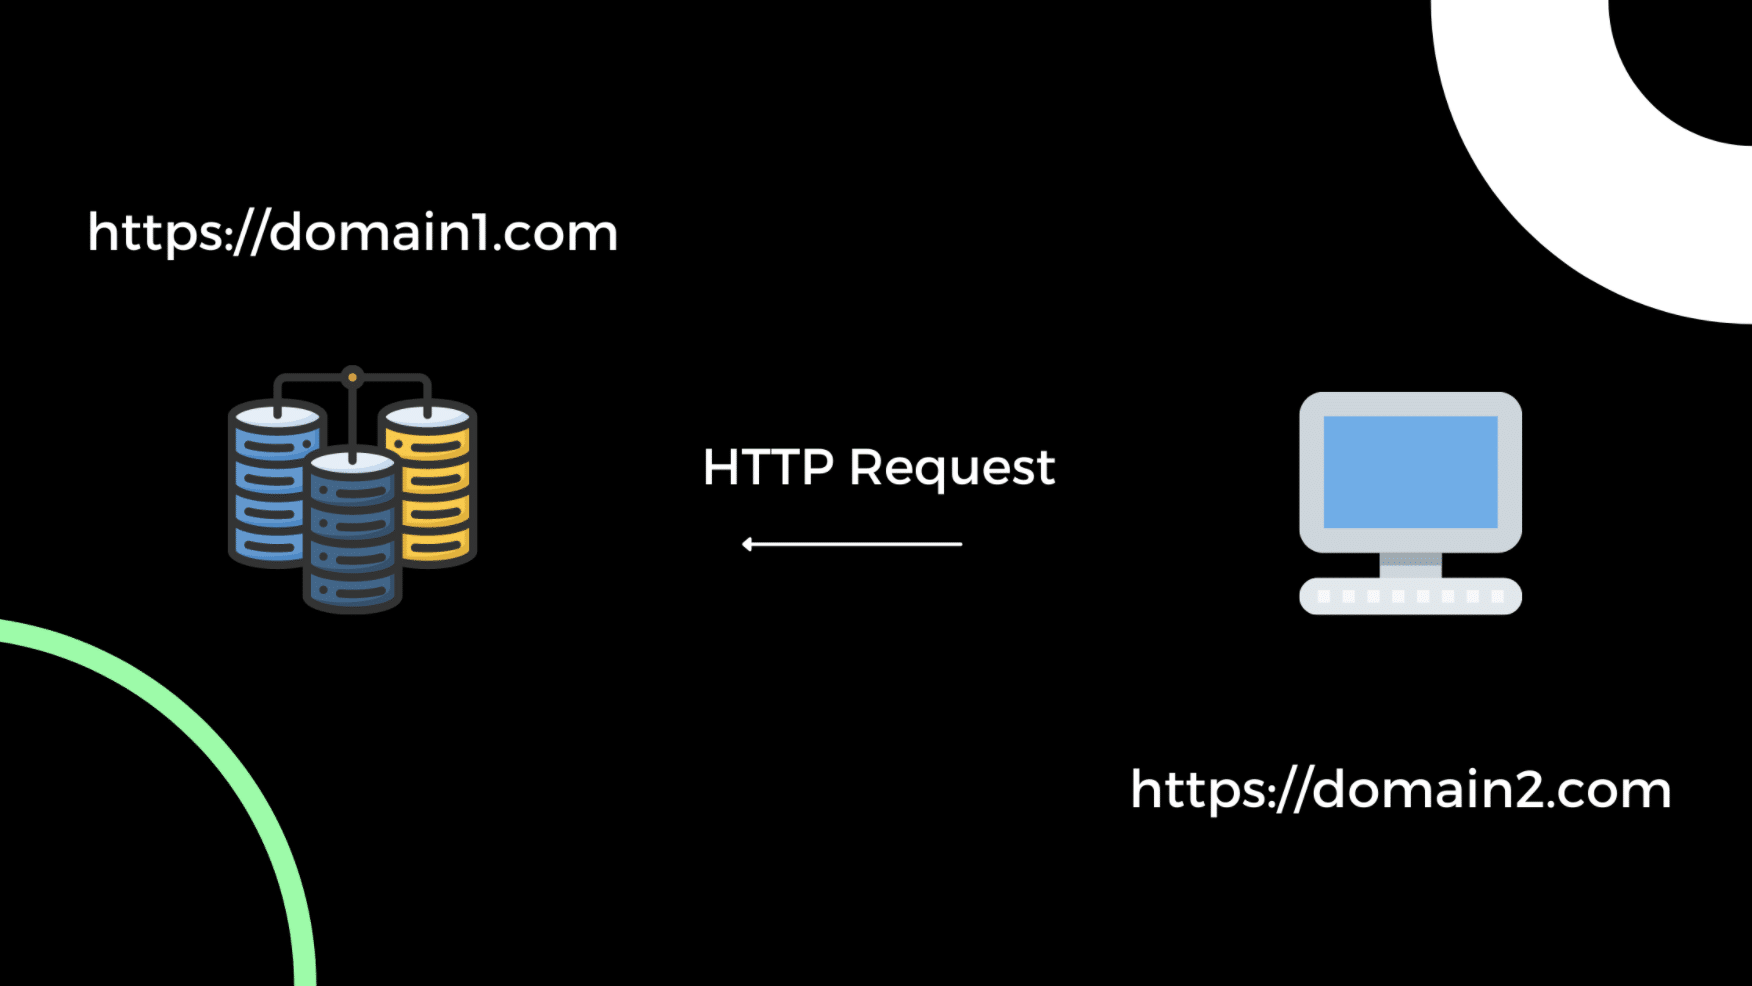
Unknown website requesting data from your server.
Every HTTP request comes with request headers that contain information about the request. So in our example, when https://domain2.com sends an HTTP request to your server, it also sends an origin property inside the request’s header. This origin property specifies the domain of the source that has made the request.
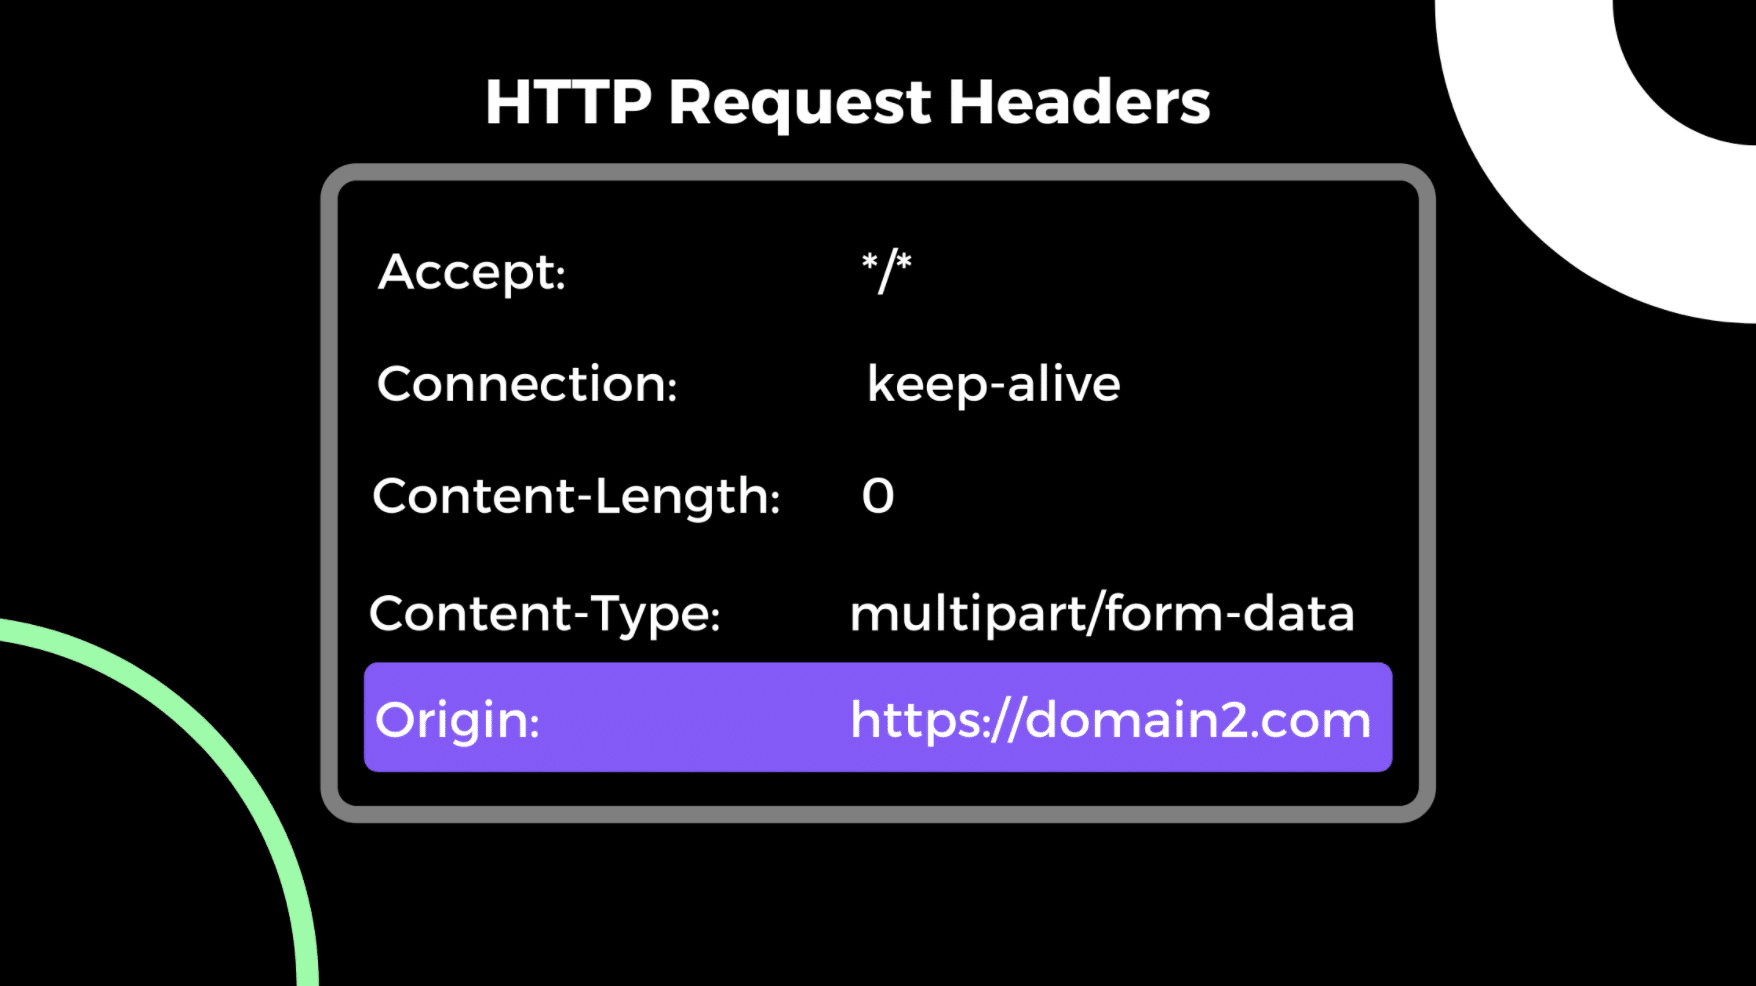
Origin in HTTP request headers.
The browser on which domain2 sends a request to domain1 implements a same-origin policy. Because of this policy, the browser blocks all requests sent from one origin to another. Therefore, web browsers by default don’t allow cross-origin resource sharing.
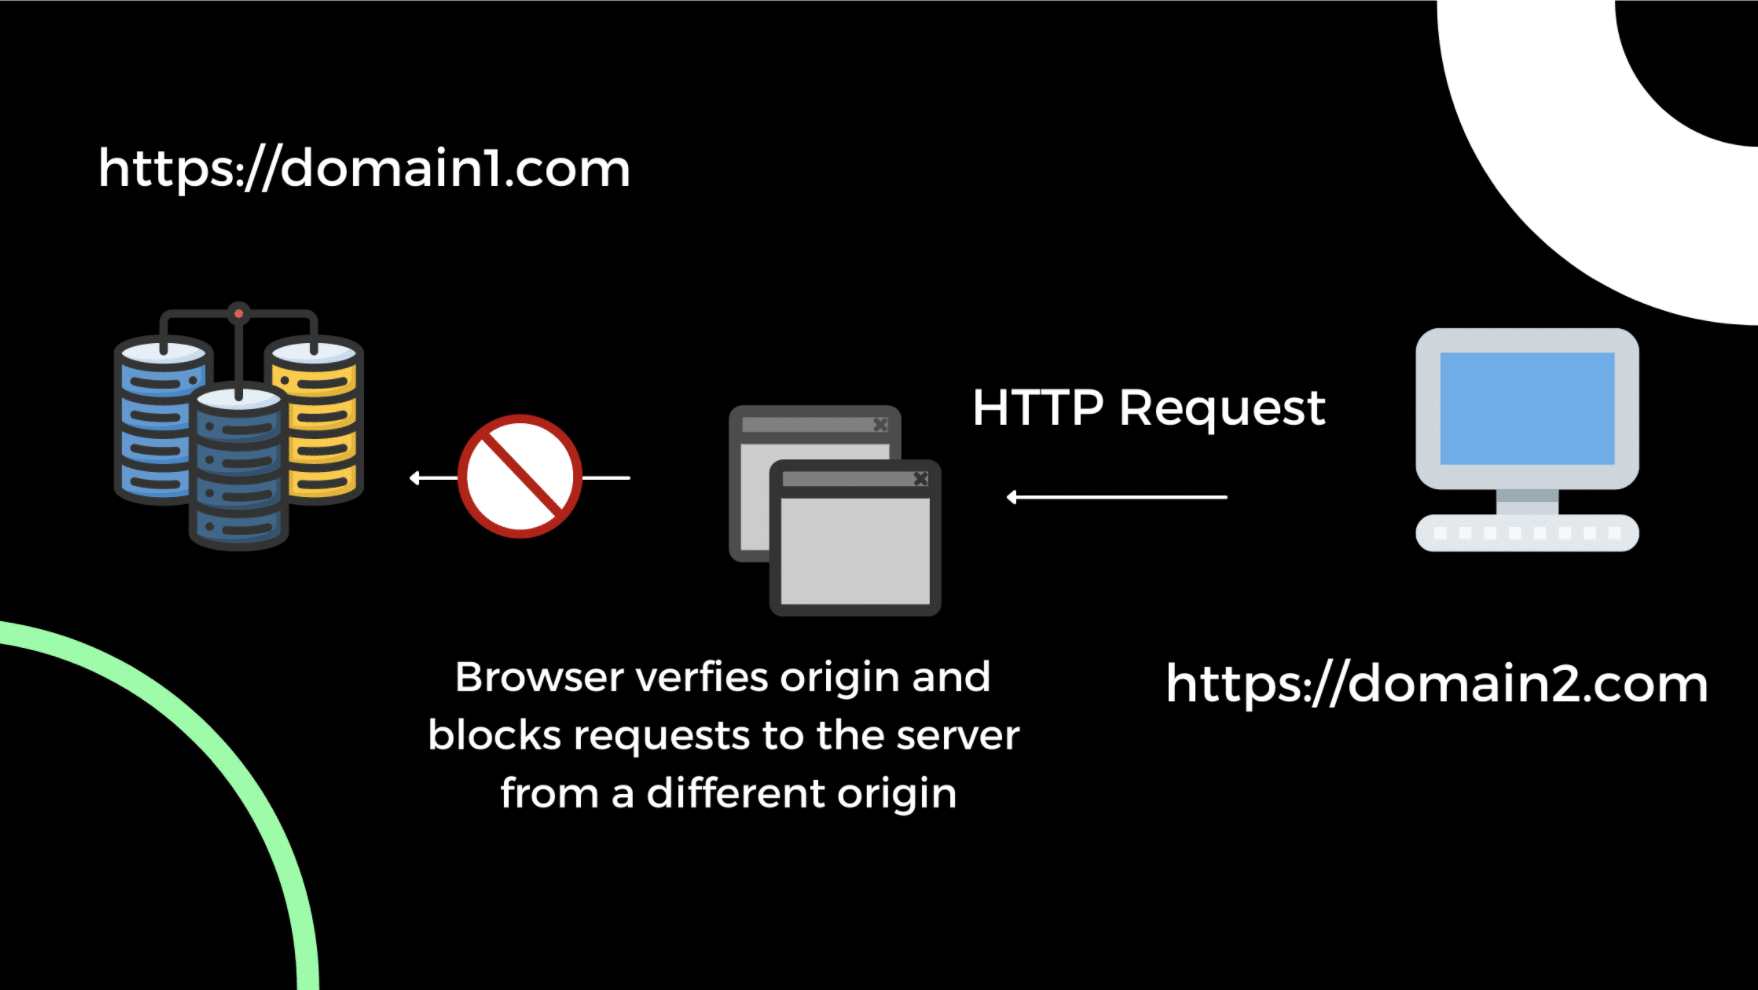
CORS request blocked by the browser.
This built-in mechanism acts as a safety blanket for web servers. It protects unknown websites from accessing their resources.

Why Would You Want to Implement CORS?
From a security standpoint, browsers assume that your server doesn’t want to share resources with websites it doesn’t know. However, there are many situations where you explicitly want to enable CORS on your server.
Open or Public APIs
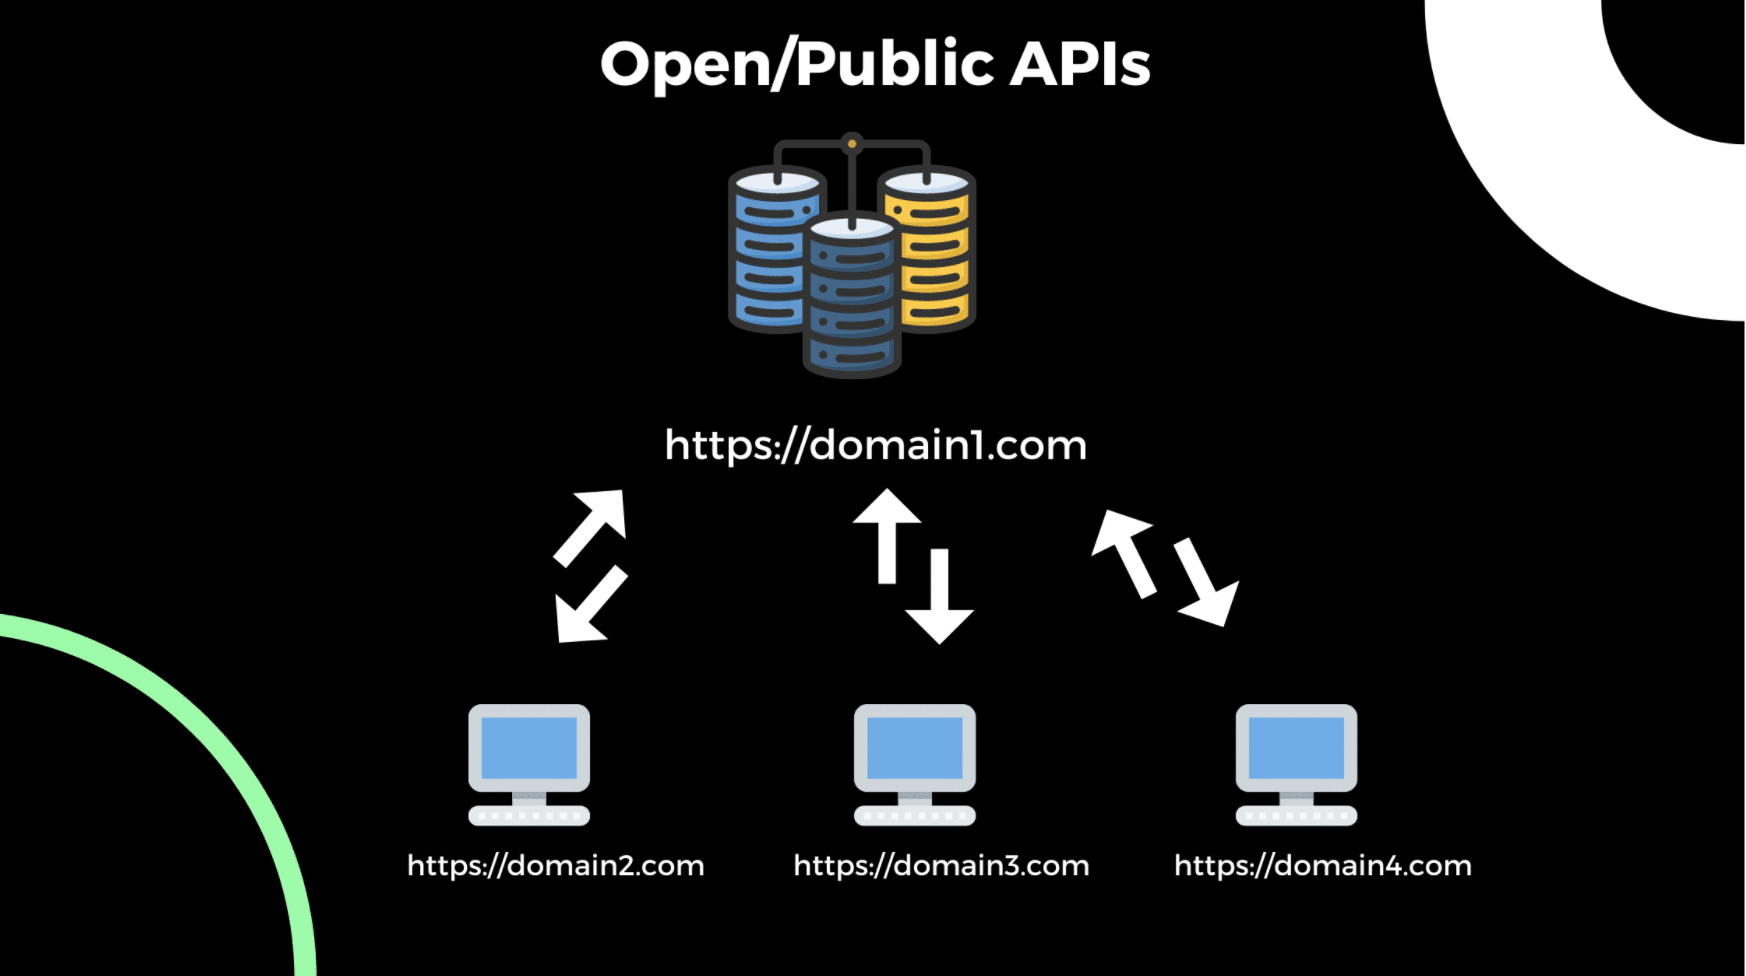
Public or open APIs with CORS enabled.
A lot of times, you want other developers to access your APIs. Developer-specific tools, Software as a Service companies, and so on have open APIs that anyone can use on their website.
For instance, you may want to create an API service that allows developers to check the SEO scores of their websites. In that case, you’d have to keep an open API that anyone can conveniently access.
Free, open, and public APIs are very popular today and are used in many businesses and side projects. Here’s an exhaustive list of free APIs that have CORS enabled so any website can make a request to them.
Allow Access to Multiple Environments of the Same Project

Multiple project environments.
Let’s say you’re pushing out a revamped version of your website. Before you push your code to production, you usually test it first in a test environment. In this case, you test your front end against different environments. You could first test it at a staging environment, then a pre-production environment, and so on. In this case, your different front ends may fail to communicate with your server if you don’t have CORS enabled.
What a CORS Error Looks Like
Enough theory. Let’s see CORS in action!
We’ll create a simple server that returns some JSON data, plus a minimal front end in React that consumes that data.
Back-End Server
Create a new npm project by running:
mkdir colors-server && cd colors-server && npm init -y
Then install Express, a lightweight framework for creating server-side applications in NodeJS:
npm i express
Inside the root directory, create a new file called app.js with the following code:
const express=require('express');
const app=express();
const PORT=5000;
app.get('/',(req,res)=>{
    console.log(colors)
    res.send('Welcome to NodeJS + Express CORS Server! 🎈')
})
app.listen(PORT,()=>{
    console.log(`Server running on port ${PORT}`)
})
The above code creates a simple NodeJS + Express server that runs on http://localhost:5000 .
Next, let’s create an endpoint /colors that returns some JSON data. For sample data, we can create a JSON file called colors.json inside the root directory with the following data that I found here .
{"colors":[
	{
		"color": "red",
		"value": "#f00"
	},
	{
		"color": "green",
		"value": "#0f0"
	},
	{
		"color": "blue",
		"value": "#00f"
	},
	{
		"color": "cyan",
		"value": "#0ff"
	},
	{
		"color": "magenta",
		"value": "#f0f"
	},
	{
		"color": "yellow",
		"value": "#ff0"
	},
	{
		"color": "black",
		"value": "#000"
	}
]
}
Inside the app.js file, add the following endpoint:
app.get('/colors',(req,res)=>{
    res.json(colors)
})
Remember to import the colors object at the top from the colors.json file, as shown below:
constcolors=require('./colors.json')
Let’s run the app now:
npm start
If you now visit http://localhost:5000/colors, you should get back the following JSON data:
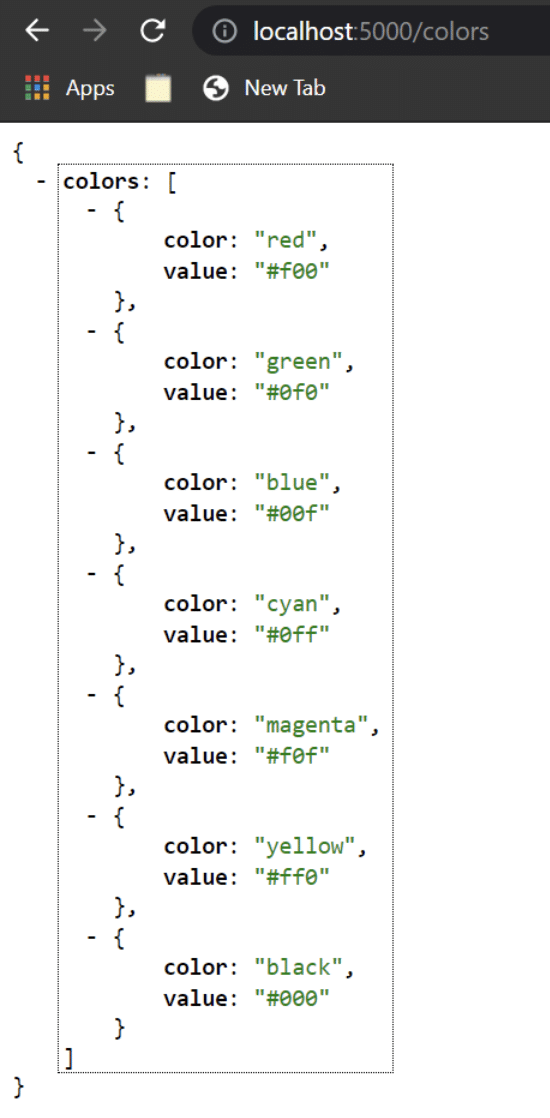
GET colors API output.
Great! Let’s try to request this API from our front-end application.
Front-End Application
Create a new React app by running the following command:
npx create-react-app colors-app
Inside the App.js file, add the following code:
import './App.css';
import {useState} from 'react';
function App() {
const [colors,setColors]=useState();
const getColors=async()=>{
    const response=await fetch('http://localhost:5000/colors')
    const data=await response.json();
    console.log({data});
    setColors(data)
  }
return (
    <div className="App">
      <header className="App-header">
        <p>
          Welcome to the <b>colors app! 🌈</b>
        </p>
        <button
          onClick={getColors}
        >
          Get Colors!
        </button>
        <p>
          {
            colors && JSON.stringify(colors)
          }
        </p>
      </header>
    </div>
  );
}
export default App;
The above code renders a button on the page that fires a function when clicked. Inside that function, we simply make an API call to the endpoint http://localhost:5000/colors and display that data on the page. I also added some simple styles for the button inside the index.css file:
button {
  border: none;
  outline: none;
  padding: 10px 20px;
  border-radius: 2px;
  cursor: pointer;
  background-color: #fff;
  color: #282c34;
}
If you now run the npm start command, you should see the following page:
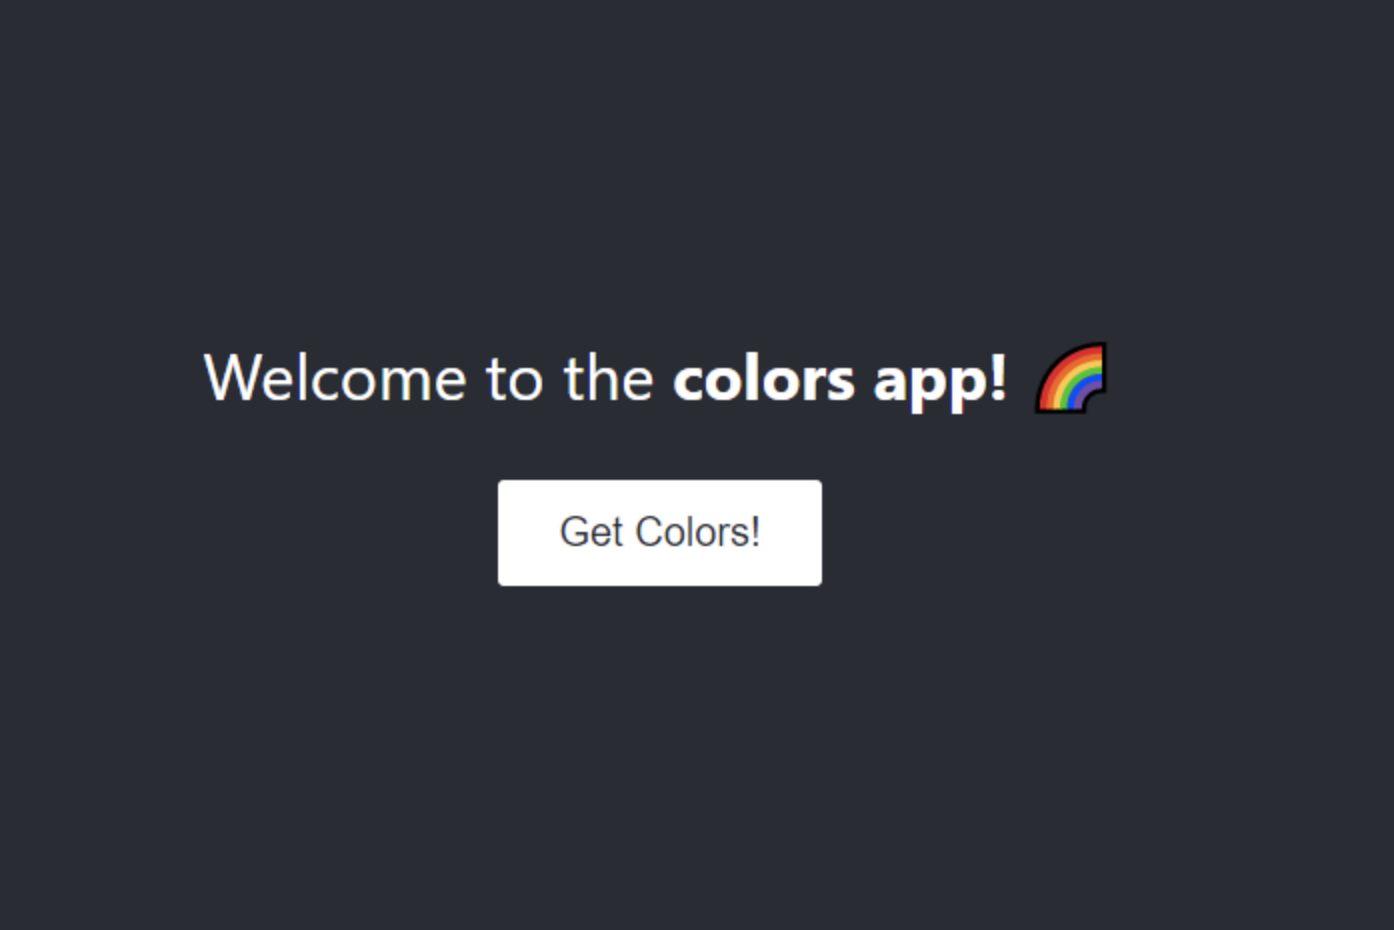
Front end.
Awesome! Let’s click the button to see what happens.
We were supposed to get some data rendered on the page, right? But that didn’t happen. If you open your browser’s console, you’ll see an error like this:

CORS error on front end.
As we saw earlier, the browser blocked our request because our front end and back end are of different origins. You can further verify this by going to the network tab and inspecting the particular network request.
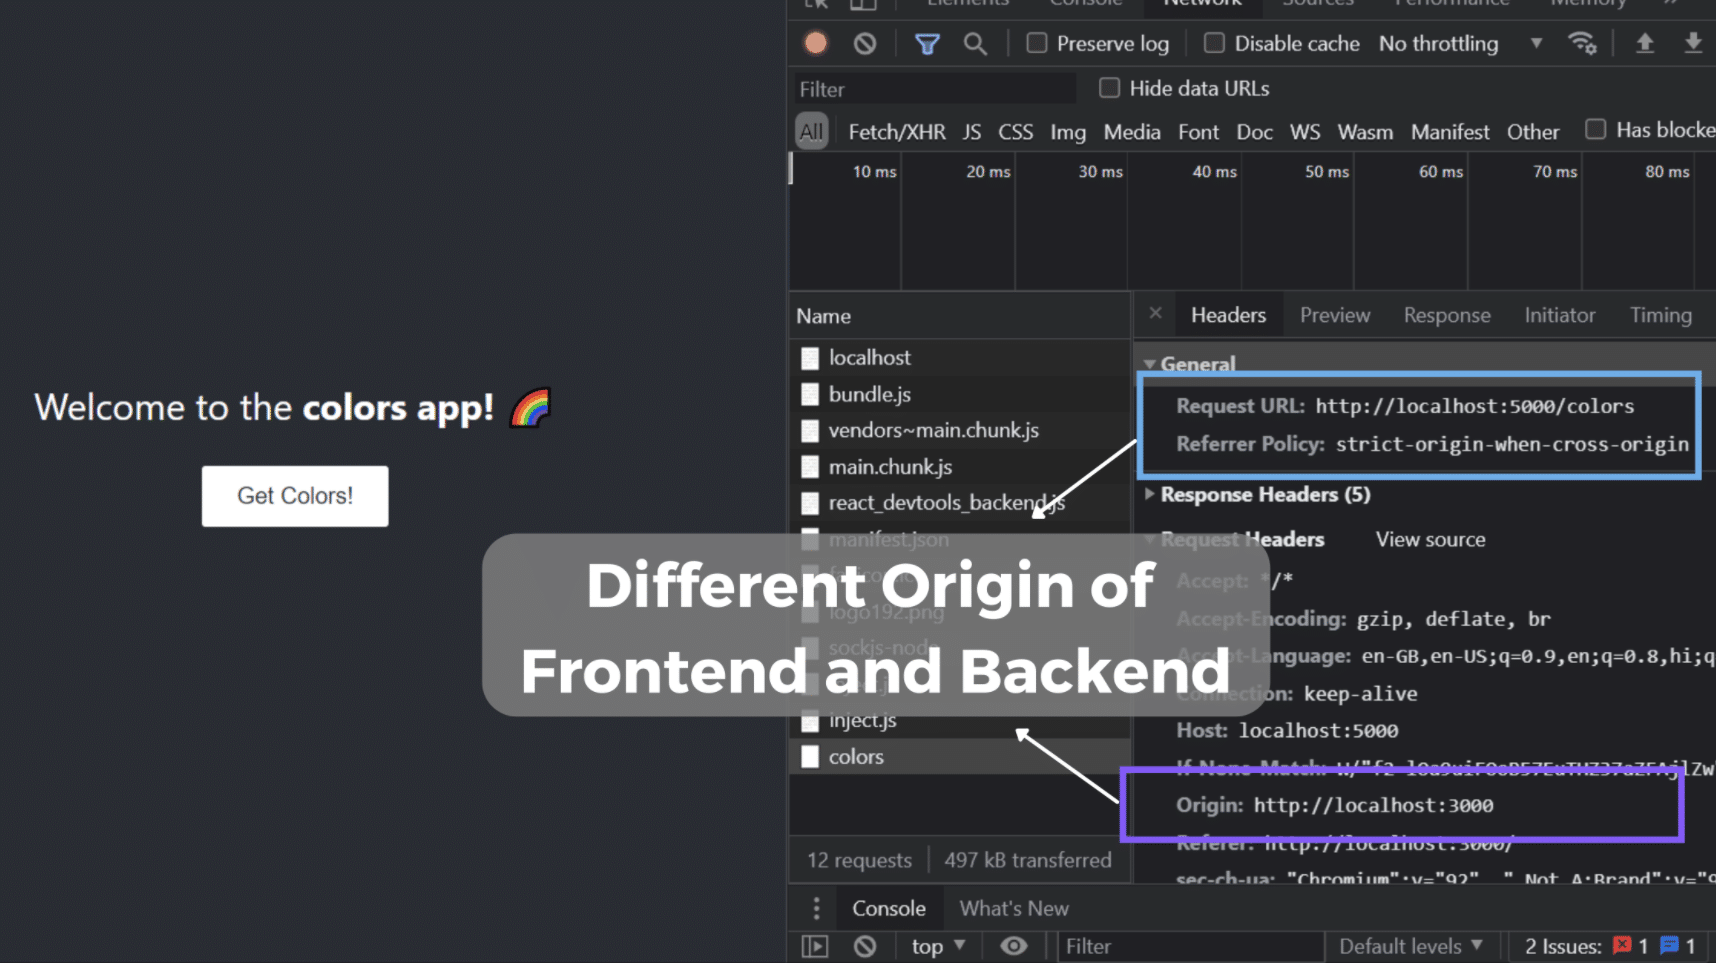
Different origins of front end and back end.
Now that you know what a typical CORS error looks like, let’s see how we can enable CORS on our server.
How to Enable CORS on a Server
There’s more than one way to enable CORS on the server. In this section, we’ll explore two popular methods.
Set Access-Control-Allow-Origin in Response Header
We can allow certain or all origins to request a resource from our APIs by sending back a property in the response. This property, called Access-Control-Allow-Origin, can be configured on the headers of our response inside the request handler.
For Public/Open APIs
You can specify the value of this property to be * for any origin or website to access the API. As a result, when the browser sees this value, it allows the website to access the resource from the API regardless of its domain or origin.
app.get('/colors',(req,res)=>{
    res.set('Access-Control-Allow-Origin', '*');
    res.json(colors)
})
If you click the Get Colors! button on the front end, the request should proceed, and you should see the JSON data on the front end:
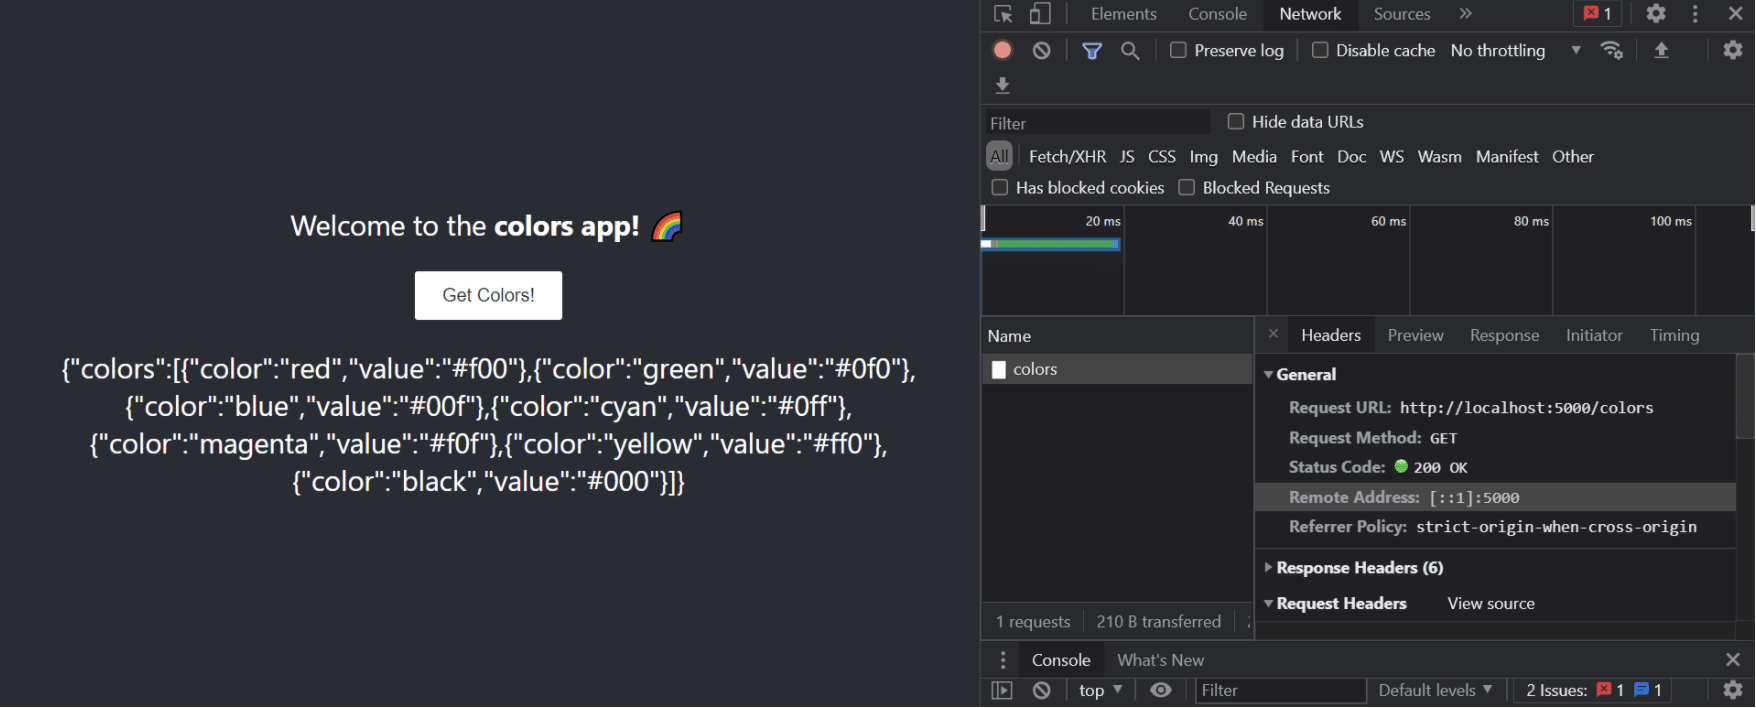
CORS enabled using wildcard property.
For Specific Websites
Alternately, if you want only users from a certain origin to access your APIs, you can set a specific value to this property. This approach is more suited for the use case where you want to enable CORS for different environments.
app.get('/colors',(req,res)=>{
    res.set('Access-Control-Allow-Origin', 'http://localhost:3000');
    res.json(colors)
})
The effect should be the same. If you click the Get Colors! button, you should see the data rendered on the page.
Use the cors Express Middleware
The cors npm module provides middleware that you can use in your request handlers. It’s simple to use, so let’s get started by installing it in our project first:
npm i cors
Import this module at the top:
const cors=require('cors');
Next, invoke this middleware in our Express app:
app.use(cors())
Now all requests received by the server will have cors enabled in them. You can also customize this by passing an options object inside the cors() method. Inside that object, you can specify the origin property, similar to how you set Access-Control-Allow-Origin in the response header previously.
const options = {
    origin: 'http://localhost:3000',
}
app.use(cors(options))
You can also specify more than one origin by passing an array to the origin property inside your options object:
const options = {
    origin: ['http://localhost:3000','http://localhost:8080'],
}
The above isn’t possible when you manually set the Access-Control-Allow-Origin property on the response header. If you pass more than one origin, the API would have cors disabled, and the error message would tell you to use only a single origin property.
If you want to specifically enable CORS for a particular request, you can call it inside the request handler:
app.get('/colors',cors(),(req,res)=>{
    res.json(colors)
})
This will enable CORS for the /colors API endpoint only.
Use a CORS-Enabled Server as a Proxy Server
A lot of times, your front end needs to access some third-party APIs that have CORS disabled. Since you don’t have access to the back-end code of those third-party APIs, it’s not possible to implement the solutions discussed above. In this case, a proxy server comes in handy. It allows your front end to access resources from a CORS-disabled server.
You can create a proxy server by using your front end application’s module bundler. I have a detailed guide on how you can achieve this in React .
The other method is creating your own custom proxy server. Let’s see how we can implement one.
Implement a Custom Proxy Server
Let’s create another simple NodeJS + Express server with a single endpoint that returns some JSON data.
mkdir cors-disabled-server && cd cors-disabled-server && npm init -y && npm i express
Inside the project, create an index.js file with the following code:
const express=require('express');

const app=express();

app.get('/user',(req,res)=>{
    res.send({
        'name':'FuzzySid',
        'age':'22'
    })
})

app.listen('8080',()=>console.log('CORS Disabled Server is Up and Running...'))
Let’s try to use the http://localhost:8080/user endpoint inside our previously made colors-app :
import './App.css';
import {useState} from 'react';
function App() {
const [colors,setColors]=useState();
const getColors=async()=>{
    const response=await fetch('http://localhost:5000/colors')
    const data=await response.json();
    console.log({data});
    setColors(data)
  }
const getUser=async()=>{
    const response=await fetch('http://localhost:8080/user')
    const data=await response.json();
    console.log({data});
  }
return (
    <div className="App">
      <header className="App-header">
        <p>
          Welcome to the <b>colors app! 🌈</b>
        </p>
        <button
          onClick={getColors}
        >
          Get Colors!
        </button>
        <br/>
        <button
          onClick={getUser}
        >
          Get User
        </button>
        <p>
          {
            colors && JSON.stringify(colors)
          }
        </p>
      </header>
    </div>
  );
}
export default App;
We now have another button that makes a request to our third-party API running at http://locahost:8080/user. Since we don’t have CORS enabled on this endpoint, the browser will throw a CORS error when you click the button:

CORS disabled server error on front end.
Let’s use our other NodeJS + Express app ( colors-server ) as a proxy server. We’ll use that to make a request to the third-party user API and then use our own endpoint to send that data back to our front end. For that, we’ll first install axios to make an HTTP request inside our NodeJS application:
npm i axios
Import axios at the top:
const axios=require('axios');
And add the following request handler:
app.get('/user',async(req,res)=>{
    const response=await axios.get('http://localhost:8080/user');
    res.json(response.data)
})
Now, we’ll make a request to this endpoint—that is, http://localhost:5000/user instead of http://localhost:8080/user. Since we have CORS enabled on our own server, we use it as a proxy server to fetch data from the server that our front end can’t directly access.
Let’s update the getUser() function inside our React application to change the endpoint:
const getUser=async()=>{
    const response=await fetch('http://localhost:5000/user')
    const data=await response.json();
    console.log({data});
  }
And now if we click the Get User button, we should get back the JSON data:

Proxy server for accessing data from CORS-disabled server.
This is how you can enable CORS on third-party APIs using a custom proxy server.

Learning More
This was all about CORS from a server-side perspective. I hope you got the hang of it and will be able to enable it for your NodeJS application using the methods discussed. You can find lots more information on StackHawk . You can create a free account or search the blog .
Until next time!
This post was written by Siddhant Varma. Siddhant is a full stack JavaScript developer with expertise in frontend engineering. He’s worked with scaling multiple startups in India and has experience building products in the Ed-Tech and healthcare industries. Siddhant has a passion for teaching and a knack for writing. He’s also taught programming to many graduates, helping them become better future developers.


