I’m sure at some point you’ve had to set up authentication in your React app. But how effectively do you handle session management while keeping social situations in mind?
A broken authentication in your React app could cause attackers to break into your users’ accounts. But it isn’t a single vulnerability that you can detect and prevent. It needs you to develop a paradigm that protects your app from a number of authentication loopholes. In this post, I’ll walk you through what it looks like in your React application and how you can prevent it.
What Is Broken Authentication?
Broken authentication includes a bunch of authentication loopholes that an attacker exploits as vulnerabilities. An attacker can then use it to authenticate on behalf of a legitimate user of your app. This lets an attacker steal a user’s credentials and access private resources for that particular user.
Authentication is handled mostly on the server side. However, there are a few techniques you can implement on the client side to prevent broken authentication. Let’s look at these techniques in detail.
Broken Authentication Due to Practical Scenarios
A lot of times, developers assume that their users will always use a private device to authenticate in their app. There are a number of real-world situations where that doesn’t happen.
For instance, a user could be on a public computer in a cybercafe. Or maybe they’ve used a public network/WiFi to use your web app. Or maybe there’s a visitor in their house or a stranger in their cab who’s using their device to do something. Have you watched Knock Knock starring Keanu Reaves, where a stranger uses Keanu’s logged-in Facebook account to post something? That’s a social scenario where an attacker uses the carelessness of the user to cause them damage.
Users generally tend to forget to log out of their accounts, especially on their own devices. If a user’s device goes missing or is stolen, the attacker has full control over the user’s account.
If you’ve never thought of these cases while implementing authentication in your app, you’re bound to have broken authentication. So what’s the solution?
Map Session-IDto the Device ID and IP Address/Location
Session-Id is a unique UUID that you create to map a session against a user in your database. For instance, if a user is authenticated in your app, your back-end server would send back a session ID. When the user logs out, this session ID is cleared.
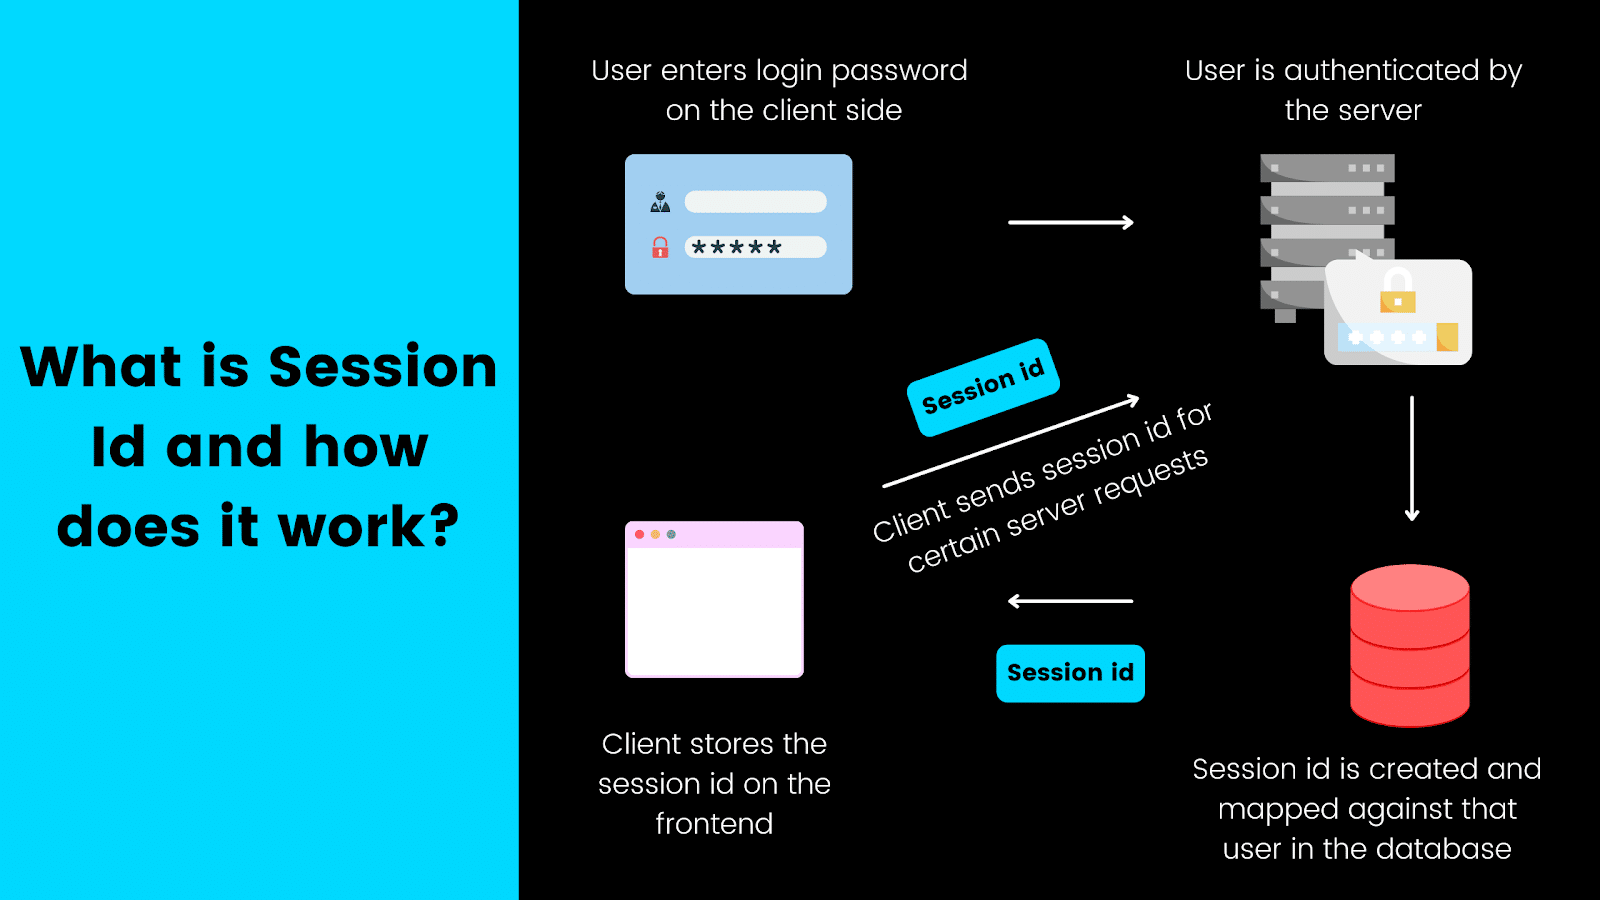
How session id works.
However, just mapping a session ID to a user is not sufficient. Think about the case where an attacker is trying to authenticate in disguise as a legitimate user from their own device. In this case, the device ID will be able to tell you if a session was triggered from a different device.
The useDeviceId Hook in React
The device ID is something you’ll need to retrieve from the client side. So how do we do that? We can use a library called FingerprintJS in our React app to do so. Here I have created a React hook that gets the device ID from the FingerprintJS library and returns it back:
import FingerprintJS from '@fingerprintjs/fingerprintjs-pro'
import { useEffect, useState } from 'react';


export default function useDeviceId(){

    const [fingerPrintInstance,setFingerPrintInstance]=useState();
    const [deviceId,setDeviceId]=useState();

    useEffect(()=>{
        const fpPromise = FingerprintJS.load({
            token: process.env.REACT_APP_FINGERPRINT_BROWSER_TOKEN
        })
        setFingerPrintInstance(fpPromise)
    },[])

    useEffect(()=>{
        if(fingerPrintInstance){
            getFingerPrintInfo()
        }
    },[fingerPrintInstance])

    const getFingerPrintInfo=()=>{
        fingerPrintInstance
        .then(fp => fp.get())
        .then(result => setDeviceId(result.visitorId))
    }
     return { deviceId }
}
You’ll need a Fingerprint browser token, an API secret key equivalent, for the above to work. I got mine by creating an account on FingerprintJS and grabbing that key from my dashboard .
Next, we also need the location data of the user. We can use the Geolocation API to retrieve the location information and IP address of the user. Note that there may be better services you could use to get more accurate and appropriate location data. However, the underlying principle is the same.
The useLocation Hook in React
Here’s another hook you can use in your React app that gives you the user’s location information:
import {useState, useEffect} from 'react';

export default function useLocation(){

    const [locationData,setLocationData]=useState();

    useEffect(()=>{
        getLocationData();
    },[])

    const getLocationData=async()=>{
        const response=await fetch('https://geolocation-db.com/json/');
        const data=await response.json();
        setLocationData(data)
    }

    return {locationData}
}
Now let’s quickly use these hooks to see if they’re working. Inside App.js, I have simply invoked these hooks and displayed the information inside the template:
import './App.css';
import useDeviceId from './hooks/useDeviceId';
import useLocation from './hooks/useLocation';

function App() {

  const {deviceId}=useDeviceId()

  const {locationData}=useLocation();

  return (
    <div className="App">
      <header className="App-header">
       <h3>Device ID - {deviceId}</h3>
       <h3>Location Info -
          <div style={{color:'darkgray',display:'flex',flexDirection:'column'}}>
              {Object.keys(locationData).map(locationDataKey=>
                <span style={{marginRight:10}}>{locationDataKey} - {locationData[locationDataKey]}</span>)}
          </div>
       </h3>
      </header>
    </div>
  );
}

export default App;
If you check the browser, you should get back that information:
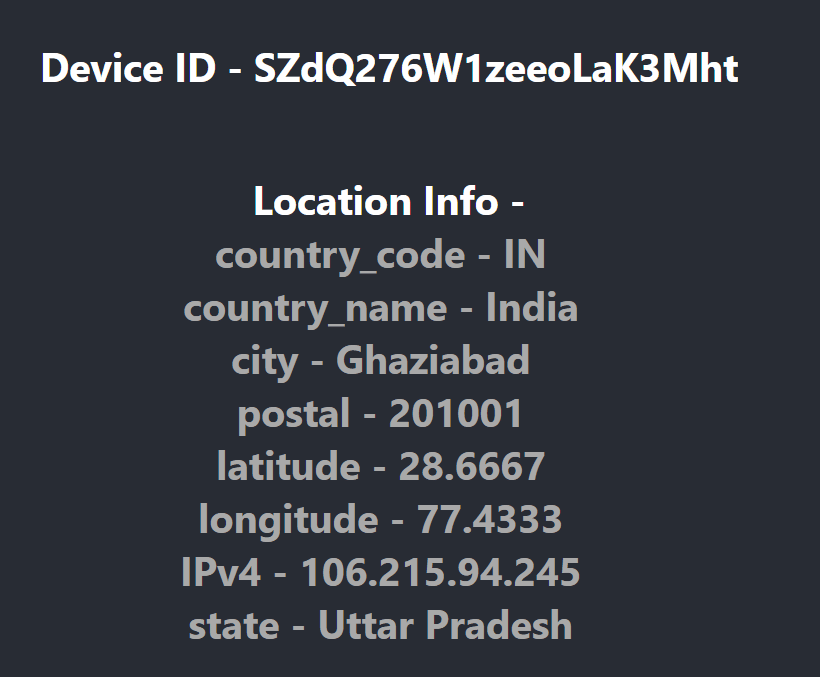
An example of the user’s location information.
You can integrate these hooks with your client-side authentication. Every time a user attempts to log in or sign up, you can send this information to the server. The server can then validate the device ID and location information to send back a flag that indicates if the session is from a different location, different device, etc.
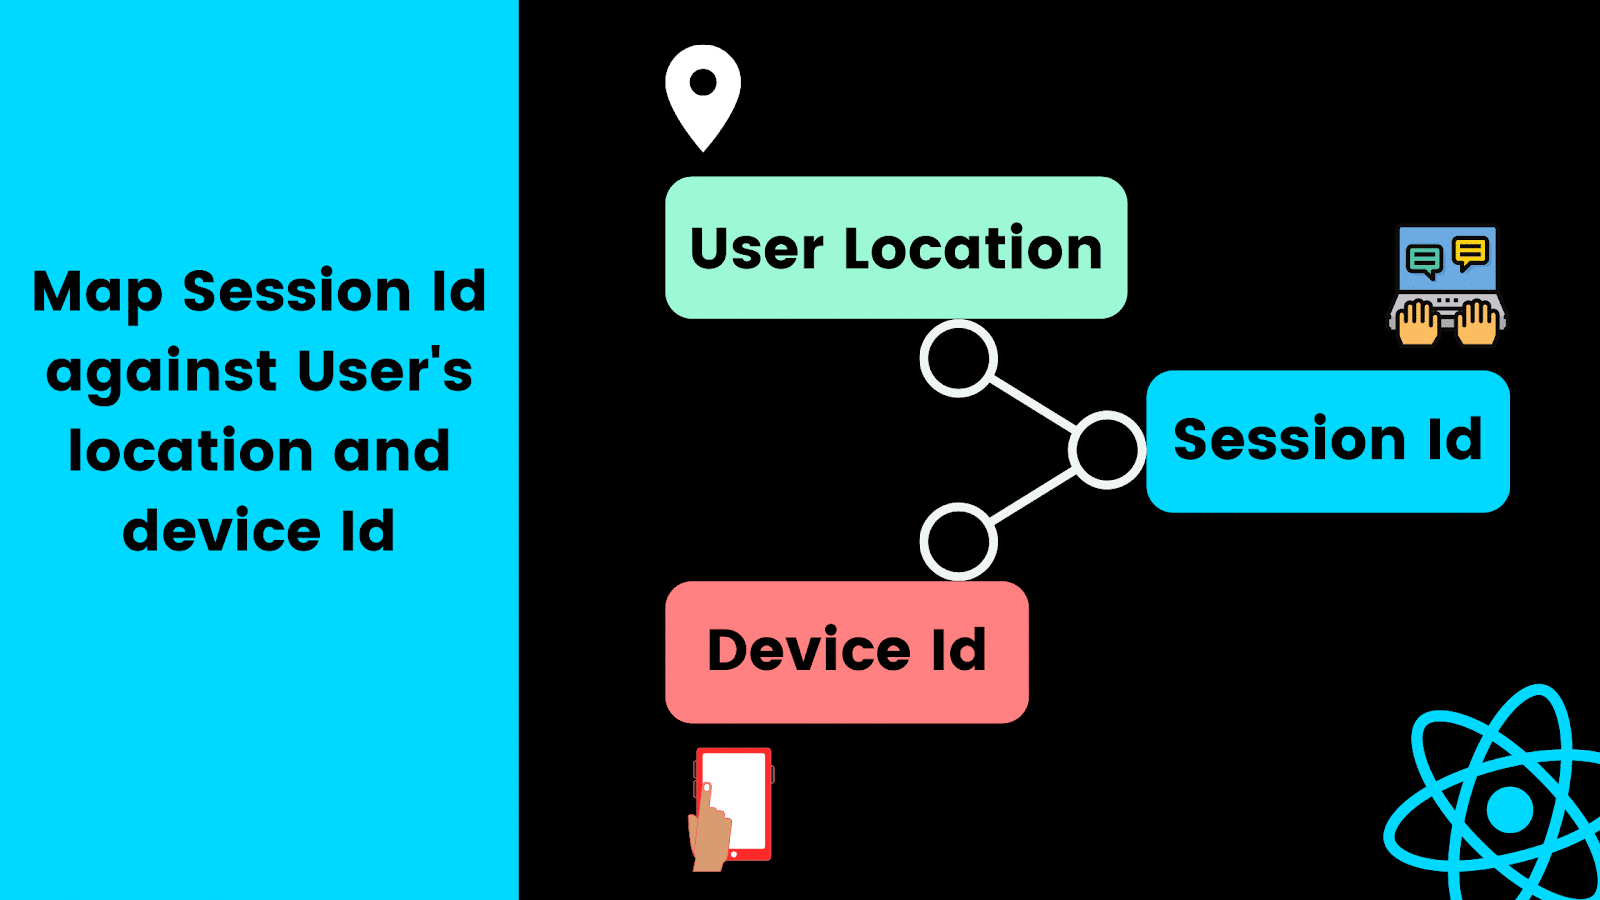
Mapping the session id against the user’s location and device id.
You can then alert the user accordingly or automatically sign them out by calling your Logout API.
Auto Sign Out for Idle User

Session timeouts are useful for when the user is idle.
Session timeouts for idle users are more important than you think. Most financial websites implement them for mere security purposes. There are three steps to implement an automatic session timeout for idle users of your app.
First, you need an idle session TTL. This means how long you need to check for an idle user before you can trigger session termination. Next, you need to detect user activity to check if the user is active or idle. Finally, you need to call your Logout API when your React app detects that your user is idle for the specified time.
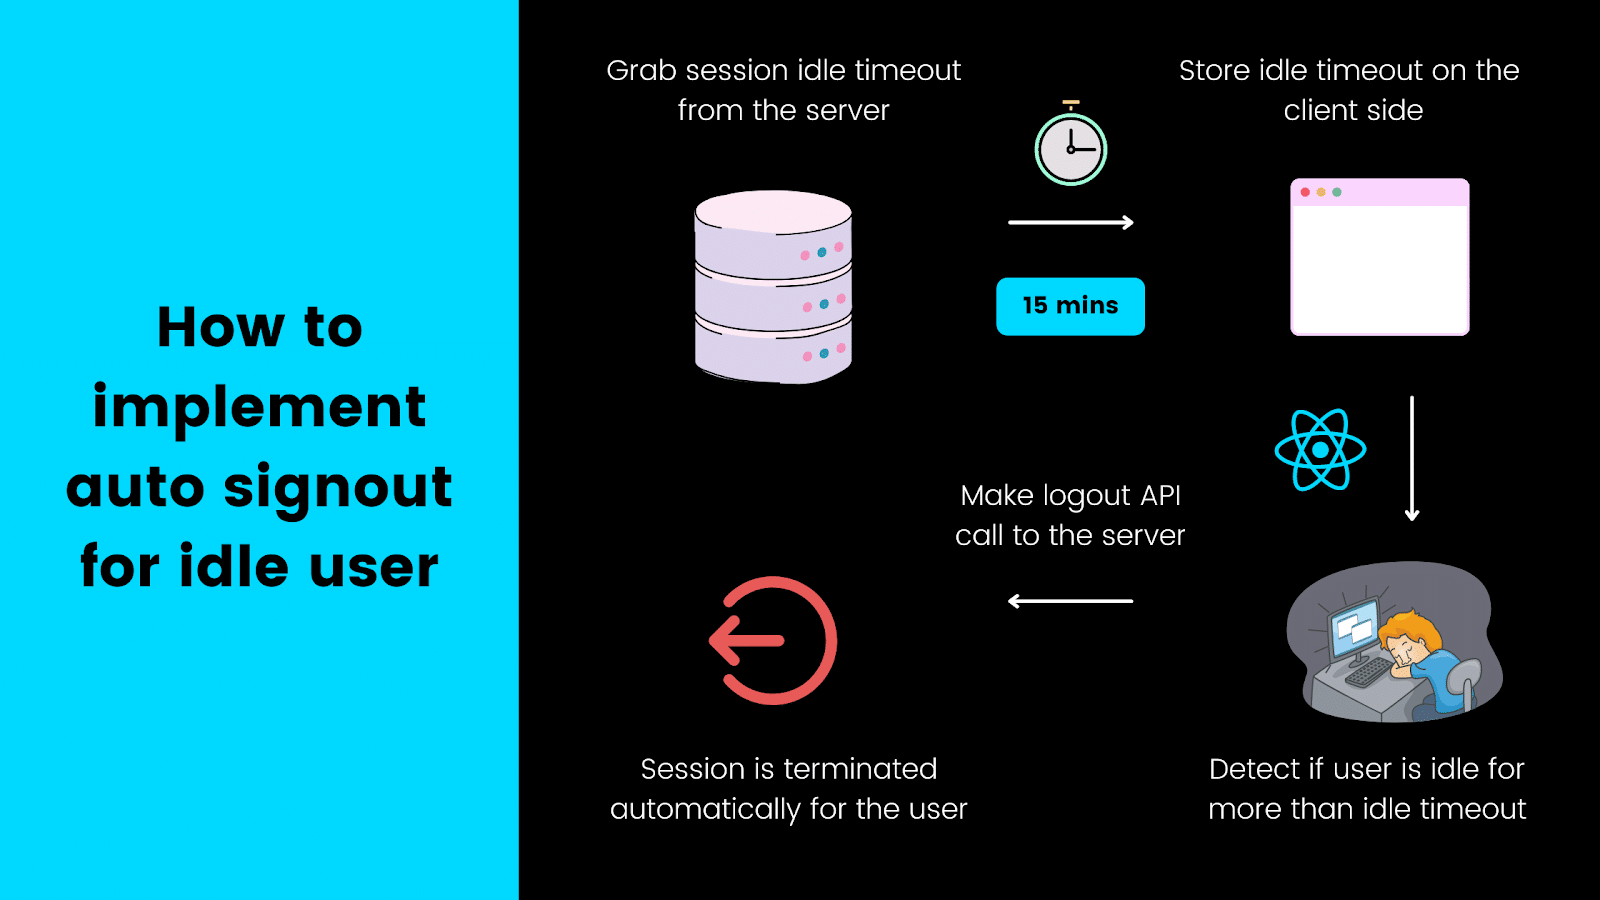
How to implement auto signout for an idle user.
Let’s assume you get an idle session timeout from your server. The remaining two steps need to be performed on the client side. We can easily detect if a user is active or idle in React using a package called react-idle-timer .
The useIdle Hook in React
You’ll need to install react-idle-timer first by running:
npm install react-idle-timer --save
We’ll abstract this logic into a separate hook called useIdle.js that looks like this:
import { useState, useEffect } from 'react';
import { useIdleTimer } from 'react-idle-timer'

export default function useIdle({
    onIdle,         //Function that gets executed when user is idle
    debounce=500,   //Debounce, default value is 500
    idleTime=15     //Idle time in minutes
}){
    const [isIdle,setIsIdle]=useState();

    const handleOnIdle = event => {
        setIsIdle(true);
        console.log('user is idle', event)
        console.log('last active', getLastActiveTime())
        onIdle();
    }

    const handleOnActive = event => {
        setIsIdle(false)
        console.log('user is active', event)
        console.log('time remaining', getRemainingTime())
    }

    const handleOnAction = event => {
        setIsIdle(false)
        console.log('user did something', event)
    }

    const { getRemainingTime, getLastActiveTime } = useIdleTimer({
        timeout: 1000 * 60 * idleTime,
        onIdle: handleOnIdle,
        onActive: handleOnActive,
        onAction: handleOnAction,
        debounce: 500
    })

      return {
          getRemainingTime,
          getLastActiveTime,
          isIdle
      }
}
You can find how the useIdleTimer hook works from react-idle-timer through GitHub . In a nutshell, this hook gives us back a flag that we can use to check if the user is idle or active. We pass it a function called onIdle. Whenever the user is detected idle, this function will be fired.
Since we need to log the user out when detected idle, we can pass the logout function to our useIdle hook. Here’s a simple usage of it inside our App.js:
import './App.css';
import useIdle from './hooks/useIdle';

function App() {

  const logout=()=>console.log('user logout');


  const {isIdle}=useIdle({onIdle:logout,idleTime:0.25})

  return (
    <div className="App">
      <header className="App-header">
          { isIdle ? 'User will be logged out' : 'User is not idle'}
      </header>
    </div>
  );
}
export default App;
You’ll need to call your relevant logout services inside the logout function used above.
Broken Authentication Due to Poor Session Management
Session management refers to how you’re handling the session of the user. It includes the following:
How you are generating session IDs for your users on each session
Where you store the session ID on the front end
Where you store JWT/authentication/refresh tokens on the front end
How you handle session timeouts for your application
All these factors help you validate if your session management is poor enough to let attackers enter your application as legitimate users.
Poor session management often leads to broken authentication in your application.
If you’re not taking care of how you’re creating and storing session ids, attackers can make authentication requests on behalf of a user.
For instance, if an attacker gets hold of a user’s session ID, they will be able to change passwords or retrieve personal information for that user.
Implement Safe Session Management
Most session management techniques cater to the server side. This is because the client only handles how to store the session ID. However, you need to be careful how and where you store your session ID in your React app.
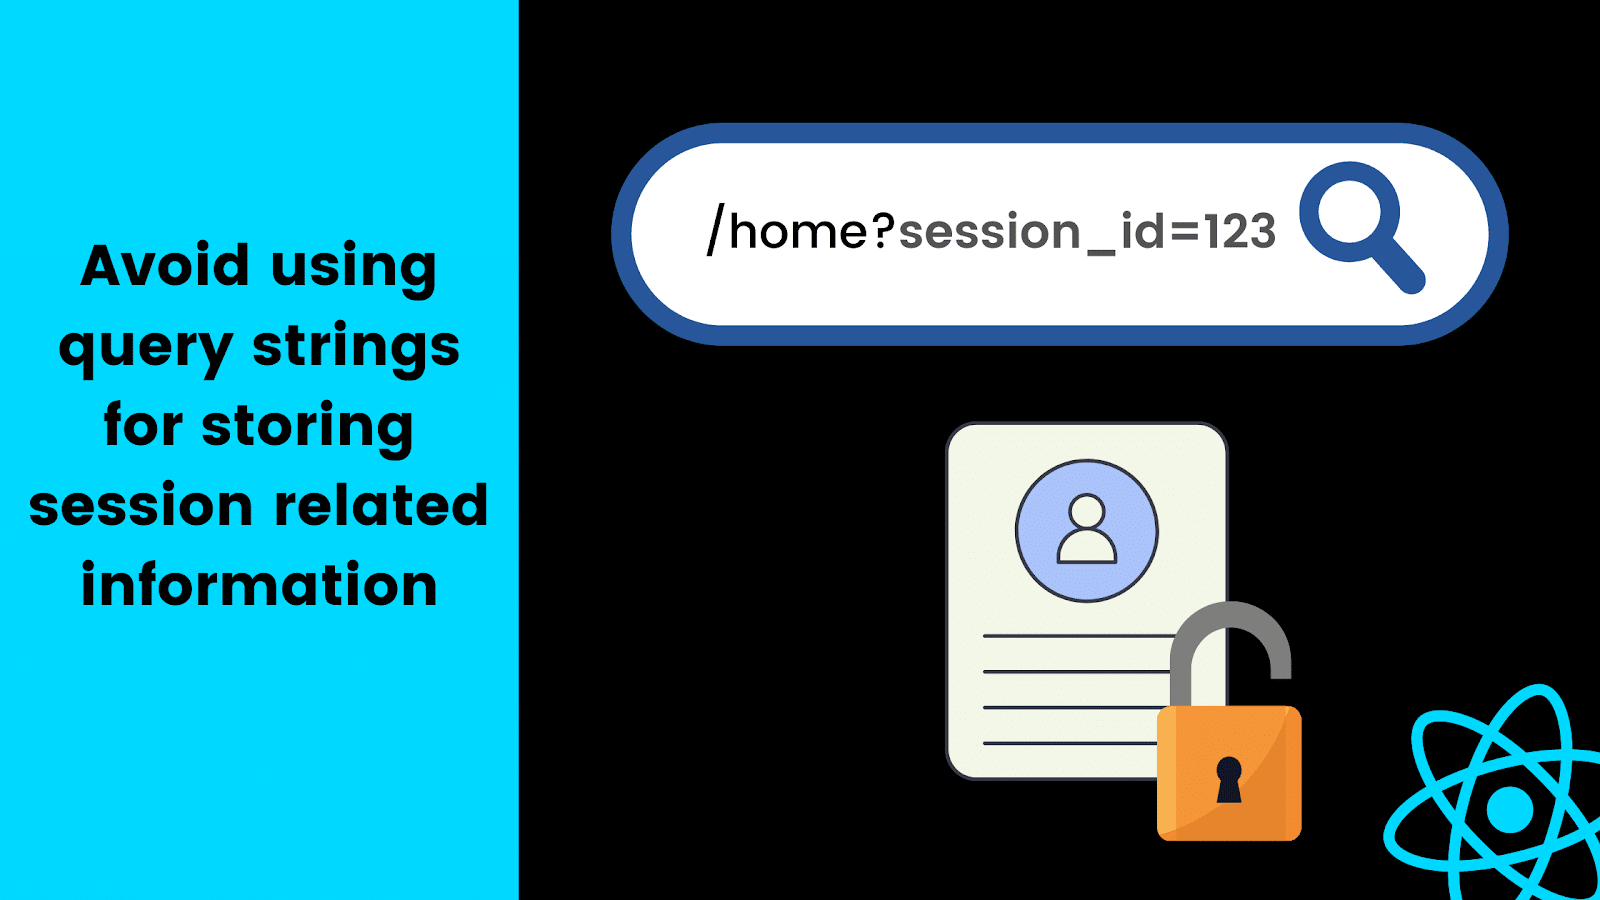
Avoid using query strings for storing information related to the session.
A lot of times developers store session-id in front-end URLs, making it clearly visible to users as well as attackers. Instead, you could store the session-id inside browser storage and use it via a custom React hook in whichever component or page of your application you need it.
The useSession Hook in React
Here’s a simple implementation of the useSession hook in React. It syncs the session ID in the local storage with its own state. It returns back this session ID so you can simply call this hook to retrieve the session ID from anywhere in your React application:
import { useEffect, useState } from "react"

export default function useSession({session_id}){

    const [sessionId,setSessionId]=useState()

    useEffect(()=>{
        if(session_id) setSessionId(session_id);
        else{
            if(localStorage.session_id) setSessionId(localStorage.session_id)
        }
    },[])

    useEffect(()=>{
        if(!localStorage.session_id) localStorage.setItem('session_id',sessionId)
    },[sessionId])

    return{
        sessionId
    }
}
So now whenever you need to use session IDon a particular page, you can grab it from this hook. Thus, you won’t need to pass it as query parameters in your React app’s routes.

Conclusion
We created a bunch of React hooks to prevent broken authentication in our React app. However, you can use the same logic and implement the same in other frameworks as well. You can also see the entire code for this post .
You can even implement strong password checks when your users are signing up. Weak credentials are a sweet spot for attackers to break your authentication workflow. The worst part is, you can’t really do anything about leaked and bypassed credentials. However, you can prevent a lot of these from happening by making sure that users are setting up passwords that are tough to crack via a brute-force approach.
This post was written by Siddhant Varma. Siddhant is a full stack JavaScript developer with expertise in frontend engineering. He’s worked with scaling multiple startups in India and has experience building products in the Ed-Tech and healthcare industries. Siddhant has a passion for teaching and a knack for writing. He’s also taught programming to many graduates, helping them become better future developers.


