

If you’ve built robust Node.js APIs with TypeScript before, I’m sure you’ve run into the infamous CORS error at least once. Or perhaps you’ve had the front-end folks of your team complain about it a million times!
CORS is often trickier than it appears. A lot of developers struggle to understand what it means. Even worse, developers spend hours fixing it, only to realize they’ve been thinking in the wrong direction. In this post, I’ll help you understand what CORS is and why it occurs. Then I’ll walk you through how to enable CORS in your Node.js and TypeScript application.
What Is CORS?
Let’s first understand what CORS actually means. CORS stands for cross-origin resource sharing. It’s a rule that determines if a browser is allowed to retrieve some data from a server. So there are two things we need to focus on to get the hang of CORS: First, who sets this rule? And second, how?
When we answer those questions, it becomes really easy to figure out why CORS errors occur and how to fix them. But before we talk about these two things, let’s understand the purpose of CORS and why it exists in the first place.
Resource Sharing Between Client and Server
Modern web applications typically follow the client-server architecture . So the client, or the front end of an application, makes an HTTP request to the server. The server receives this request, understands it, and performs an action accordingly.
Now, this action could be anything, from getting data from the database to writing into the database to updating an entry in the database—literally anything. But all in all, it sends back a response to the client.

The client-server relationship.
This allows the front end and back end of an application to communicate and share resources with one another. But the client side of a web application always runs on a browser. That’s where some complications arise because there are a lot of things that front-end developers don’t have a hundred percent control over.
Browser Imposes the Same-Origin Policy
Web browsers have been around for decades. Their existence has shaped the way web applications work, especially the security aspect of it. This is why browsers by default impose the same-origin policy on all client applications. This policy states that if your application that’s running on a browser requests a resource from a server that has a different origin than your application, the browser will block that request by default.
But What Is This Origin?
Origin typically constitutes a combination of the domain name, port number, and scheme. The scheme represents the protocol of the URL—for instance if it’s HTTP or HTTPS. The domain name and port number together represent the part of the URL that’s visible to you or other users.
So if your web app is running at abcd.com, and you try to request a resource located at xyz.com, the browser (where your abcd.com is running and making requests out to xyz.com) will kick in its same-origin policy.
You Need CORS!
So now the problem is that your applications need resources from providers of different origins. And this problem has a number of use cases.
First, you could have a decoupled client-server architecture for your web application. This means you could have a purely isolated front end running at abcd.com, and an isolated back end running at xyz.com. You need them to interact with each other, but since they’re on different domains and essentially different origins, you can’t.
Another use case is interacting with third-party APIs and services. You could use a third-party API for payments on your website, or maybe a third-party service to handle authentication on your application.
No matter what the use case , a third-party service will always have a different origin than your application.
For your application to interact with web servers and APIs of different origins, you need CORS. CORS will tell the browser to lift its same-origin policy and enable resource sharing between the respective client and server. That’s why and how CORS can be helpful to you. In case you’re curious to learn more about CORS, check out this amazing guide that dives deeper into the subject.
So now let’s answer the first question. Who actually sets CORS?
CORS Is Enabled From the Server
Since resources are retrieved from the server, the server has full control over which clients are given access to it. For the same reason, enabling CORS is also done on the server side.
This means that in your application, you’ll have a back-end component. This back-end component is supposed to ensure which URLs or clients it will enable CORS for.
Now to answer the second question. As to how to enable CORS, let’s write some code!
Create a Node.js Project With TypeScript
For the purpose of this tutorial, we’ll focus on a back end built with Node.js and Express, written in TypeScript. I have a similar tutorial that follows in JavaScript that you can check out too.
Inside a directory of your choice, create a new npm project by running:
mkdir nodejs-ts-cors && npm init -y
Then, we’ll install TypeScript as a development dependency by running:
npm i --save-dev typescript
If you open the project, you should now have a package.json file, a package-lock.json file, and a node_modules folder.
Next, create a file called tsconfig.json at the root of the project. This file will specify all the configurations for TypeScript to build our project. Add the following code inside it:
{
    "compilerOptions": {
      "module": "commonjs",
      "esModuleInterop": true,
      "target": "es6",
      "moduleResolution": "node",
      "sourceMap": true,
      "outDir": "dist"
    },
    "lib": ["es2015"]
  }
Finally, we need to replace the main entry inside our package.json file:
...
"main": "dist/server.js"
...
And add a new script that can directly run our JavaScript code at runtime when it’s compiled from TypeScript:
...
"scripts": {
    "start": "tsc && node dist/server.js",
    "test": "echo "Error: no test specified" && exit 1"
  },
...
Create an Express and TypeScript Server
We need to set up a server before we can create an endpoint to send resources. To create the server, we’ll install Express as shown:
npm i --save express@4.17.1
To use Express alongside TypeScript’s classes and types, we also need to install types/express as shown:
npm install -save-dev @types/express@4.17.1
Now create a file called server.ts inside the root directory with the following code:
const app:any = express();
const port:Number = 3000;

app.get('/', (req, res) => {
  res.send('NodeJS + Express + Typescript App Up! 👍');
});

app.listen(port, () => {
  console.log(`Server running on port ${port}`);
});
If you now run the command npm run start , our TypeScript compiler will compile our server.ts file, generate its equivalent JavaScript code inside the dist/server.js file, and serve it on our localhost. If you visit http://localhost:3000, you should get back the following response:

A view of the response you’ll get.
Awesome! Let’s now create a simple endpoint that sends back some resources.
Create a REST API
Let’s write a simple REST API that sends back some JSON data. We’ll create an endpoint /dog to send back some JSON data about—you guessed it—a dog!
app.get('/dog',(req,res)=>{
    res.json({
        'name':'Bruno',
        'age':'5',
        'image':'https://post.medicalnewstoday.com/wp-content/uploads/sites/3/2020/02/322868_1100.jpg'
    })
})
Great! Let’s test it out now. You’ll need to rerun the npm run start command. If you now visit http://localhost:3000/dog, you should get back the following response:

A view of the response you’ll get.
So it seems we now have a GET API in TypeScript that sends back some resources. But what happens when we request this resource from a client-side application like React or Angular?
The CORS Error
To demonstrate this, we’ll create a React app and try to make a request to the above endpoint. First, let’s create a new React project by running:
npx create-react-app dog-app
Once that’s done, open up the project and update the App.js file with the following code:
import {useState} from 'react';
import './App.css';

function App() {
  const [dogData,setDogData]=useState();
  const getDogData=async()=>{
    const response=await fetch('http://localhost:3000/dog');
    const data=await response.json();
    setDogData(data);
  }
  return (
    <div className="App">
      <header className="App-header">
        <button onClick={getDogData} disabled={dogData}>Get Dogg!</button>
        {dogData &&
          <div>
            <h3>{dogData?.name}</h3>
            <h3>{dogData?.age}</h3>
            <img src={dogData?.image} />
          </div>
        }
      </header>
    </div>
  );
}

export default App;
This code renders a button on the page. When you click the button, it calls a function that makes a request to the endpoint http://localhost:3000/dog. It then takes the resource or JSON data received, pushes that data into the app component’s state, and shows it on the page.
Let’s test it out. You have to run npm to start running this, and it might ask you to open this app on a different port since we’re already using port 3000 for our TypeScript and Express back-end server. Once it’s in your browser, if you press the Get Dogg! button, you should get an error on the console like this:

The CORS error after hitting the “Get Dogg!” button.
Enable CORS
We need to get rid of that CORS error. One solution is that we can manually enable CORS on our endpoint for that client. We can do that by adding a key “Access-Control-Allow-Origin” on the header of the response. The value of this key is the URL of the application or client you wish to enable CORS for.
In our case, it’s http://localhost:3001 or wherever your React app is running.
app.get('/dog',(req,res)=>{
    res.set('Access-Control-Allow-Origin', 'http://localhost:3001');
   ...
})
Now your React application will be able to access resources from http://localhost:3000. If you refresh your back end, click the Get Dogg! button again.
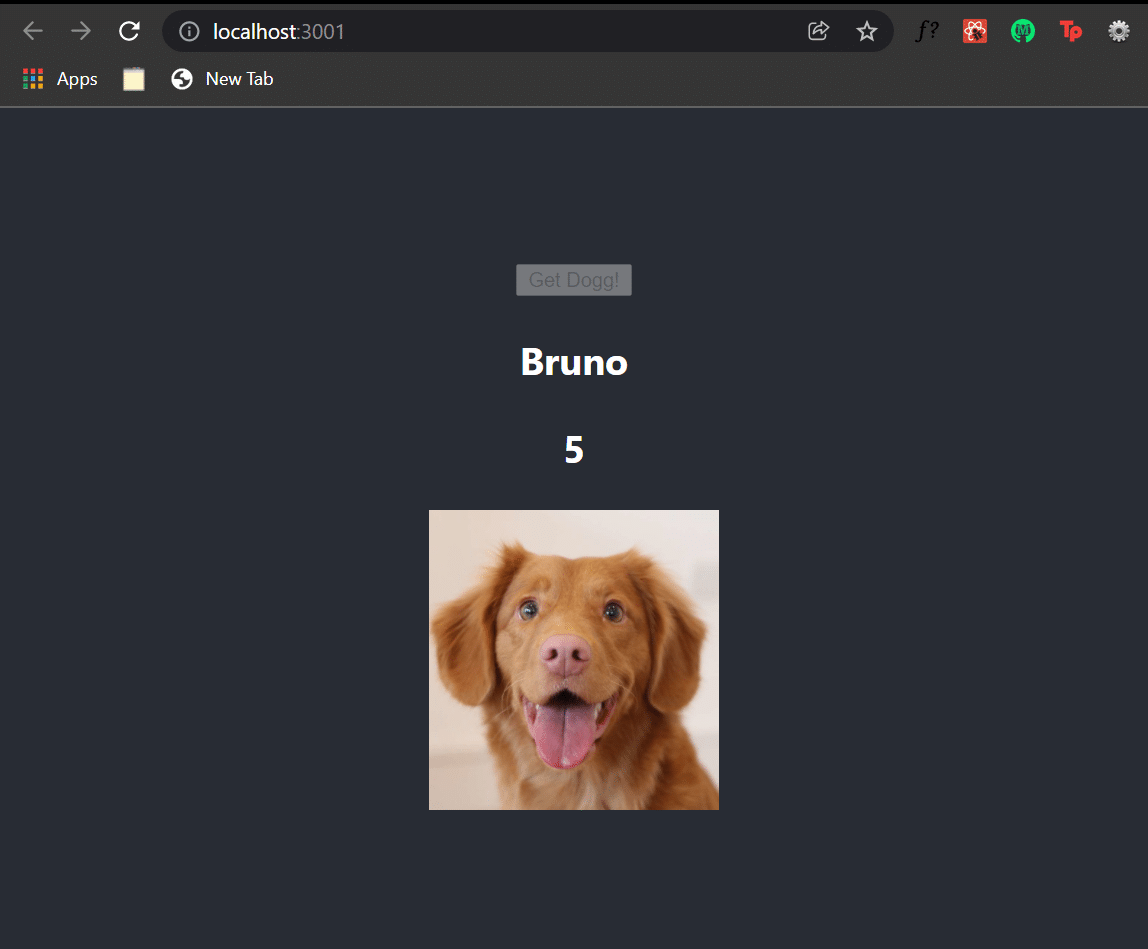
The Get Dogg! button in action.
We now get back the data from our TypeScript API! Awesome. We’ve successfully enabled CORS in our Node.js and TypeScript application.

Conclusion
There’s another neat way to enable CORS in your Node.js and TypeScript server. You can use the CORS middleware dependency that allows you to configure CORS easily in a more customized way. The implementation for Node.js is similar to TypeScript, and you can learn how to do that in this tutorial .
If you want a front-end-specific hack to this age-old CORS problem, here are solutions for React and Angular . But remember, the correct way to deal with CORS is on the server by setting proper Access Control Allow Origin. But all in all, I hope this was enough to help you get the hang of CORS and understand how to enable it in a Node.js and TypeScript application.
This post was written by Siddhant Varma. Siddhant is a full stack JavaScript developer with expertise in frontend engineering. He’s worked with scaling multiple startups in India and has experience building products in the Ed-Tech and healthcare industries. Siddhant has a passion for teaching and a knack for writing. He’s also taught programming to many graduates, helping them become better future developers.


